Using the Power Advantage Tool
Overview
The purpose of this project is to demonstrate the use of the Power Advantage Tool on the Ultra96v2 board. The Power Advantage tool connects to the Infineon measurement chip on-board this device via wired I2C connections. Connecting to this on-board chip enables you to not only extract important measurements regarding power from the board, but you can also begin your dive into power management and gain some meaningful experience working with the tools that enable you to monitor power. Throughout this tutorial, you as an engineer will learn about the process of setting up the Power Advantage Tool, as well as hopefully learn some transferable knowledge to your own projects. Just like the engineers in our Power Advantage Tool Video, let’s get to work!
Hardware Requirements
To successfully perform this tutorial, ensure that you have the following hardware available:
Ultra96v2 board
Bus Pirate
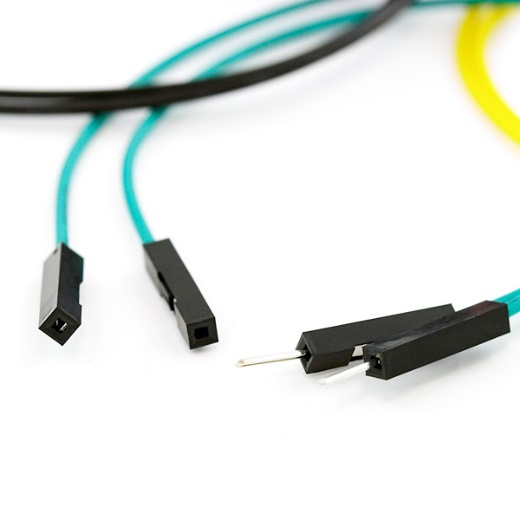
Three wires, where one side is a male header and the other side is a female header
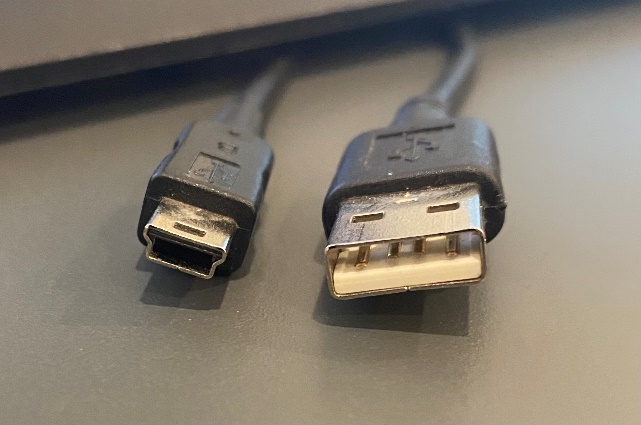
USB to USB MINI-B cord
Step-by-step Walkthrough
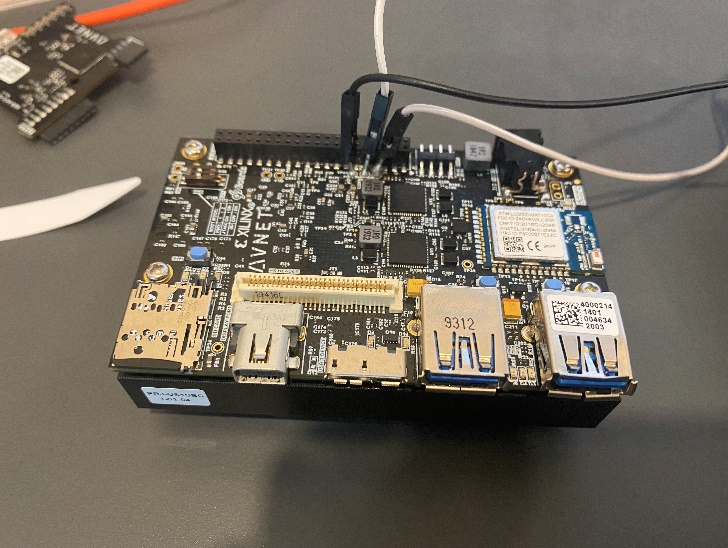
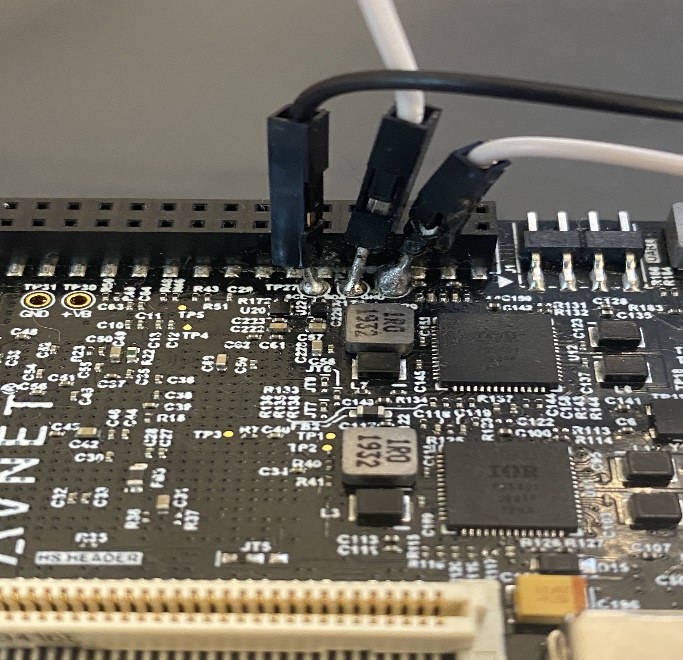
Solder the three male headers of the separate wires to the I2C interface on the Ultra96v2 board. The soldering job is shown in the following figure.
The left black wire is SCL, the middle white wire is SDA, and the right grey wire is GND.
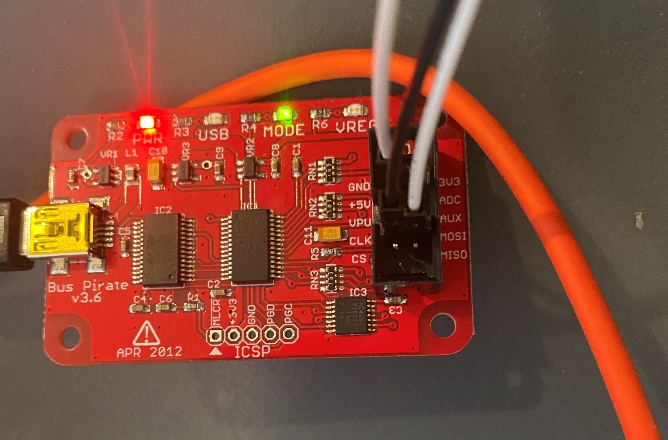
Next, connect the female headers of these wires to the bus pirate.
The SCL wire connects to the
CLKpin, the SDA wire connects to theMOSIpin, and the GND wire connects to theGNDpin. This wiring is shown below. Once the wires are connected, connect the USB MINI-B port of the bus pirate to the USB port on the host computer using the USB MINI-B to USB cord. Do not forget to turn on your device!
3. Now that you have successfully completed the hardware setup of the project, you can start on getting the Power Advantage Tool set up! Download the .zip file for the board you would like to use. You can find a list of files here. Make sure to download the most updated version.
After downloading the zip file, unzip it to the file path you choose.

Inside this folder, navigate to the following path:

Once in this folder, click on the
CP210xVCPInstaller_x64.exefile to download a necessary USB to UART driver for the Power Advantage Tool. If you are using a 32-bit machine, make sure to download the x86 version instead.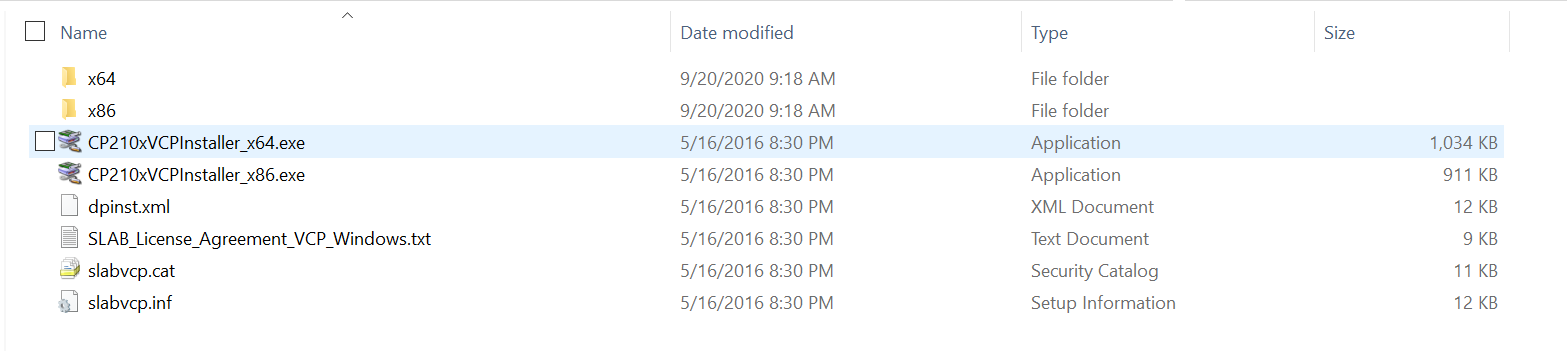
Also install the following tools which are available in the
tools/folder within the Power Advantage Tool directory.![Machine generated alternative text: AutoHotkey1122D3 Install.exe Z] • WHQL Certlfied.exe 7/17/2015258 AM 11/30/2015 11:18 AM Application Application 2802 KB 2032 KB](../../_images/image9.png)
Once all of the necessary drivers are installed, move the
ZynqUS_Demosfolder to yourC:/drive. This is necessary to allow the proper shortcut when opening the Power Advantage Tool. The necessary path is shown below.
Now connect your Ultra96v2 board to power and turn on your board. Booting by JTAG or by SD card is not necessary since you are only extracting data from the INA226 chip on the board.
With the board powered on, navigate through your
ZynqUS_Demosfolder to the following path.

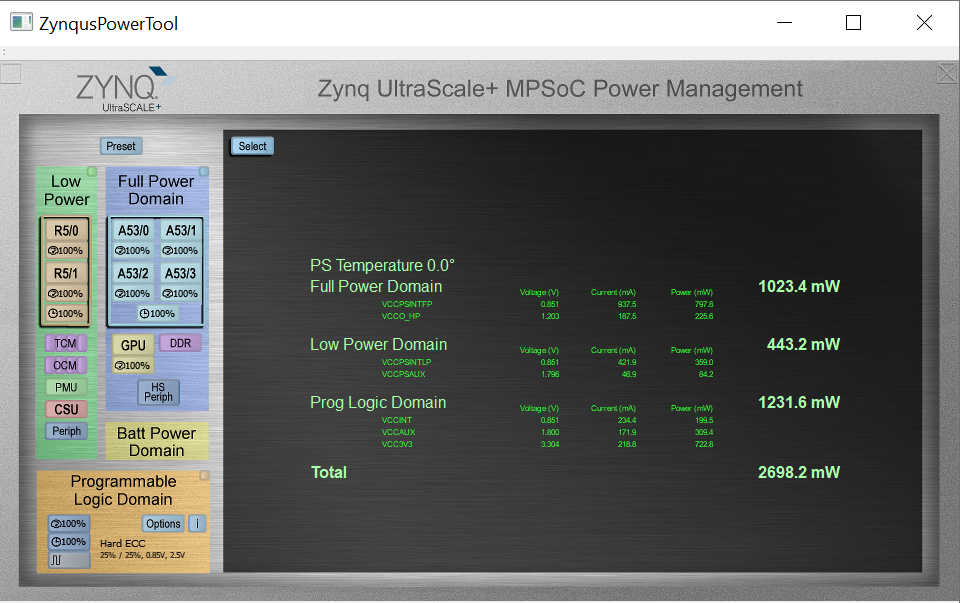
Within this folder is a shortcut titled
ZynqusPowerTool.exe Ultra96 - Shortcut. Double-click to open this shortcut. Once the shortcut executes, you should see the Power Advantage Tool at work!
Congratulations on completing this project! Hope you had some fun along the way.