AI Engine DevelopmentSee Vitis™ Development Environment on xilinx.com See Vitis-AI™ Development Environment on xilinx.com |
AI Engine Debug with Software Emulator
Software emulation supports fast emulation execution and printf() to help verify the kernel’s functionalities. Users can check the output by examining design output files in the ${PROJECT}/Emulation-SW/data directory.
Hardware constraints such as heap/stack sizes and program memory size are not verified in software emulator.
The following steps outline the procedure:
1. Launch and Verify Software Emulation in Vitis IDE
1. Launch and Verify Software Emulation in Vitis IDE
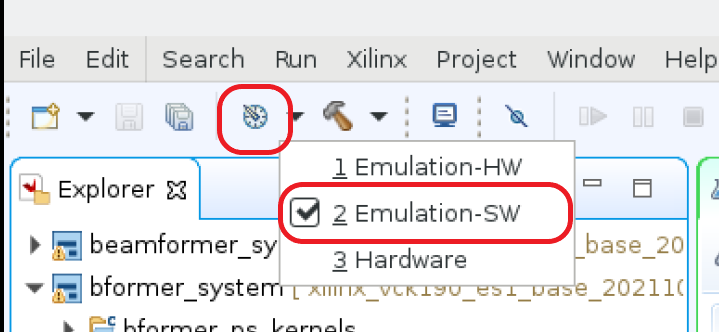
Step 1.1. Select Software Emulation Configuration
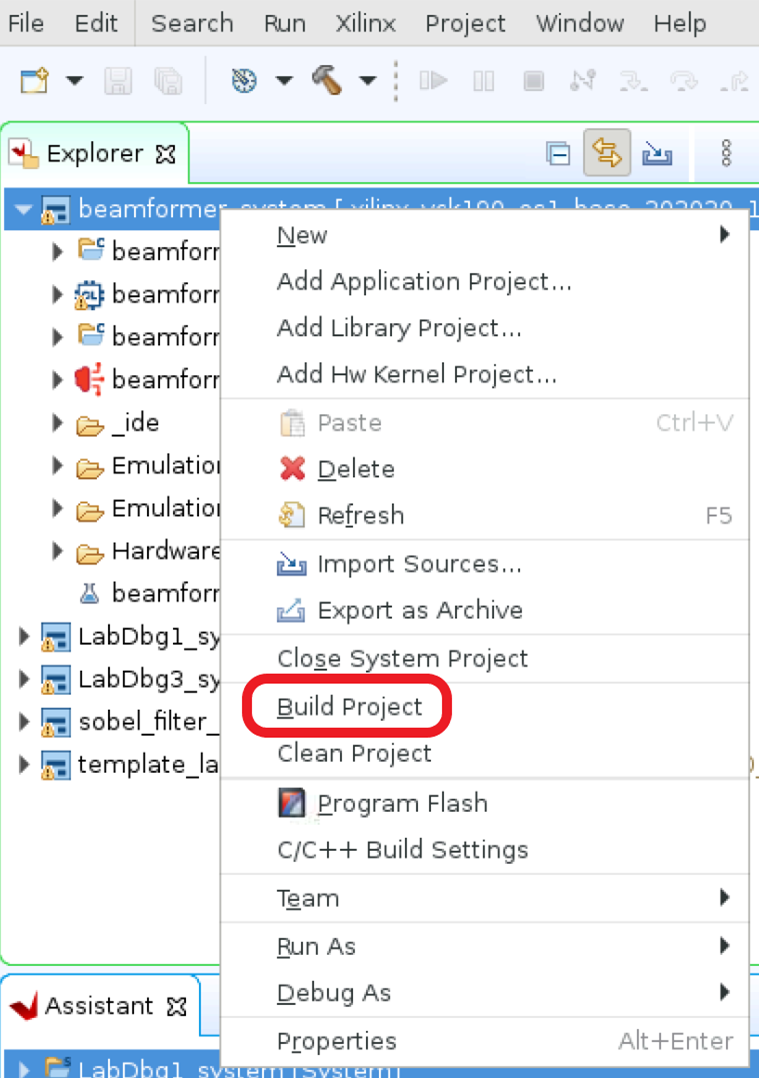
Step 1.2. Build with Software Emulator
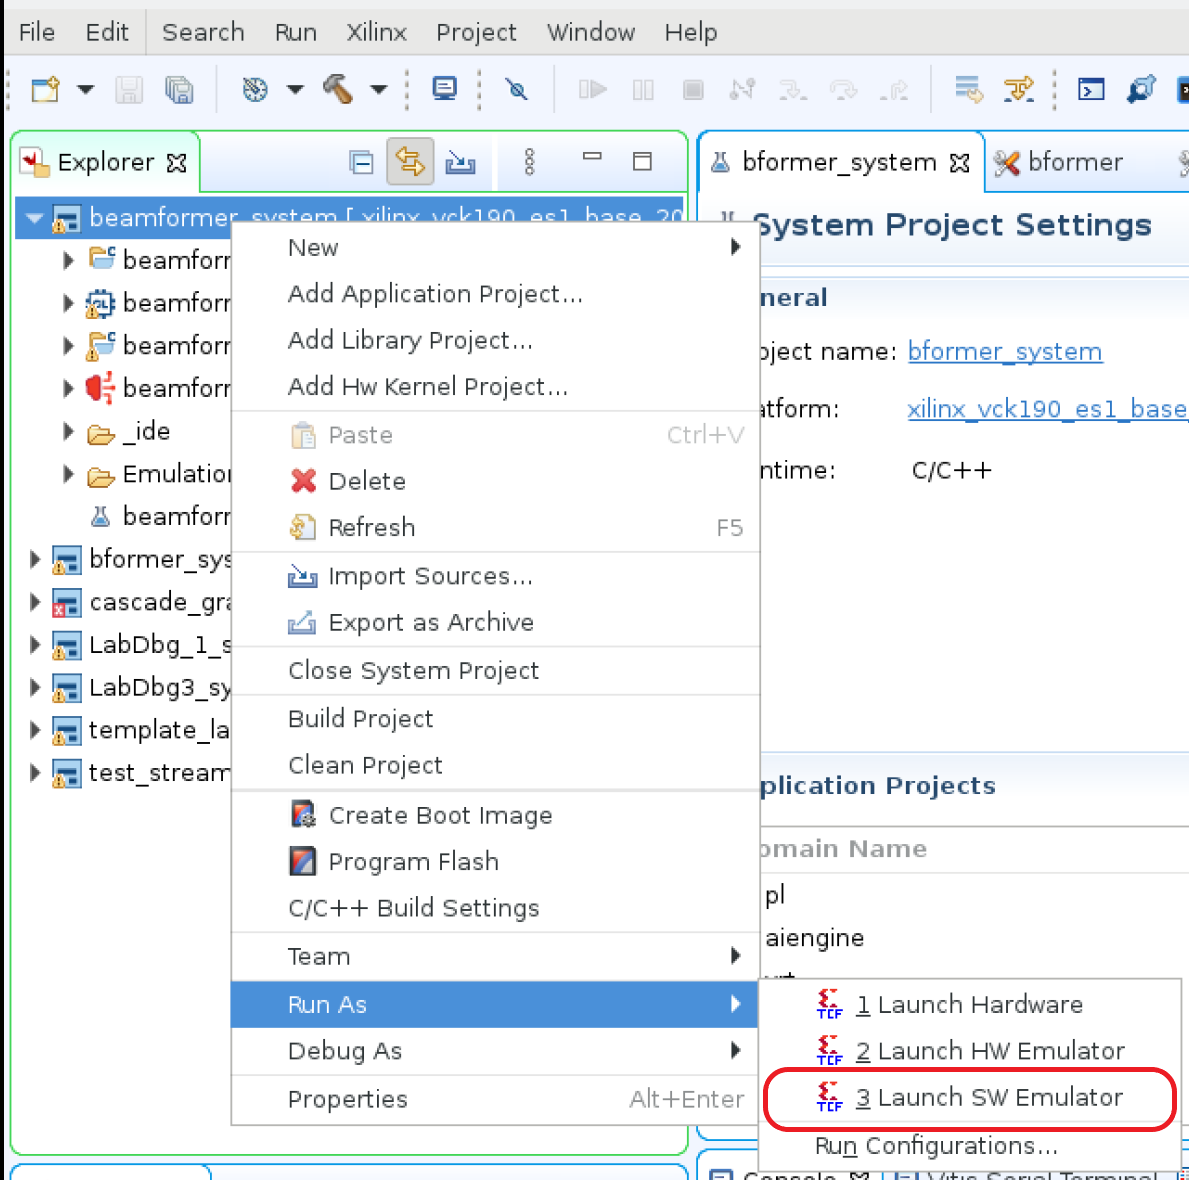
Step 1.3. Run with Software Emulator
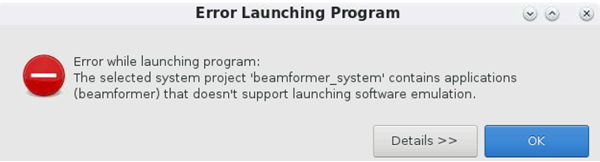
Note: Launching the software emulator run from system project is not supported. This error from Vitis™ IDE is expected when the launch software emulator for system project option is selected.
Step 1.4: Verify Run Result
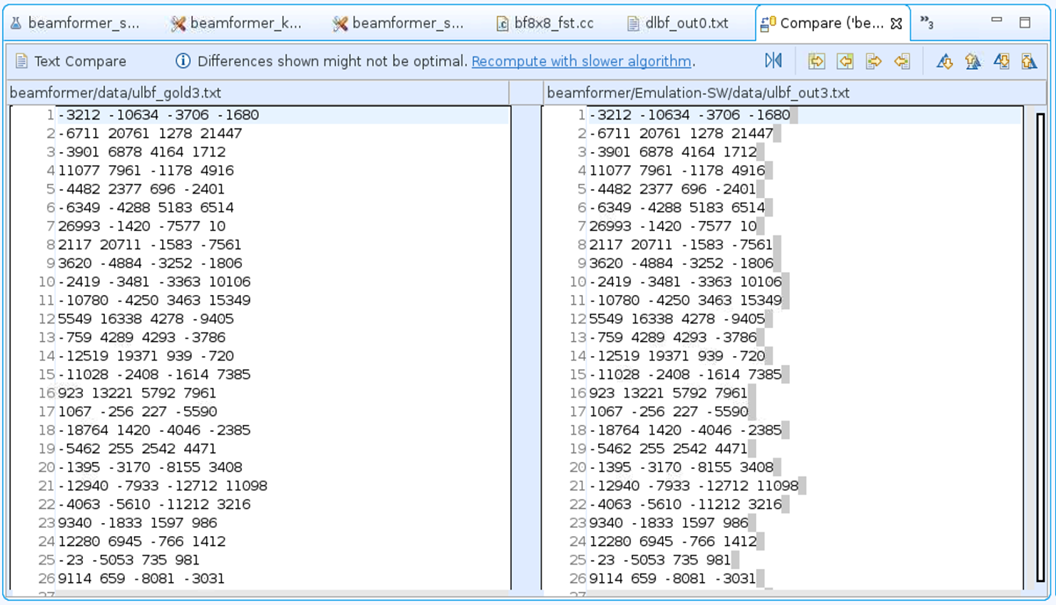
Software emulator output files from design are located at ${PROJECT}/Emulation-SW/data. Verify the output files ${PROJECT}/Emulation-SW/data/dlbf_out[0-7].txt and ${PROJECT}/Emulation-SW/data/ulbf_out[0-3].txt against golden files ${PROJECT}/data/dlbf_gold[0-7].txt and ${PROJECT}/data/ulbf_gold[0-3].txt to ensure that the design’s I/O functionalities are correct. Vitis IDE supports compare with feature to compare two files, highlight two files to be compared then right click one of highlighted file and select compare with then each other.
For example, Compare ${PROJECT}/data/ulbf_gold3.txt and ${PROJECT}/Emulation-SW/data/ulbf_out3.txt
2. printf Support
The simplest form of tracing is to use a formatted printf() statement in the code for printing debug messages. Visual inspection of intermediate values and addresses can help you understand the progress of program execution. No additional include files are necessary for using printf() other than standard C/C++ includes (stdio.h). You can add printf() statements to your code to be processed during simulation, or hardware emulation, and remove them or comment them out for hardware builds.
Step 2.1. Add printf() statement
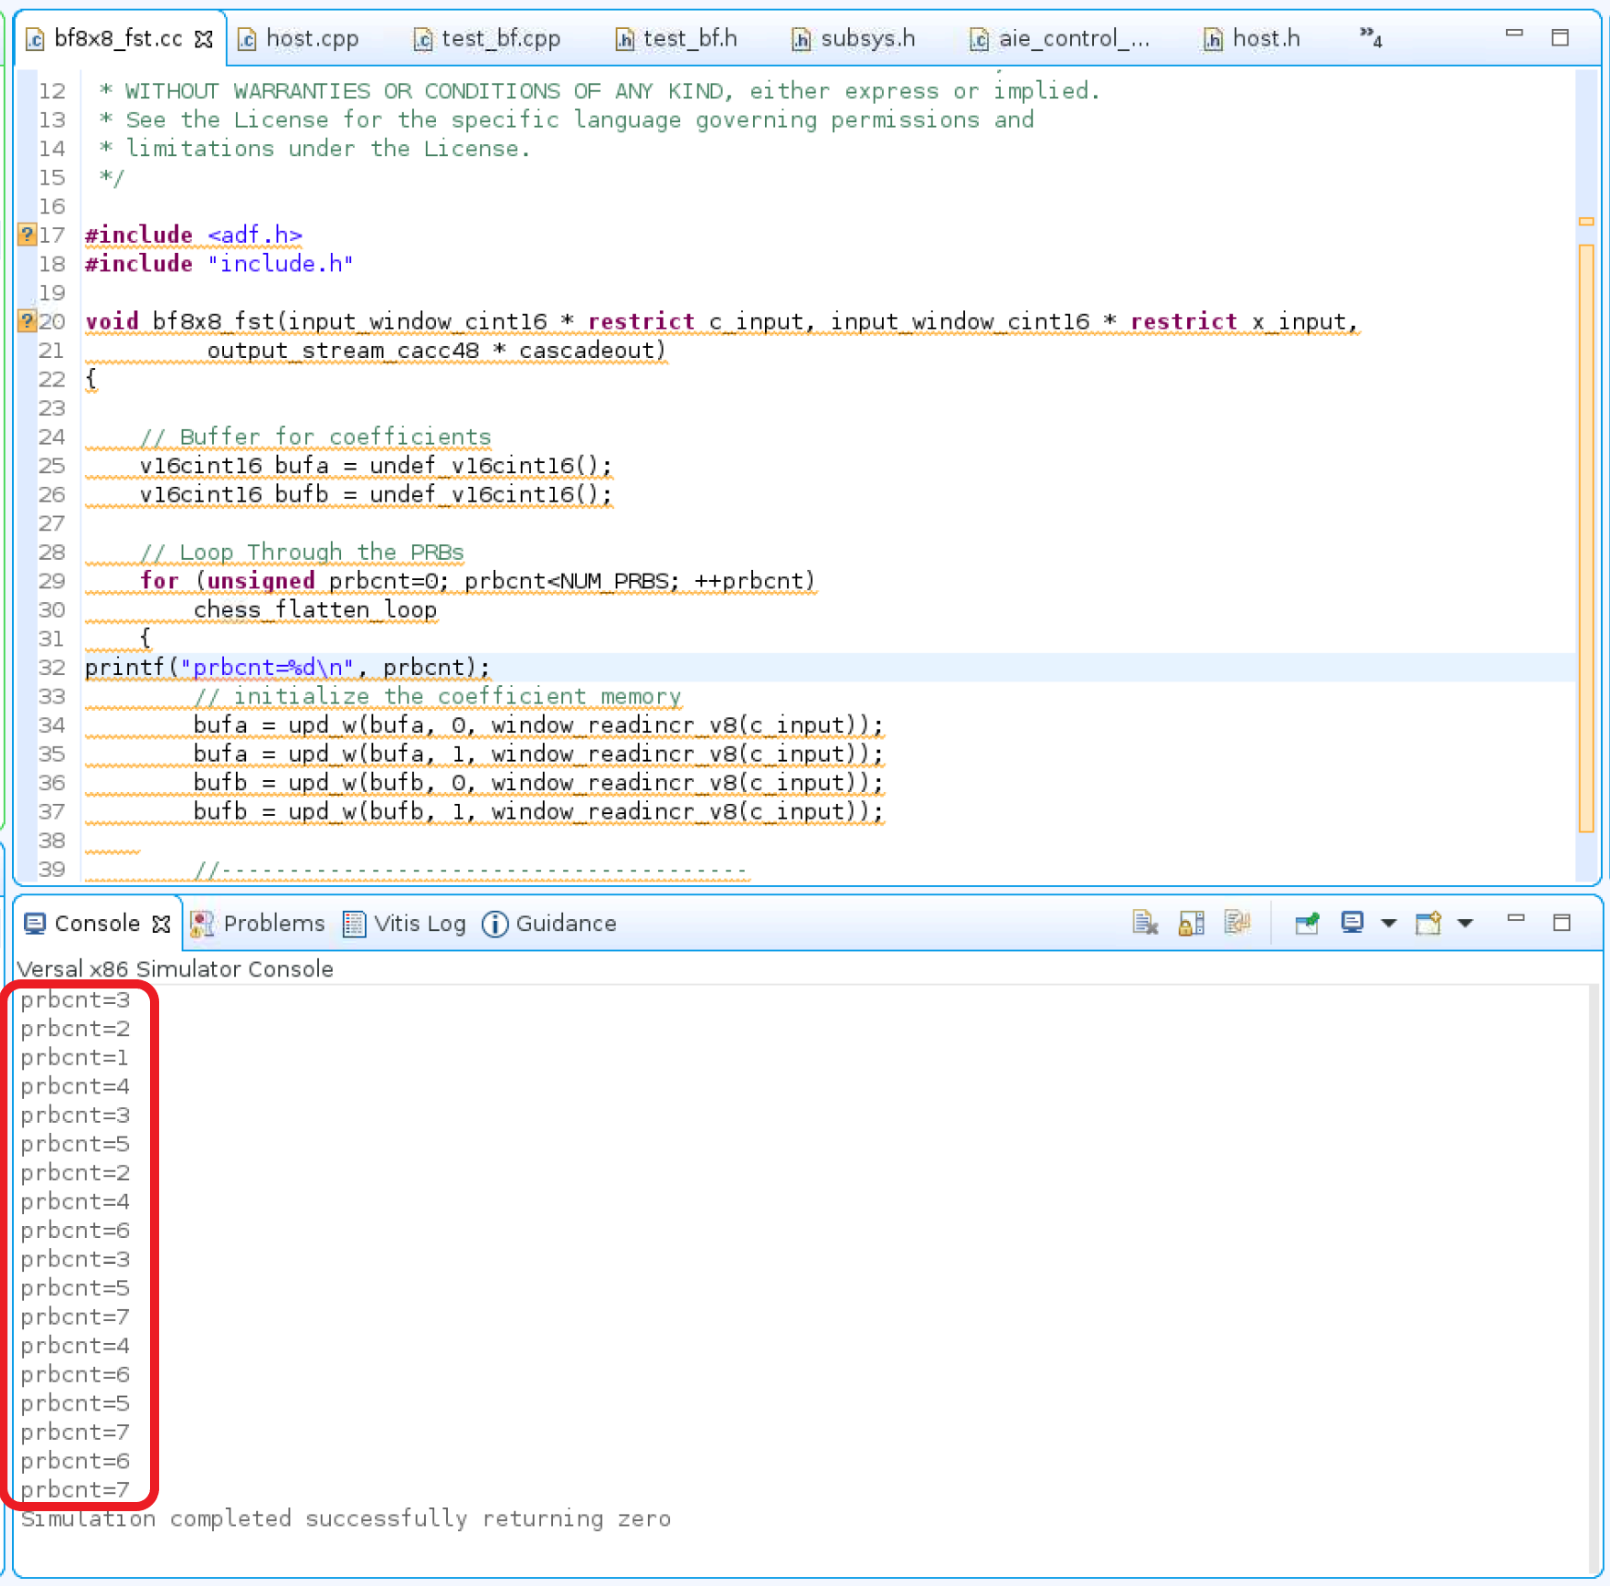
Select bf8x8_fst.cc file in Vitis IDE to be edited. Add printf("prbcnt=%d\n", prbcnt); statement at line 32 of bf8x8_fst.cc file.
bf8x8_fst.cc can be found from Vitis IDE’s explorer, browse to beamformer sub-project, click on src then kernel to expand the directory, and click on bf8x8_fst.cc. The file will be displayed at the center of the Vitis IDE.
Step 2.2. Compile the Project
Highlight the beamformer sub-project, right-click to enable pull-down menu, and select Build Project to build the beamformer project.
Step 2.3. Run the Project
Highlight the beamformer sub-project, right-click to enable pull-down menu, select Run As, and then Launch SW Emulator to run the project in Vitis IDE.
Step 2.4. Expected Result
Expect to observe the output of printf() statement displayed at Vitis IDE console window.
 Note: A predefined marco
 defined(__PTHREAD_API__) can be used to wrap around printf statements in software emulation to improve code portability.
Limitations
System project run with software emulator is not supported.
Source code debug in software emulator is not supported hence Launch SW Emulator option from the “Debug As” pulldown menu is not available.
Hardware constraints check is not supported in software emulator. Functionalities verified in software emulator need to check resource constraints in AI Engine emulator before running on the hardware board.
License
Licensed under the Apache License, Version 2.0 (the “License); you may not use this file except in compliance with the License. You may obtain a copy of the License at
http://www.apache.org/licenses/LICENSE-2.0
Unless required by applicable law or agreed to in writing, software distributed under the License is distributed on an “AS IS” BASIS, WITHOUT WARRANTIES OR CONDITIONS OF ANY KIND, either express or implied. See the License for the specific language governing permissions and limitations under the License.
XD005 | © Copyright 2021 Xilinx, Inc.