Building QDMA DPDK Software
DPDK requires certain packages to be installed on host system. For a full list, refer to the official DPDK documentation: https://doc.dpdk.org/guides/linux_gsg/sys_reqs.html.
Note: If the NUMA library is missing, it should be installed. For example:
For Ubuntu:
sudo apt-get install libnuma-devFor Red Hat:
sudo yum install numactl-devel
Modifying the driver for PCIe device ID
During the PCIe DMA IP customization in Vivado, user can specify a PCIe Device ID. This Device ID must be added to the driver to identify the PCIe QDMA device. The current driver is designed to recognize the PCIe Device IDs that get generated with the PCIe example design when this value has not been modified. If the PCIe Device ID is modified during IP customization, one needs to modify QDMA PMD to recognize this new ID.
User can also remove PCIe Device IDs that will not be used by the end solution. To modify the PCIe Device ID in the driver,
- For PF devices,
- update
struct rte_pci_id qdma_pci_id_tbl[]insidedrivers/net/qdma/qdma_ethdev.c- For VF devices,
- update
struct rte_pci_id qdma_vf_pci_id_tbl[]insidedrivers/net/qdma/qdma_vf_ethdev.cAlso add the device IDs in
usertools/dpdk-devbind.pyinxilinx_qdma_pffor PF device andxilinx_qdma_vffor VF device as specified in later section.
Once modified, the driver and application must be recompiled.
Xilinx QDMA DPDK Software database structure
Below Table describes the DPDK software database structure and its contents on the Xilinx GitHub https://github.com/Xilinx/dma_ip_drivers, subdirectory QDMA/DPDK.
| Directory | Description |
|---|---|
| drivers/net/qdma | Xilinx QDMA DPDK poll mode driver |
| examples/qdma_testapp | Xilinx CLI based test application for QDMA |
| tools/0001-PKTGEN-3.6.1- Patch-to-add-Jumbo-packet -support.patch | This is dpdk-pktgen patch based on dpdk-pktgen v3.6.1. This patch extends dpdk-pktgen application to handle packets with packet sizes more than 1518 bytes and it disables the packet size classification logic to remove application overhead in performance measurement. This patch is used for performance testing with dpdk-pktgen application. |
| RELEASE.txt | Release Notes |
Setup: Download and modifications
The reference driver code requires DPDK version 19.11. Follow the steps below to download the proper version of DPDK and apply driver code and test application supplied in the GitHub.
Extract the DPDK driver software database from the Xilinx GitHub to the server where VCU1525 is installed. Henceforth, this area is referred as <dpdk_sw_database>.
Create a directory for the DPDK download on the server where the VCU1525 is installed and move to this directory.
mkdir <server_dir>/<dpdk_test_area>
cd <server_dir>/<dpdk_test_area>
git clone http://dpdk.org/git/dpdk-stable
cd dpdk-stable
git checkout v19.11
cp -r <dpdk_sw_database>/drivers/net/qdma ./drivers/net/
cp -r <dpdk_sw_database>/examples/qdma_testapp ./examples/
Additionally, make below changes to the DPDK 19.11 tree to build QDMA driver, support 2K queues and populate Xilinx devices for binding.
- To build QDMA driver
- Add below lines to
./config/common_basein DPDK 19.11 tree# #Complie Xilinx QDMA PMD driver # CONFIG_RTE_LIBRTE_QDMA_PMD=y CONFIG_RTE_LIBRTE_QDMA_DEBUG_DRIVER=n To enable driver debug logs, set CONFIG_RTE_LIBRTE_QDMA_DEBUG_DRIVER=y
- Add below lines to
drivers/net/Makefile, where PMDs are addedDIRS-$(CONFIG_RTE_LIBRTE_QDMA_PMD) += qdma
- Add below lines to
mk/rte.app.mk, where PMDs are added_LDLIBS-$(CONFIG_RTE_LIBRTE_QDMA_PMD) += -lrte_pmd_qdma
- To add Xilinx devices for device binding, add below lines to
./usertools/dpdk-devbind.pyafter cavium_pkx class, where PCI base class for devices are listed.xilinx_qdma_pf = {'Class': '05', 'Vendor': '10ee', 'Device': '9011,9111,9211,9311,9014,9114,9214,9314,9018,9118,9218,9318,901f,911f,921f,931f,9021,9121,9221,9321,9024,9124,9224,9324,9028,9128,9228,9328,902f,912f,922f,932f,9031,9131,9231,9331,9034,9134,9234,9334,9038,9138,9238,9338,903f,913f,923f,933f,9041,9141,9241,9341,9044,9144,9244,9344,9048,9148,9248,9348', 'SVendor': None, 'SDevice': None} xilinx_qdma_vf = {'Class': '05', 'Vendor': '10ee', 'Device': 'a011,a111,a211,a311,a014,a114,a214,a314,a018,a118,a218,a318,a01f,a11f,a21f,a31f,a021,a121,a221,a321,a024,a124,a224,a324,a028,a128,a228,a328,a02f,a12f,a22f,a32f,a031,a131,a231,a331,a034,a134,a234,a334,a038,a138,a238,a338,a03f,a13f,a23f,a33f,a041,a141,a241,a341,a044,a144,a244,a344,a048,a148,a248,a348', 'SVendor': None, 'SDevice': None}Update entries in network devices class in
./usertools/dpdk-devbind.pyto add Xilinx devicesnetwork_devices = [network_class, cavium_pkx, xilinx_qdma_pf, xilinx_qdma_vf]
- To support 2K queues and 256 PCIe functions, update below configurations in
./config/common_baseCONFIG_RTE_MAX_VFIO_GROUPS=256 CONFIG_RTE_MAX_VFIO_CONTAINERS=256 CONFIG_RTE_MAX_MEMZONE=7680 CONFIG_RTE_MAX_ETHPORTS=256 CONFIG_RTE_MAX_QUEUES_PER_PORT=2048
Setup: Host system
DPDK requires that hugepages are setup on the server.
The following modifications must be made to the /boot/grub/grub.cfg on the host system
Add hugepages for DPDK
Add following parameter to
/etc/default/grub fileGRUB_CMDLINE_LINUX="default_hugepagesz=1GB hugepagesz=1G hugepages=20"
This example adds 20 1GB hugepages, which are required to support 2048 queues, with descriptor ring of 1024 entries and each descriptor buffer length of 4KB.The number of hugepages required should be changed if the above configuration (queues, ring size, buffer size) changes.Enable IOMMU for VM testing
Update
/etc/default/grubfile as below.GRUB_CMDLINE_LINUX="default_hugepagesz=1GB hugepagesz=1G hugepages=20 iommu=pt intel_iommu=on"
Execute the following command to modify the /boot/grub/grub.cfg with the configuration set in the above steps and permanently add them to the kernel command line.
update-grub
Reboot host system after making the above modifications.
Setup: Make Commands
Compile DPDK & QDMA driver
Execute the following to compile the driver.
cd <server_dir>/<dpdk_test_area>/dpdk-stable
make config T=x86_64-native-linuxapp-gcc install
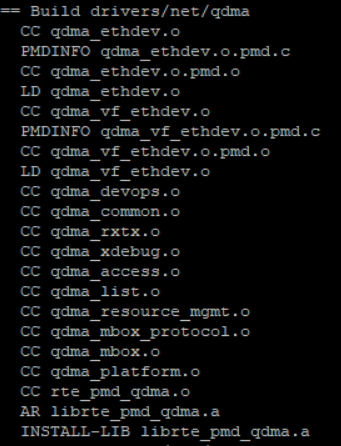
In the make output, verify that the QDMA files are being built. Below figure shows the QDMA files that are built as part of make.
The following should appear when make completes
Build complete [x86_64-native-linuxapp-gcc]
Verify that
librte_pmd_qdma.ais installed in./x86_64-native-linuxapp-gcc/libdirectory.
Additionally, for memory mapped mode, BRAM size can be configured with
makecommand. Default BRAM size is set to 512KB in the driver makefile.make config T=x86_64-native-linuxapp-gcc BRAM_SIZE=<BRAM size in bytes in decimal> install
Compile Test application
Change to root user and compile the application
sudo su
cd examples/qdma_testapp
make RTE_SDK=`pwd`/../.. RTE_TARGET=x86_64-native-linuxapp-gcc
The following should appear when make completes
INSTALL-MAP qdma_testapp.map
Additionally, for memory mapped mode, BRAM size can be configured with make command. Default BRAM size is set to 512KB in the driver makefile.
make BRAM_SIZE=<BRAM size in bytes in decimal> RTE_SDK=`pwd`/../.. RTE_TARGET=x86_64-native-linuxapp-gcc
If any of above steps are missed or require code modifications,
perform make clean before required modifications and re-building.
For driver related modifications, perform make clean
from inside x86_64-native-linuxapp-gcc directory.