Step 1: Set up the SD Card Image
The Starter Kit has a primary and secondary boot device, isolating the boot firmware from the run-time OS and application. This allows you to focus on developing and updating your application code within the application image on the secondary boot device, without having to develop the boot firmware. The primary boot device is a QSPI memory located on the SOM, which is pre-programmed (pre-loaded QSPI image) at the factory. The secondary boot device is a microSD card interface on the carrier card.
For setting up the microSD card, you’ll need to download the latest SD card image and then write it using an Image Flashing tool.
Download the Kria Ubuntu 24.04 LTS Image and save it on your computer. Note that there are two releases, Ubuntu 24.04 and Ubuntu 22.04. Choose the appropriate image based on the applications (and their version) targeted. Refer back to Linux boot landing page for compatible applications for each Ubuntu version.
Download the Raspberry Pi Imager (recommended; available for Window, Linux, and macOS). Find additional OS specific tool options below.
Follow the instructions in the tool and select the downloaded image to flash onto your microSD card.
Once your microSD card is flashed with the image, proceed to the next step.
Instructions for Raspberry Pi Imager (any OS)
For any OS users, visit the page below for instructions to copy the image to the SD card:
https://documentation.ubuntu.com/core/how-to-guides/deploy-an-image/install-on-amd/#write-the-ubuntu-core-image-to-the-microsd-card
Instructions for Win32 Disk Imager tool (Windows only)
For Windows users, you can also use the Win32 Disk Imager toolWin32 Disk Imager tool instead of Raspberry Pi Imager. Ensure that your SD card is correctly formatted before using the tool. Also, ensure that the compressed SD card image for the Kria Starter Kit has been extracted using an archive decompression tool.
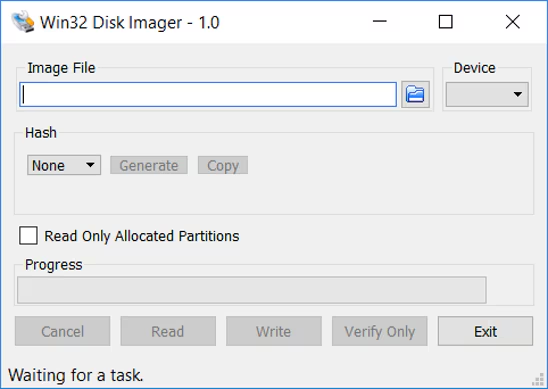
Browse to the location of the uncompressed image in the tool using the Blue folder icon. From the device drop-down menu, select the correct microSD card.
Click on ‘Write’ and then ‘Yes’ at the prompt to continue the write process and wait till the process is completed.