Attention
This product has reached its End Of Life. All new designs should migrate to MA35D.
Using FFmpeg
This page documents how to use FFmpeg with the Xilinx Video SDK.
Introduction
FFmpeg is an industry standard, open source, widely used utility for handling video. FFmpeg has many capabilities, including encoding and decoding all video compression formats, encoding and decoding audio, encapsulating, and extracting audio, and video from transport streams, and many more. The Xilinx Video SDK includes an enhanced version of FFmpeg that can communicate with the hardware accelerated transcode pipeline in Xilinx devices.
It is not within the scope of this document to provide an exhaustive guide on the usage of FFmpeg. Various resources can be found online, for example:
The following sections describe the options used with FFmpeg to configure the various hardware accelerators available on Xilinx devices.
Example Commands
A simple FFmpeg command for accelerated encoding with the Xilinx Video SDK will look similar to this one:
ffmpeg -c:v mpsoc_vcu_h264 -i infile.mp4 -c:v mpsoc_vcu_hevc -s:v 1920x1080 -b:v 1000K -r 60 -f mp4 -y transcoded.mp4
There are many other ways in which FFmpeg can be used to leverage the video transcoding features of Xilinx devices. Examples illustrating how to run FFmpeg for encoding, decoding, and transcoding with and without ABR scaling. To see examples of all these possibilities, refer to the FFmpeg tutorials included in this repository.
Using FFmpeg for Video Encoding and Decoding
General FFmpeg Options
Options |
Descriptions |
|---|---|
|
The input file.
|
|
Specify the video bitrate.
You can specify this in Mb or Kb. For example -b:v 1M or -b:v 1000K.
Can be specified in Mb or Kb. For example -b:v 1M or -b:v 1000K
|
|
Specify the video codec.
This option must be set for any video stream sent to a Xilinx device.
Valid values are
mpsoc_vcu_hevc (for HEVC) or mpsoc_vcu_h264 (for H.264) |
|
The frame size (WxH). For example 1920x1080 or 3840x2160.
|
|
The container format.
|
|
The frame rate in fps (Hz).
|
|
Used to specify ABR scaling options.
Consult the section about Using the Xilinx Multiscale Filter for more details on how to use this option.
|
|
Specify on which Xilinx device the FFmpeg job should run
Valid values are positive integers. Default is device 0.
Consult the Using Explicit Device IDs section for more details on how to use this option.
|
Encoder Options
Options |
Descriptions |
|---|---|
|
Number of encoder cores in the Xilinx device to utilize
Valid values: 0 to 4
The FFmpeg encoder plugin automatically determines how many encoder cores are needed to sustain
real-time performance (e.g. 1 for 1080p60, 4 for 4K60). The
-cores option can be used to manuallyspecify how many encoder cores are to be used for a given job. When encoding file-based clips with a
resolution of 1080p60 or lower, leveraging additional cores may increase performance. This option will
provide diminishing returns when multiple streams are processed on the same device. This option has no
impact on live streaming use-cases as a video stream cannot be processed faster than it is received.
|
|
Number of slices to operate on at once within a core
Valid values: 0 to 68
Slices are a fundamental part of the stream format. You can operate on slices in parallel to increase
speed at which a stream is processed. However, operating on multiple “slices” of video at once will have
a negative impact on video quality. This option must be used when encoding 4k streams to H.264 in order
to sustain real-time performance.
The maximum practical value for this option is 4 since there are 4 encoder cores in a device.
|
|
GOP size
Set this to 2x frame rate for a 2 second GOP
|
|
Encoding level restriction
1 (default). If the user does not set this value, the encoder will automatically assign appropriate level
based on resolution, frame rate and bitrate
Valid values for H.264: 1, 1.1, 1.2, 1.3, 2, 2.1, 2.2, 3, 3.1, 3.2, 4, 4.1, 4.2, 5, 5.1, 5.2
Valid values for HEVC: 1, 2, 2.1, 3, 3.1, 4, 4.1, 5, 5.1
|
|
Set the encoding profile
Valid values for H.264:
high (default), baseline, mainValid values for HEVC:
main (default), main-intra |
|
Maximum bitrate
Valid values: 0 to 3.5e+10 (default 5e+06)
You may want to use this to limit encoding bitrate if you have not specified a
-b:v bitrate |
|
IDR picture frequency
Valid values: 0 to UINT32_MAX (default)
|
|
Number of B frames
Valid values: 0 to 4 (default is 2)
For tuning use 1 or 2 to improve video quality at the cost of latency.
Consult the B Frames section for more details on how to use this option.
|
|
Number of frames to lookahead for qp maps
Valid values: 0 (default) to 20
For tuning set this to 20 to improve subjective video quality at the cost of latency.
Lookahead is not supported when encoding 4k streams.
Consult the Lookahead section for more details on how to use this option.
|
|
QP control mode
Valid values:
auto (default), relative_load, uniformFor tuning use uniform for best objective scores
Consult the Adaptive Quantization section for more details on how to use this option.
|
|
Enable spatial AQ
Valid values: disable or enable (default)
Consult the Adaptive Quantization section for more details on how to use this option.
|
|
Percentage of spatial AQ gain.
Valid values: 0 to 100 (default 50)
Consult the Adaptive Quantization section for more details on how to use this option.
|
|
Enable temporal AQ
Valid values: disable or enable (default)
Consult the Adaptive Quantization section for more details on how to use this option.
|
|
Determine if the quantization values are auto scaled
Valid values: 0, 1 (default)
Consult the Scaling List section for more details on how to use this option.
|
|
Add in a vsync frame
Valid values: 0, 1
Set this to 0 to prevent extra frames being added.
|
Decoder Options
Options |
Descriptions |
|---|---|
|
Configure decoder to handle out-of-order frames in order to decrease the latency of the system.
IMPORTANT: This option should not be used when processing streams containing B frames.
Valid values: 0 (default) and 1
|
|
Specify number of internal entropy buffers.
Valid values: 2 (default) to 10
Can be used to improve the performance of ABR ladders for input streams with a high bitrate
or a high number of reference frames. 2 is enough for most cases. 5 is the practical limit.
|
|
Configure decoder in split/unsplit input buffer mode.
Valid values: 0 (default) and 1
|
Miscellaneous Options
Options |
Descriptions |
|---|---|
|
Log latency information to syslog.
Valid values: 0 (disabled, default) and 1 (enabled)
|
|
Configures the FFmpeg log level.
Setting this option to
debug displays comprehensive debug information about the job |
Tuning Video Quality of Encoded Video
The quality of encoded video depends on various factors. It is primarily a function of target bit rate and type of video content. However, there are some encoder parameters which can be used to adjust the video quality.
The sections below describe the major FFmpeg options impacting video quality. Various examples illustrating the effect of these settings can be found here: Quality analysis examples.
Number of B Frames
The default number of B frames is 2, but for most streams, the optimal number of B frames is 1. This provides the best tradeoffs for both video quality and objective quality use cases. The number of B frames can be adjusted according to the amount of motion in the video content. Generally, more B-frames helps compression, but hurts very high motion scenes. Xilinx recommends the following B frames settings:
-bf2 for static or slow moving scenes, talking heads, or video conferencing type of content-bf1 for all other content, including gaming and fast motion streams.
To change B frames, use the -bf option on the FFmpeg command line. Valid values are 0 to 4, default is 2.
Lookahead
Lookahead is used to improve the accuracy of rate control by enabling the encoder to buffer a specified number of frames (using the parameter). Spatial and temporal complexity measures are computed for these frames. The rate control uses these measures to distribute more bits to frames which are hard to encode, and less bits to frames which are easy to encode. This redistribution results in better video quality. When latency is tolerable in applications, Xilinx recommends a lookahead depth of 20 frames to get optimum video quality.
To enable lookahead, use the -lookahead_depth option on the FFmpeg command line.
Adaptive Quantization
This tool improves the video qualitity by changing the quantization parameter (QP) within a frame. The QP for each frame is determined by the rate control, and adaptive quantization (AQ) adjusts QP on top of that for different regions within a frame. It exploits the fact that the human eye is more sensitive to certain regions of a frame and redistributes more bits to those regions.
The Xilinx video encoders support two types of AQ: Spatial Adaptive Quantization and Temporal Adaptive Quantization. Both of these AQ modes are enabled by default, and -qp-mode is set to relative-load when -lookahead_depth >= 1.
Spatial Adaptive Quantization
Spatial AQ adjusts the QP within a frame based on the spatial characteristics. The human eye is more sensitive to regions which are flat and have low texture than regions which have lots of detail and texture. Spatial AQ exploits this and provides more bits to the low texture and flat regions at the expense of high texture regions. This redistribution of bits to visually perceptible regions of the frame brings about visual improvement. Although spatial AQ improves video qualitity, it hurts objective metrics and causes a drop in PSNR and VMAF. It is recommended to turn this feature off when performing PSNR/VMAF based evaluation.
The spatial AQ algorithm can be controlled using the -spatial-aq-gain option. The range of this option is from 0 to 100 and indicates the strength of this algorithm as a percentage.
To enable spatial AQ, set the -spatial-aq-gain to 1 and the -spatial-aq-gain to 50 on the FFmpeg command line. If no value is specified for the -spatial-aq-gain option, the default value is 50.
Temporal Adaptive Quantization
Temporal AQ adjusts the QP based on the temporal characteristics of the sequence. It utilizes the lookahead frames to capture the temporal characteristics where static/low motion or background is differentiated with high motion regions. The high motion regions are not very sensitive to the human eye as compared with low motion regions. Temporal AQ exploits this fact and redistributes more bits to static or low motion regions.
To enable temporal AQ, set the -temporal-aq option to 1 on the FFmpeg command line.
Scaling List
Scaling list offers a mechanism to scale the transform coefficients by specifying scaling matrices. This influences the quality of encoded video. There are two options to specify the scaling lists mode: 0 = default and 1 = flat.
For video qualitity improvements, the scaling list mode must be set to default. The default scaling mode gives more importance to low-frequency coefficients and less importance to high-frequency coefficients. To improve the objective numbers (such as PSNR and VMAF), the scaling mode must be set to flat, where all the coefficients are scaled equally.
To change the scaling list mode, use the -scaling-list option (0 = flat, 1 = default) on the FFmpeg command line.
Considerations for Decoding and Encoding 4K Streams
The Xilinx Video SDK solution supports real-time decoding and encoding of 4k streams with the following notes:
The Xilinx video pipeline is optimized for live-streaming use cases. For 4k streams with bitrates significantly higher than the ones typically used for live streaming, it may not be possible to sustain real-time performance.
When decoding 4k streams with a high bitrate, increasing the number of entropy buffers using the
-entropy_buffers_countoption can help improve performanceWhen encoding raw video to 4k, set the
-soption to3840x2160to specify the desired resolution.When encoding 4k streams to H.264, the
-slicesoption is required to sustain real-time performance. A value of 4 is recommended. This option is not required when encoding to HEVC.The lookahead feature is not supported for 4k. FFmpeg will give an error if
-lookahead_depthis enabled when encoding to 4k.
Video Scaling
Xilinx devices provide hardware-accelerated video decoding, scaling, and encoding. Each device supports multiple input channels (raw or encoded) up to a total equivalent bandwidth of 4kp60. Using the Multiscale XMA FFmpeg plug-in included in the Xilinx Video SDK, each input channel can be scaled in hardware to multiple lower resolution and/or lower frame rate outputs.
The Xilinx Video SDK supports the following scaling features and capabilities:
Up to 32 input streams of raw or encoded video can be scaled down per device
Each input stream can be scaled down to a maximum of 8 outputs streams of lower resolution and/or lower frame rate
Up to 32 scaled outputs streams are supported per device, up to a maximum total equivalent bandwidth of 4kp60
The scaler supports spatial resolutions from 3840x2160 to 128x128, in multiples of 4
Scaled output streams can optionally be encoded to H.264 of HEVC, using the same codec for all streams
The scaler passes scaled frames and meta data to the next scaling level (if one is defined) and to the encoder (if one is being used)
Each level of scaling adds a little more latency to the pipeline
For additional details about the specification of the hardware scaler, refer to the Adaptive Bitrate Scaler features section in the introductory chapter of this user guide.
The figure below illustrates a scaling ladder with a 1920x1080 input and 4 outputs with resolutions of 1280x720, 852x480, 640x360, and 416x240, respectively.
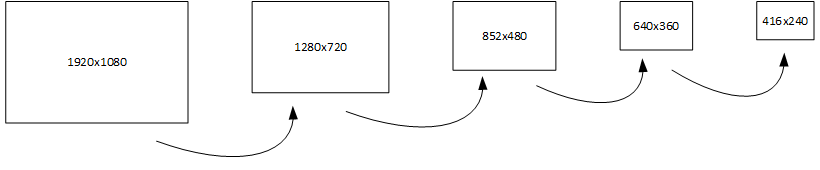
IMPORTANT: The frame rate and resolution of a given output should be smaller or equal than the rate of the previous output. Since the output of one scaling stage is passed as an input to the next, video quality will be negatively affected if frame rate is increased after it has been lowered.
Multiscale Filter Options
An ABR ladder is created using the multiscale_xma complex filter and the FFmpeg filter graph syntax. This section describes the options of the multiscale_xma complex filter.
- multiscale_xma
Filter implementing the Xilinx ABR multiscaler. Takes one input and up to 8 output streams. The complete list of options is described below.
Options |
Description |
|---|---|
|
Specify the number of scaler outputs
Valid values are integers between 1 and 8
|
|
Specify the width of each of the scaler outputs
The output number {N} must be an integer value between 1 and 8, and must not exceed the number of outputs
specified with
outputsValid values are integers between 3840 and 128, in multiples of 4
The frame resolution of a given output should be smaller or equal than the resolution of the previous output
|
|
Specify the height of each of the scaler outputs
The output number {N} must be an integer value between 1 and 8, and must not exceed the number of outputs
specified with
outputsValid values are integers between 2160 and 128, in multiples of 4
The frame resolution of a given output should be smaller or equal than the resolution of the previous output
|
|
Specify the frame rate of each of the scaler outputs
By default, the scaler uses the input stream frame rate for all outputs. While the encoder supports frame
dropping with the -r option, there is also hardware support in the scaler for dropping frames. Dropping
frames in the scaler is preferred since it saves scaler bandwidth, allowing the scaler and encoder to operate
more efficiently.
The output number {N} must be an integer value between 1 and 8, and must not exceed the number of outputs
specified with
outputsValid values are
full (default) and halfThe first output has to be full rate output (
out_1_rate=full)The frame rate of a given output should be smaller or equal than the resolution of the previous output
|
Using the Multiscale Filter
The filter graph specification for the multiscale_xma filter should be constructed in the following way:
Add the
multiscale_xmafilter to the graphSet the number of scaler outputs
Set the width, height, and rate settings for each scaler output
Define the name each scaler output
If the outputs are not to encoded on the device, add
xvbm_convertfilters to the filter graph to copy the frames back to the host and convert them to AV frames.
The following example shows a complete command to decode, scale and encode to five different resolutions:
ffmpeg -c:v mpsoc_vcu_h264 -i input.mp4 \
  -filter_complex " \
    multiscale_xma=outputs=4: \
    out_1_width=1280: out_1_height=720: out_1_rate=full: \
    out_2_width=848:  out_2_height=480: out_2_rate=half: \
    out_3_width=640:  out_3_height=360: out_3_rate=half: \
    out_4_width=288:  out_4_height=160: out_4_rate=half  \
    [a][b][c][d]; [a]split[aa][ab]; [ab]fps=30[abb]" \
  -map "[aa]"  -b:v 4M    -c:v mpsoc_vcu_h264 -f mp4 -y ./scaled_720p60.mp4 \
  -map "[abb]" -b:v 3M    -c:v mpsoc_vcu_h264 -f mp4 -y ./scaled_720p30.mp4 \
  -map "[b]"   -b:v 2500K -c:v mpsoc_vcu_h264 -f mp4 -y ./scaled_480p30.mp4 \
  -map "[c]"   -b:v 1250K -c:v mpsoc_vcu_h264 -f mp4 -y ./scaled_360p30.mp4 \
  -map "[d]"   -b:v 625K  -c:v mpsoc_vcu_h264 -f mp4 -y ./scaled_288p30.mp4
This example can also be found in the FFMpeg introductory tutorials: Transcode With Multiple-Resolution Outputs.
Encoding Scaler Outputs
The outputs of an ABR ladder can be encoded on the device using either the mpsoc_vcu_h264 or the mpsoc_vcu_hevc codec. IMPORTANT: All outputs must be encoded using the same codec.
Using Raw Scaler Outputs
To return raw video outputs from the ABR ladder, use the xvbm_convert filter to copy the frames from the device to the host and convert them to AV frames. The converted AV frames can then be used in FFmpeg software filters or directly saved to file as shown in this command:
ffmpeg -c:v mpsoc_vcu_h264 -i input.mp4 \
-filter_complex " \
  multiscale_xma=outputs=4: \
  out_1_width=1280: out_1_height=720:  out_1_rate=full: \
  out_2_width=848:  out_2_height=480:  out_2_rate=half: \
  out_3_width=640:  out_3_height=360:  out_3_rate=half: \
  out_4_width=288:  out_4_height=160:  out_4_rate=half  \
  [a][b][c][d]; [a]split[aa][ab]; [ab]fps=30[abb]; \
  [aa]xvbm_convert[aa1];[abb]xvbm_convert[abb1];[b]xvbm_convert[b1];[c]xvbm_convert[c1]; \
  [d]xvbm_convert[d1]" \
-map "[aa1]"  -pix_fmt yuv420p -f rawvideo ./scaled_720p60.yuv \
-map "[abb1]" -pix_fmt yuv420p -f rawvideo ./scaled_720p30.yuv \
-map "[b1]"   -pix_fmt yuv420p -f rawvideo ./scaled_480p30.yuv \
-map "[c1]"   -pix_fmt yuv420p -f rawvideo ./scaled_360p30.yuv \
-map "[d1]"   -pix_fmt yuv420p -f rawvideo ./scaled_288p30.yuv
This example can also be found in the FFMpeg introductory tutorials: Decode Only Into Multiple-Resolution Outputs.
Performance Considerations
Encoded input streams with a high bitrate or with a high number of reference frames can degrade the performance of an ABR ladder. The -entropy_buffers_count decoder option can be used to help with this. A value of 2 is enough for most cases, 5 is the practical limit.
Moving Data through the Video Pipeline
Automatic Data Movement
The Xilinx Video SDK takes care of moving data efficiently through the FFmpeg pipeline in these situations:
Individual operations:
Decoder input: encoded video is automatically sent from the host to the device
Scaler input: raw video is automatically sent from the host to the device
Encoder input: raw video is automatically sent from the host to the device
Encoder output: encoded video is automatically sent from the device to the host
Multistage pipelines
Pipelines with hardware accelerators only (such as transcoding with ABR ladder): the video frames remain on the device and are passed from one accelerator to the next, thereby avoiding unnecessary data movement between the host and the device
Pipelines with software filters: when using the ouput of the decoder or the scaler with a FFmpeg software filter, the video frames are automatically copied back to the host, as long as the software filter performs frame cloning. Examples of such filters include
fpsandsplit.
Explicit Data Movement
It is necessary to explicitly copy video frames from the device to the host in these situations:
Writing the output of the decoder or the scaler to file.
Using the output of the decoder or the scaler with a software filter which does not perform frame cloning.
This is done using the xvbm_convert filter.
- xvbm_convert
FFmpeg filter which converts and copies a XVBM frame on the device to an AV frame on the host
Examples using the xvbm_convert filter can be found here:
FFmpeg tutorials Decode Only and Decode Only Into Multiple-Resolution Outputs
FFmpeg examples with Software Filters
Mapping Audio Streams
When the FFmpeg job has a single input and a single output, the audio stream of the input is automatically mapped to the output video.
When the FFmpeg job has multiple outputs, FFmpeg must be explicitely told which audio stream to map to each of the output streams. The example below implements an transcoding pipeline with an ABR ladder. The input audio stream is split into 4 different channels using the asplit filter, one for each video output. Each audio channel is then uniquely mapped to one of the output video streams using the -map option.
ffmpeg -c:v mpsoc_vcu_h264 -i input.mp4
    -filter_complex "multiscale_xma=outputs=4:
    out_1_width=1280: out_1_height=720:  out_1_rate=full:
    out_2_width=848:  out_2_height=480:  out_2_rate=full:
    out_3_width=640:  out_3_height=360:  out_3_rate=full:
    out_4_width=288:  out_4_height=160:  out_4_rate=full
    [vid1][vid2][vid3][vid4]; [0:1]asplit=outputs=4[aud1][aud2][aud3][aud4]" \
    -map "[vid1]" -b:v 3M    -c:v mpsoc_vcu_h264 -map "[aud1]" -c:a aac -f mp4 -y output1.mp4
    -map "[vid2]" -b:v 2500K -c:v mpsoc_vcu_h264 -map "[aud2]" -c:a aac -f mp4 -y output2.mp4
    -map "[vid3]" -b:v 1250K -c:v mpsoc_vcu_h264 -map "[aud3]" -c:a aac -f mp4 -y output3.mp4
    -map "[vid4]" -b:v 625K  -c:v mpsoc_vcu_h264 -map "[aud4]" -c:a aac -f mp4 -y output4.mp4
Rebuilding FFmpeg
There are two methods for rebuilding FFmpeg with the Xilinx Video SDK plugins enabled:
Using the complete source code
Using the git patch file
Using the Source Code
The sources/app-ffmpeg4-xma submodule contains the entire source code for the FFmpeg executable included with the Video SDK. This is a fork of the main FFmpeg GitHub (release 4.1, commid ID bb01cd3cc01c9982e4b57f8ce5cfd6ec4724f848) with a Xilinx patch applied to enable the Xilinx Video SDK plugins. Due to licensing restrictions, the FFmpeg executable included in the Video SDK is enabled with the Xilinx Video SDK plugins only.
You can rebuild the FFmpeg executable with optional plugins by following the instructions below. Additionally, comprehensive instructions for compiling FFmpeg can be found on the FFmpeg wiki page.
Make sure
nasmandyasmare installed on your machine.Navigate the top of the Xilinx Video SDK repository:
cd /path/to/video-sdk
Make sure the sources have been downloaded from the repository:
git submodule update --init --recursive
Navigate to the directory containing the FFmpeg sources:
cd sources/app-ffmpeg4-xma
Optionally install FFmpeg plugins you wish to enable (either from source or from your package manager like
yumorapt). For example: libx264, or libx265.Configure FFmpeg with
--enableflags to enable the desired plugins. The-enable-libxma2apiflag enables the Xilinx Video SDK plugins. The command below will configure the Makefile to install the custom FFmpeg in the/tmp/ffmpegdirectory. To install in another location, modify the--prefixand--datadiroptions:./configure --prefix=/tmp/ffmpeg --datadir=/tmp/ffmpeg/etc --enable-x86asm --enable-libxma2api --disable-doc --enable-libxvbm --enable-libxrm --extra-cflags=-I/opt/xilinx/xrt/include/xma2 --extra-ldflags=-L/opt/xilinx/xrt/lib --extra-libs=-lxma2api --extra-libs=-lxrt_core --extra-libs=-lxrt_coreutil --extra-libs=-lpthread --extra-libs=-ldl --disable-static --enable-shared
Build and install the FFmpeg executable:
make -j && sudo make install
The
/opt/xilinx/xcdr/setup.shscript puts the Xilinx-provided FFmpeg in thePATHenvironment variable. To use the newly built FFmpeg, update yourPATHor provide the full path to the custom-built executable.
Using the Git Patch File
The Xilinx patch applied folder contains a git patch file which can be applied to a FFmpeg fork to enable the Xilinx Video SDK plugins.
This patch is designed to apply to FFmpeg n4.1. As such, applying this patch to earlier or later versions of FFmpeg may require edits to successfully merge these changes and represent untested configurations.
The patch makes edits to FFmpeg and adds new plugins to FFmpeg to initialize, configure and use Xilinx video accelerators.
Here is an example of how the patch can be applied to a FFmpeg fork:
Clone the n4.1 version of FFmpeg:
git clone https://github.com/FFmpeg/FFmpeg.git -b n4.1
After the git clone, you will have a directory named FFmpeg. Enter this directory:
cd FFmpeg
Copy the patch file into the FFmpeg directory:
cp /path/to/sources/app-ffmpeg4-xma-patch/0001-Add-plugins-to-support-U30-based-Video-SDK-v1.5.0.patch .
Apply the patch:
git am 0001-Add-plugins-to-support-U30-based-Video-SDK-v1.5.0.patch --ignore-whitespace --ignore-space-change
You can then install additional FFmpeg plugins and proceed with the FFmpeg build and installation process.
Xilinx FFmpeg Reference Guide
H.264 Codec Reference
H.264 Decoder Options
The entire list options for the Xilinx H.264 decoder (mpsoc_vcu_h264) can be displayed using the following command:
ffmpeg -h decoder=mpsoc_vcu_h264
The mpsoc_vcu_h264 decoder has the following options:
Decoder mpsoc_vcu_h264 [MPSOC H.264 Decoder]:
    General capabilities: delay avoidprobe
    Threading capabilities: none
    Supported pixel formats: xlnx_xvbm
MPSOC H.264 decoder AVOptions:
  -low_latency       <int>        .D.V..... Should low latency decoding be used (from 0 to 1) (default 0)
  -entropy_buffers_count <int>        .D.V..... Specify number of internal entropy buffers (from 2 to 10) (default 2)
  -latency_logging   <int>        .D.V..... Log latency information to syslog (from 0 to 1) (default 0)
  -splitbuff_mode    <int>        .D.V..... configure decoder in split/unsplit input buffer mode (from 0 to 1) (default 0)
H.264 Encoder Options
The entire list options for the Xilinx H.264 encoder (mpsoc_vcu_h264) can be displayed using the following command:
ffmpeg -h encoder=mpsoc_vcu_h264
The mpsoc_vcu_h264 encoder has the following options:
Encoder mpsoc_vcu_h264 [MPSOC H.264 Encoder]:
    General capabilities: delay threads
    Threading capabilities: auto
    Supported pixel formats: xlnx_xvbm nv12
MPSOC VCU H264 encoder AVOptions:
  -control-rate      <int>        E..V..... Rate Control Mode (from 0 to 3) (default cbr)
     const-qp                     E..V..... Constant QP
     cbr                          E..V..... Constant Bitrate
     vbr                          E..V..... Variable Bitrate
     low-latency                  E..V..... Low Latency
  -max-bitrate       <int64>      E..V..... Maximum Bit Rate (from 0 to 3.5e+10) (default 5e+06)
  -slice-qp          <int>        E..V..... Slice QP (from -1 to 51) (default auto)
     auto                         E..V..... Auto
  -min-qp            <int>        E..V..... Minimum QP value allowed for the rate control (from 0 to 51) (default 0)
  -max-qp            <int>        E..V..... Maximum QP value allowed for the rate control (from 0 to 51) (default 51)
  -bf                <int>        E..V..... Number of B-frames (from 0 to UINT32_MAX) (default 2)
  -periodicity-idr   <int>        E..V..... IDR Picture Frequency (from -1 to UINT32_MAX) (default -1)
  -profile           <int>        E..V..... Set the encoding profile (from 66 to 100) (default high)
     baseline                     E..V..... Baseline profile
     main                         E..V..... Main profile
     high                         E..V..... High profile
  -level             <int>        E..V..... Set the encoding level restriction (from 10 to 52) (default 1)
     1                            E..V..... 1 level
     1.1                          E..V..... 1.1 level
     1.2                          E..V..... 1.2 level
     1.3                          E..V..... 1.3 level
     2                            E..V..... 2 level
     2.1                          E..V..... 2.1 level
     2.2                          E..V..... 2.2 level
     3                            E..V..... 3 level
     3.1                          E..V..... 3.1 level
     3.2                          E..V..... 3.2 level
     4                            E..V..... 4 level
     4.1                          E..V..... 4.1 level
     4.2                          E..V..... 4.2 level
     5                            E..V..... 5 level
     5.1                          E..V..... 5.1 level
     5.2                          E..V..... 5.2 level
  -slices            <int>        E..V..... Number of Slices (from 1 to 68) (default 1)
  -qp-mode           <int>        E..V..... QP Control Mode (from 0 to 2) (default auto)
     uniform                      E..V..... Use the same QP for all coding units of the frame
     auto                         E..V..... Let the VCU encoder change the QP for each coding unit according to its content
     relative-load                E..V..... Use the information gathered in the lookahead to calculate the best QP
  -aspect-ratio      <int>        E..V..... Aspect-Ratio (from 0 to 3) (default auto)
     auto                         E..V..... 4:3 for SD video, 16:9 for HD video, unspecified for unknown format
     4:3                          E..V..... 4:3 aspect ratio
     16:9                         E..V..... 16:9 aspect ratio
     none                         E..V..... Aspect ratio information is not present in the stream
  -scaling-list      <int>        E..V..... Scaling List Mode (from 0 to 1) (default default)
     flat                         E..V..... Flat scaling list mode
     default                      E..V..... Default scaling list mode
  -cores             <int>        E..V..... Number of cores to use (from 0 to 4) (default auto)
     auto                         E..V..... Automatic
  -lookahead_depth   <int>        E..V..... Number of frames to lookahead for qp maps generation or custom rate control. Up to 20 (from 0 to 20) (default 0)
  -temporal-aq       <int>        E..V..... Enable Temporal AQ. (from 0 to 1) (default enable)
     disable                      E..V..... Disable Temporal AQ
     enable                       E..V..... Enable Temporal AQ
  -spatial-aq        <int>        E..V..... Enable Spatial AQ. (from 0 to 1) (default enable)
     disable                      E..V..... Disable Spatial AQ
     enable                       E..V..... Enable Spatial AQ
  -spatial-aq-gain   <int>        E..V..... Percentage of spatial AQ gain (from 0 to 100) (default 50)
  -latency_logging   <int>        E..V..... Log latency information to syslog (from 0 to 1) (default 0)
  -expert-options    <string>     E..V..... Expert options for MPSoC H.264 Encoder
  -tune-metrics      <int>        E..V..... Tunes MPSoC H.264 Encoder's video quality for objective metrics (from 0 to 1) (default disable)
     disable                      E..V..... Disable tune metrics
     enable                       E..V..... Enable tune metrics
HEVC Codec Reference
HEVC Decoder Options
The entire list options for the Xilinx HEVC decoder (mpsoc_vcu_hevc) can be displayed using the following command:
ffmpeg -h decoder=mpsoc_vcu_hevc
The mpsoc_vcu_hevc decoder has the following options:
Decoder mpsoc_vcu_hevc [MPSOC HEVC Decoder]:
    General capabilities: delay avoidprobe
    Threading capabilities: none
    Supported pixel formats: xlnx_xvbm
MPSOC HEVC decoder AVOptions:
  -low_latency       <int>        .D.V..... Should low latency decoding be used (from 0 to 1) (default 0)
  -entropy_buffers_count <int>        .D.V..... Specify number of internal entropy buffers (from 2 to 10) (default 2)
  -latency_logging   <int>        .D.V..... Log latency information to syslog (from 0 to 1) (default 0)
  -splitbuff_mode    <int>        .D.V..... configure decoder in split/unsplit input buffer mode (from 0 to 1) (default 0)
HEVC Encoder Options
The entire list options for the Xilinx HEVC encoder (mpsoc_vcu_hevc) can be displayed using the following command:
ffmpeg -h encoder=mpsoc_vcu_hevc
The mpoc_vcu_hevc encoder has the following options:
Encoder mpsoc_vcu_hevc [MPSOC VCU HEVC Encoder]:
    General capabilities: delay threads avoidprobe
    Threading capabilities: auto
    Supported pixel formats: xlnx_xvbm nv12
MPSOC VCU HEVC encoder AVOptions:
  -control-rate      <int>        E..V..... Rate Control Mode (from 0 to 3) (default cbr)
     const-qp                     E..V..... Constant QP
     cbr                          E..V..... Constant Bitrate
     vbr                          E..V..... Variable Bitrate
     low-latency                  E..V..... Low Latency
  -max-bitrate       <int64>      E..V..... Maximum Bit Rate (from 0 to 3.5e+10) (default 5e+06)
  -slice-qp          <int>        E..V..... Slice QP (from -1 to 51) (default auto)
     auto                         E..V..... Auto
  -min-qp            <int>        E..V..... Minimum QP value allowed for the rate control (from 0 to 51) (default 0)
  -max-qp            <int>        E..V..... Maximum QP value allowed for the rate control (from 0 to 51) (default 51)
  -bf                <int>        E..V..... Number of B-frames (from 0 to UINT32_MAX) (default 2)
  -periodicity-idr   <int>        E..V..... IDR Picture Frequency (from -1 to UINT32_MAX) (default -1)
  -profile           <int>        E..V..... Set the encoding profile (from 0 to 1) (default main)
     main                         E..V..... Main profile
     main-intra                   E..V..... Main Intra profile
  -level             <int>        E..V..... Set the encoding level restriction (from 10 to 51) (default 1)
     1                            E..V..... 1 level
     2                            E..V..... 2 level
     2.1                          E..V..... 2.1 level
     3                            E..V..... 3 level
     3.1                          E..V..... 3.1 level
     4                            E..V..... 4 level
     4.1                          E..V..... 4.1 level
     5                            E..V..... 5 level
     5.1                          E..V..... 5.1 level
  -tier              <int>        E..V..... Set the encoding tier (from 0 to 1) (default main)
     main                         E..V..... Main tier
     high                         E..V..... High tier
  -slices            <int>        E..V..... Number of Slices (from 1 to 68) (default 1)
  -qp-mode           <int>        E..V..... QP Control Mode (from 0 to 2) (default auto)
     uniform                      E..V..... Use the same QP for all coding units of the frame
     auto                         E..V..... Let the VCU encoder change the QP for each coding unit according to its content
     relative-load                E..V..... Use the information gathered in the lookahead to calculate the best QP
  -aspect-ratio      <int>        E..V..... Aspect-Ratio (from 0 to 3) (default auto)
     auto                         E..V..... 4:3 for SD video, 16:9 for HD video, unspecified for unknown format
     4:3                          E..V..... 4:3 aspect ratio
     16:9                         E..V..... 16:9 aspect ratio
     none                         E..V..... Aspect ratio information is not present in the stream
  -scaling-list      <int>        E..V..... Scaling List Mode (from 0 to 1) (default default)
     flat                         E..V..... Flat scaling list mode
     default                      E..V..... Default scaling list mode
  -cores             <int>        E..V..... Number of cores to use (from 0 to 4) (default auto)
     auto                         E..V..... Automatic
  -lookahead_depth   <int>        E..V..... Number of frames to lookahead for qp maps generation or custom rate control. Up to 20 (from 0 to 20) (default 0)
  -temporal-aq       <int>        E..V..... Enable Temporal AQ. (from 0 to 1) (default enable)
     disable                      E..V..... Disable Temporal AQ
     enable                       E..V..... Enable Temporal AQ
  -spatial-aq        <int>        E..V..... Enable Spatial AQ. (from 0 to 1) (default enable)
     disable                      E..V..... Disable Spatial AQ
     enable                       E..V..... Enable Spatial AQ
  -spatial-aq-gain   <int>        E..V..... Percentage of spatial AQ gain (from 0 to 100) (default 50)
  -latency_logging   <int>        E..V..... Log latency information to syslog (from 0 to 1) (default 0)
  -expert-options    <string>     E..V..... Expert options for MPSoC HEVC Encoder
  -tune-metrics      <int>        E..V..... Tunes MPSoC HEVC Encoder's video quality for objective metrics (from 0 to 1) (default disable)
     disable                      E..V..... Disable tune metrics
     enable                       E..V..... Enable tune metrics
Multiscaler Filter Reference
The entire list options for the Xilinx Multiscaler (multiscale_xma) can be displayed using the following command:
ffmpeg -h filter=multiscale_xma
The multiple output hardware scaling filter has the following options:
Filter multiscale_xma
  Xilinx Multi Scaler (in ABR mode) using XMA APIs
    Inputs:
       #0: default (video)
    Outputs:
        dynamic (depending on the options)
multiscale_xma AVOptions:
  outputs           <int>        ..FV..... set number of outputs (from 1 to 8) (default 8)
  out_1_width       <int>        ..FV..... set width of output 1 (should be multiple of 4) (from 128 to 3840) (default 1600)
  out_1_height      <int>        ..FV..... set height of output 1 (should be multiple of 4) (from 128 to 3840) (default 900)
  out_1_pix_fmt     <string>     ..FV..... set format of output 1 (default "xlnx_xvbm")
  out_1_rate        <string>     ..FV..... set rate of output 1 (default "full")
  out_2_width       <int>        ..FV..... set width of output 2 (should be multiple of 4) (from 128 to 3840) (default 1280)
  out_2_height      <int>        ..FV..... set height of output 2 (should be multiple of 4) (from 128 to 3840) (default 720)
  out_2_pix_fmt     <string>     ..FV..... set format of output 2 (default "xlnx_xvbm")
  out_2_rate        <string>     ..FV..... set rate of output 2 (default "full")
  out_3_width       <int>        ..FV..... set width of output 3 (should be multiple of 4) (from 128 to 3840) (default 800)
  out_3_height      <int>        ..FV..... set height of output 3 (should be multiple of 4) (from 128 to 3840) (default 600)
  out_3_pix_fmt     <string>     ..FV..... set format of output 3 (default "xlnx_xvbm")
  out_3_rate        <string>     ..FV..... set rate of output 3 (default "full")
  out_4_width       <int>        ..FV..... set width of output 4 (should be multiple of 4) (from 128 to 3840) (default 832)
  out_4_height      <int>        ..FV..... set height of output 4 (should be multiple of 4) (from 128 to 3840) (default 480)
  out_4_pix_fmt     <string>     ..FV..... set format of output 4 (default "xlnx_xvbm")
  out_4_rate        <string>     ..FV..... set rate of output 4 (default "full")
  out_5_width       <int>        ..FV..... set width of output 5 (should be multiple of 4) (from 128 to 3840) (default 640)
  out_5_height      <int>        ..FV..... set height of output 5 (should be multiple of 4) (from 128 to 3840) (default 480)
  out_5_pix_fmt     <string>     ..FV..... set format of output 5 (default "xlnx_xvbm")
  out_5_rate        <string>     ..FV..... set rate of output 5 (default "full")
  out_6_width       <int>        ..FV..... set width of output 6 (should be multiple of 4) (from 128 to 3840) (default 480)
  out_6_height      <int>        ..FV..... set height of output 6 (should be multiple of 4) (from 128 to 3840) (default 320)
  out_6_pix_fmt     <string>     ..FV..... set format of output 6 (default "xlnx_xvbm")
  out_6_rate        <string>     ..FV..... set rate of output 6 (default "full")
  out_7_width       <int>        ..FV..... set width of output 7 (should be multiple of 4) (from 128 to 3840) (default 320)
  out_7_height      <int>        ..FV..... set height of output 7 (should be multiple of 4) (from 128 to 3840) (default 240)
  out_7_pix_fmt     <string>     ..FV..... set format of output 7 (default "xlnx_xvbm")
  out_7_rate        <string>     ..FV..... set rate of output 7 (default "full")
  out_8_width       <int>        ..FV..... set width of output 8 (should be multiple of 4) (from 128 to 3840) (default 224)
  out_8_height      <int>        ..FV..... set height of output 8 (should be multiple of 4) (from 128 to 3840) (default 224)
  out_8_pix_fmt     <string>     ..FV..... set format of output 8 (default "xlnx_xvbm")
  out_8_rate        <string>     ..FV..... set rate of output 8 (default "full")
  latency_logging   <int>        ..FV..... Log latency information to syslog (from 0 to 1) (default 0)