Using Tensorflow Framework and Inception v1
In this lab you will use inceptionv1 model and imagenet dataset with TensorFlow framework. It is assumed that you have an AWS F1 instance setup for the Vitis-AI version 1.4.1 otherwise refer to AWS_README to set one up.
Launch Docker Container
Open a terminal window and launch Docker Container.
cd /home/ubuntu/Vitis-AI_1_4_1
./docker_run.sh xilinx/vitis-ai-cpu:1.4.1.978
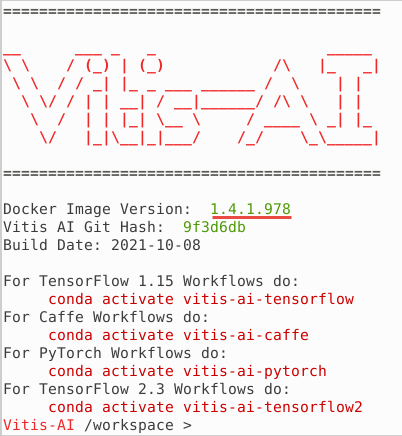
The docker shell will start showing the following:
Activate Conda Environment for TensorFlow in the docker window.
conda activate vitis-ai-tensorflow
Note the root folder changes to (vitis-ai-tensorflow) Vitis-AI /workspace>.
Source DPU IP (DPUCADF8H).
source /workspace/setup/alveo/setup.sh DPUCADF8H
Download a validation dataset
Download a minimal validation set for Imagenet2012 using Collective Knowledge (CK) by executing the following steps. The images will be used to test the model.
Note: User is responsible for the use of the downloaded content and compliance with any copyright licenses.
python -m ck pull repo:ck-env
python -m ck install package:imagenet-2012-val-min
python -m ck install package:imagenet-2012-aux --tags=from.berkeley
head -n 500 ~/CK-TOOLS/dataset-imagenet-ilsvrc2012-aux-from.berkeley/val.txt > ~/CK-TOOLS/dataset-imagenet-ilsvrc2012-val-min/val.txt
Download the source files
We will use the pretrained Inception-v1 network with the Tensorflow framework from the AI-Model-Zoo.
Download the model source files.
cd /workspace/models/AI-Model-Zoo/
python3 downloader.py
You will see output like:

Type tf inceptionv1 and hit Enter. The available selections will be displayed.
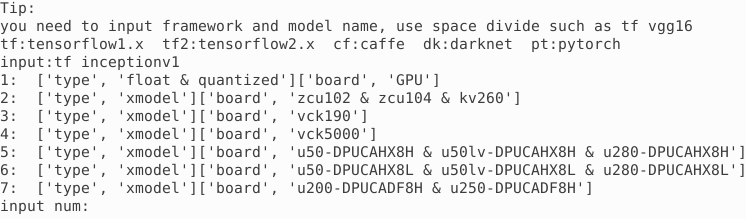
Note 1 is for the board independent source files, 7 is for the U200 specific compiled files, 2 to 6 are for the other boards specific option.
Type 1 and hit Enter to download the zip file (tf_inceptionv1_imagenet_224_224_3G_1.4.zip). Move the downloaded zip file in the tf_inception_v1 example directory. Extract the downloaded file to get the inception_v1_tf directory and associated files.
mv tf_inceptionv1_imagenet_224_224_3G_1.4.zip /workspace/examples/DPUCADF8H/tf_inception_v1/
cd /workspace/examples/DPUCADF8H/tf_inception_v1/
unzip tf_inceptionv1_imagenet_224_224_3G_1.4.zip
The tf_inceptionv1_imagenet_224_224_3G_1.4 will be created with its source files.
Copy the unquantized model file.
cp tf_inceptionv1_imagenet_224_224_3G_1.4/float/inception_v1_inference.pb .
The inception_v1_inference.pb is the unquantized Tensorflow trained model with data in float format.
Inspect TensorFlow model
Inspect the Tensorflow model to get input and output node(s), and input node shape.
./inspect_tf_model.sh inception_v1_inference.pb
You should see the output as:
Op types used: 297 Const, 231 Identity, 58 Conv2D, 57 FusedBatchNormV3, 57 Relu, 13 MaxPool, 9 ConcatV2, 2 Reshape, 1 AvgPool, 1 BiasAdd, 1 Placeholder, 1 Shape, 1 Softmax, 1 Squeeze

Found 1 possible inputs: (name=input, type=float(1), shape=[?,224,224,3])
Found 1 possible outputs: (name=InceptionV1/Logits/Predictions/Reshape_1, op=Reshape)
Quantize the Model
To deploy a model on the FPGA, it must be quantized (into INT8 data format) and compiled.
Quantize the model
The quantizer will generate scaling parameters for quantizing float to INT8. FPGAs take advantage of Fixed Point Precision to achieve more parallelization at lower power.
Execute the following command which invokes vai_q_tensorflow quantizer program with several input parameters.
vai_q_tensorflow quantize --input_frozen_graph inception_v1_inference.pb --input_nodes input --output_nodes InceptionV1/Logits/Predictions/Reshape_1 --input_fn utils.input_fn_inception_v1_tf --input_shapes ?,224,224,3 --calib_iter 50
where the arguments are:
| Quantizer Arguments | Description |
|---|---|
| –input_frozen_graph | TensorFlow floating-point network model pb file |
| –input_nodes | input function name (input) |
| –output_nodes | Output function name (InceptionV1/Logits/Predictions/Reshape_1) |
| –input_fn | Function defined in the utils.py |
| –input_shapes | 224x224 pixels image in RGB format |
| –eval_image_path | Location to the evaluation images directory |
| –calib_iter | Number of images on which to calibrate |
The calib_iter will have impact on the quality of results. The smaller the number, the poorer the probabilities will be.
By default, the quantization result (quantized model quantize_eval_model.pb) will be saved to quantize_results directory under the current directory.
Compile the Model
In this step, the network graph, xmodel file, tf_inception_v1_compiled.xmodel will be generated in the out directory under the current directory using the Vitis-AI compiler. Note this may take approximately 5-8 minutes.
Execute the following command which invokes vai_c_tensorflow compiler with several input parameters
vai_c_tensorflow --arch /opt/vitis_ai/compiler/arch/DPUCADF8H/U200/arch.json --frozen_pb quantize_results/quantize_eval_model.pb --output_dir out --net_name tf_inception_v1_compiled --options '{"input_shape": "4,224,224,3"}'
where the arguments are:
| Compiler Arguments | Description |
|---|---|
| –arch | Architecture JSON file |
| –frozen_pb | Quantized network |
| –output_dir | Output directory name |
| –net_name | compiled network name |
| –options | Extra options including defining input_shape |
The input_shape parameters of 4,224,224,3 means process four images of 224x224 pixels in RGB format.
Note: DPUCADF8H uses a default batchsize of 4. If the original model’s batchsize is 1, you will need to specify the
input_shapeusing the--optionsargument as the command above. The--optionsis a general argument for vai_c_caffe/vai_c_tensorflow/vai_c_tensorflow2.
Run example classification code
In the current directory there is a src folder with source files which will be run on the host. Compile the host code using the provided build shell script.
Compile the executable
./build.sh
The compiled executable called inception_example will be generated in the current directory.
Run the compiled application using the images downloaded into the ~/CK-TOOLS directory.
Run
./inception_example ./out/tf_inception_v1_compiled.xmodel ~/CK-TOOLS/dataset-imagenet-ilsvrc2012-val-min
The output should look like:
WARNING: Logging before InitGoogleLogging() is written to STDERR
I0126 15:56:19.671056   482 main.cc:293] create running for subgraph: subgraph_InceptionV1/InceptionV1/Conv2d_1a_7x7/Conv2D
...
...
Image : ILSVRC2012_val_00000498.JPEG
top[0] prob = 0.549440  name = common newt, Triturus vulgaris
top[1] prob = 0.084259  name = centipede
top[2] prob = 0.065621  name = eft
top[3] prob = 0.024141  name = spotted salamander, Ambystoma maculatum
top[4] prob = 0.014642  name = European fire salamander, Salamandra salamandra

Image : ILSVRC2012_val_00000237.JPEG
top[0] prob = 0.451046  name = English foxhound
top[1] prob = 0.351275  name = Walker hound, Walker foxhound
top[2] prob = 0.047540  name = Great Dane
top[3] prob = 0.028834  name = English setter
top[4] prob = 0.012020  name = German short-haired pointer

Image : ILSVRC2012_val_00000073.JPEG
top[0] prob = 0.295080  name = kite
top[1] prob = 0.157945  name = sulphur-crested cockatoo, Kakatoe galerita, Cacatua galerita
top[2] prob = 0.108554  name = vulture
top[3] prob = 0.045252  name = papillon
top[4] prob = 0.035242  name = bald eagle, American eagle, Haliaeetus leucocephalus
The top five priorities are identified for each image. The names it displays comes from words.txt provided in the repository directory. Its offset is provided in val.txt under the ~/CK-TOOLS/dataset-imagenet-ilsvrc2012-val-min downloaded dataset. Execute the following command to see the label number for the ILSVRC2012_val_00000498.JPEG:
cat ~/CK-TOOLS/dataset-imagenet-ilsvrc2012-val-min/val.txt | grep 00000498
You should see the output as ILSVRC2012_val_00000498.JPEG 26, indicating label offset for the file is 26.
You may want to close the docker image by typing exit in the image console.
Note If the previous attempt to run the application fails with a core dump, then run
xbutil examineand verify that the board is detected. If the board is not detected then source the setup.sh (source /workspace/setup/alveo/setup.sh DPUCADF8H) and run the same command to see that the board is detected. Once the board is detected, you can run the application.
Copyright© 2022 Xilinx