Vector Add lab, part 2
Introduction
The second part of this lab guides you through the steps involved in creating both the PL and x86 domain and to run the code in real hardware.
References
Below you can find a list of comprehensive documentation related to the steps we are going to carry out in this lab.
Description of the lab
This lab uses an adder kernel on the AI Engine and three datamovers on the Adaptable Engine (PL), the lab also uses a host code running on the x86 to control these kernels.
Concepts
-
PL and x86 domain
-
Linking file
-
HW emulation
-
Implement and run on hardware
Steps
Add Hw Kernel Project
-
In the Explore pane, right-click
aie_vadd_systemand select Add Hw Kernel Project…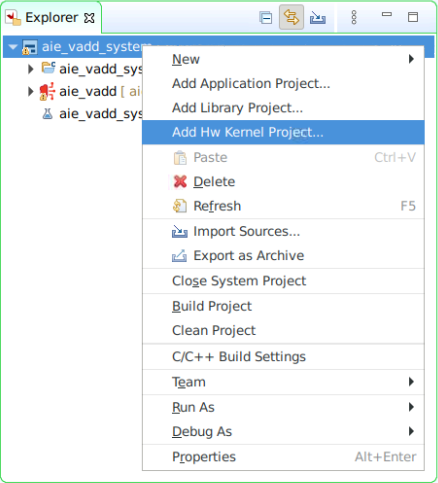
-
In the New Vitis IDE Project window, enter
datamovers_plas Hw Kernel project name:, then click Finish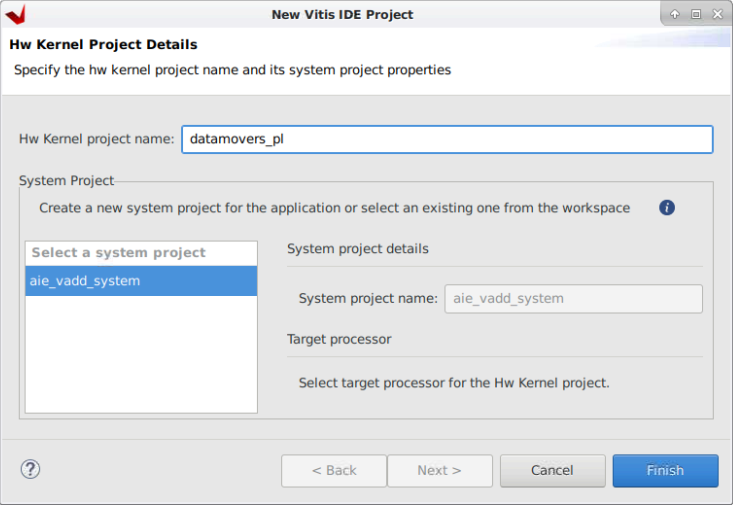
-
Right-click on the new created
datamovers_pl > srcfolder, then selectImport Sources...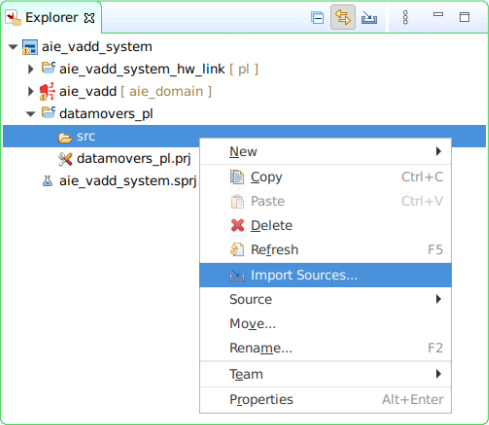
-
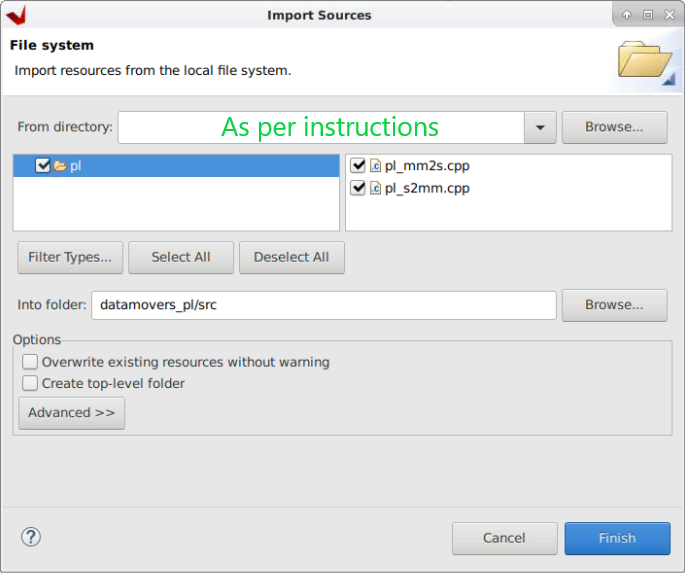
In the Import Source window, click Browse…, then navigate to
$HOME/xup_aie_training/sources/vadd_lab/pland click Open. -
Tick the pl box, then update click Finish
-
In the Explore pane, double-click
datamovers_pl.prj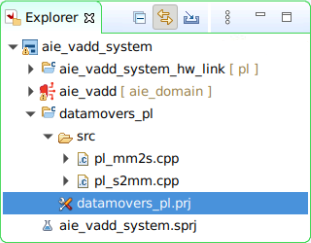
-
In the Hardware Kernel Project Settings, click the
Add Hardware Function...button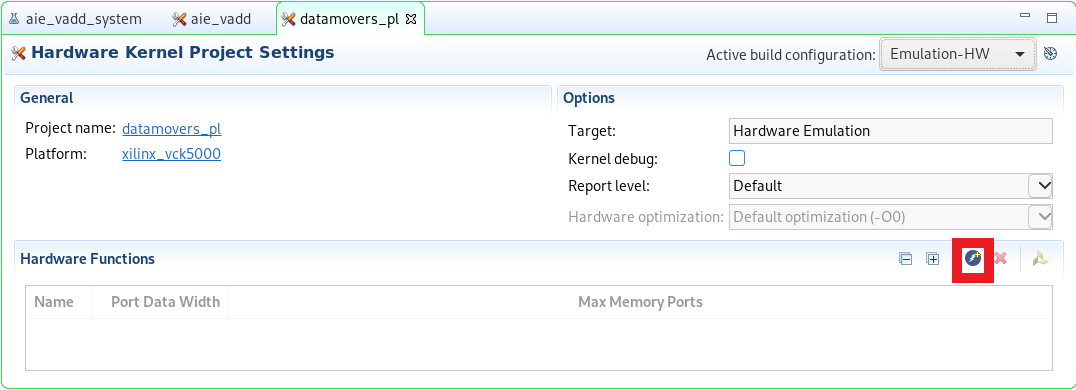
-
In the Add Hardware Function window, select both pl_mm2s and pl_s2mm and then click OK
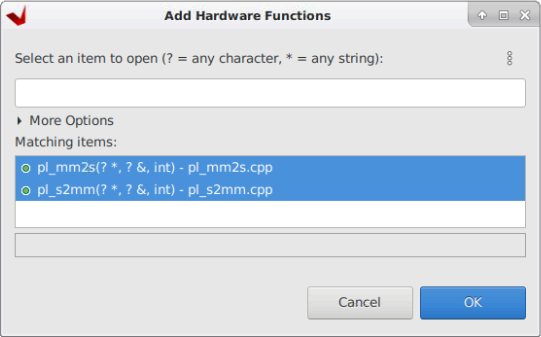
Notice how both kernels are added into the Hardware Function box
Add kernel linking file
We need to specify how the streaming interfaces of our kernels are going to be connected to the AI Engine array.
-
In the Explore pane, right-click on
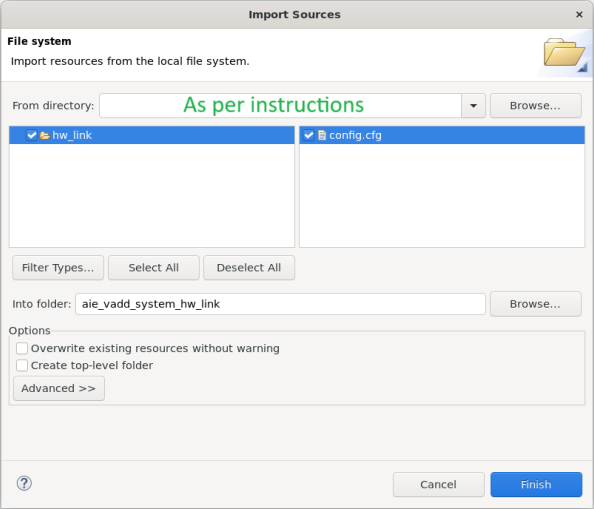
aie_vadd_system_hw_link, then select Import Sources…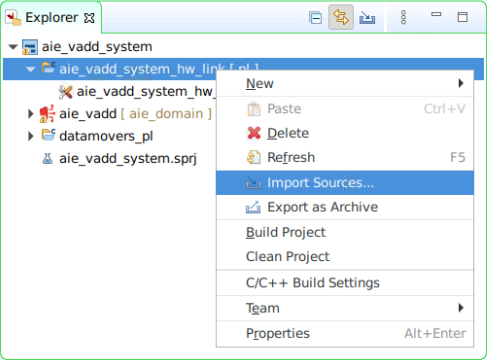
-
In the Import Source window, click Browse…, then navigate to
$HOME/xup_aie_training/sources/vadd_lab/hw_linkand click Open. -
Tick the hw_link box
-
Enter aie_vadd_system_hw_link/ in the Into folder: field, then click Finish
-
In the Explore pane, double-click
aie_vadd_system_hw_link > aie_vadd_system_hw_link.prj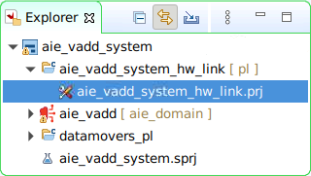
-
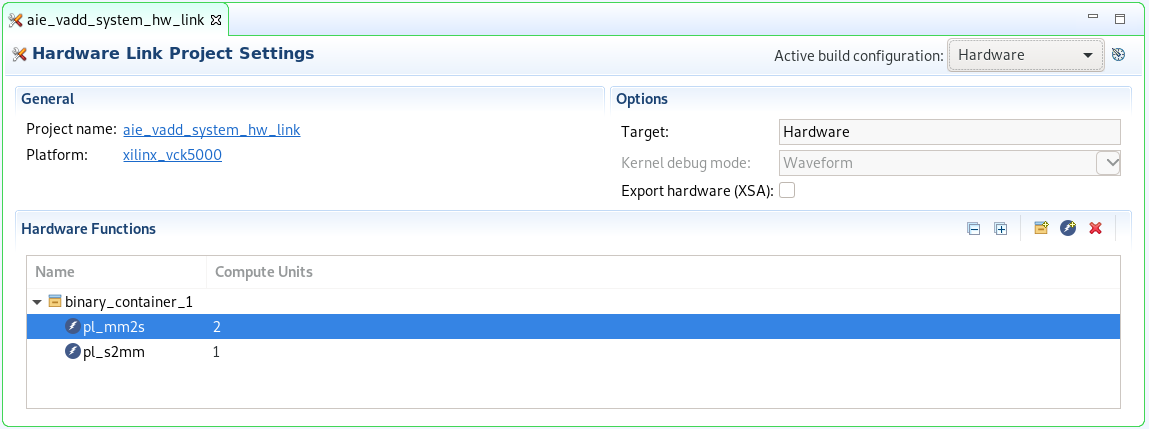
In the Hardware Link Project Settings, increase the pl_mm2s compute units to 2
-
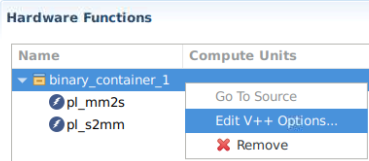
Right-click on the binary_container_1, , and select Edit V++ Options…
-
In the
V++ command line options: add--config ../config.cfgthen click Apply and Close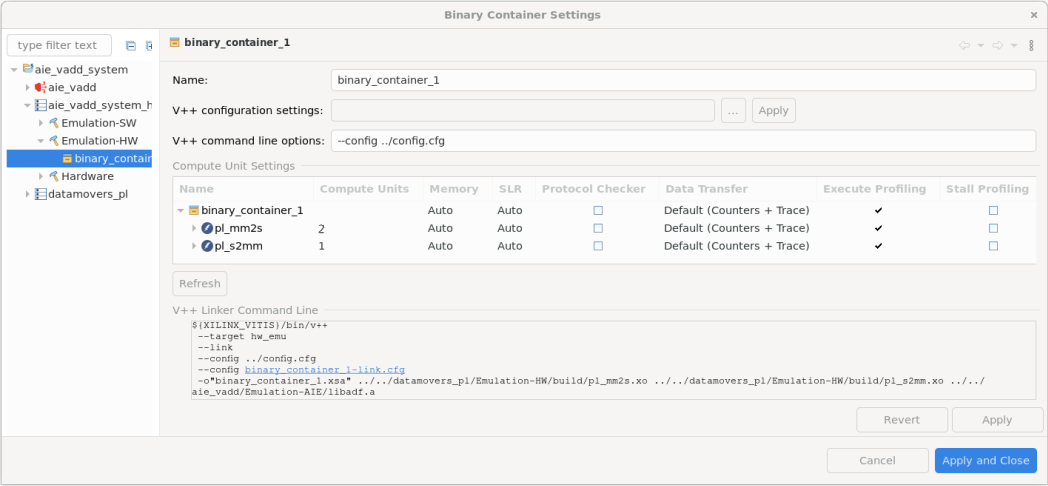
Add host code
-
In the Explore pane, right-click
aie_vadd_systemand select Add Application Project…
-
In the New Vitis IDE Project window, enter
host_x86as Application project name:, select the x86 SMP processor and finally click Next >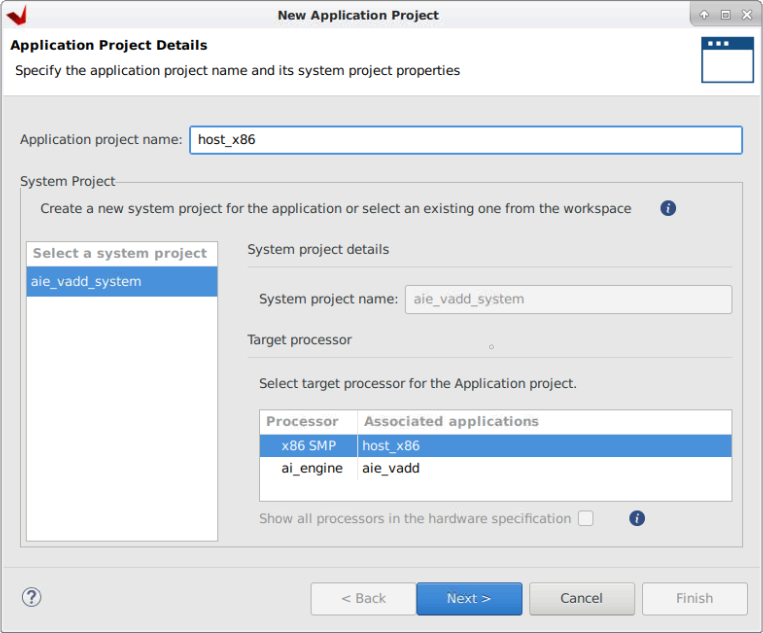
-
In the Template window, select
Empty Applicationthen click Next >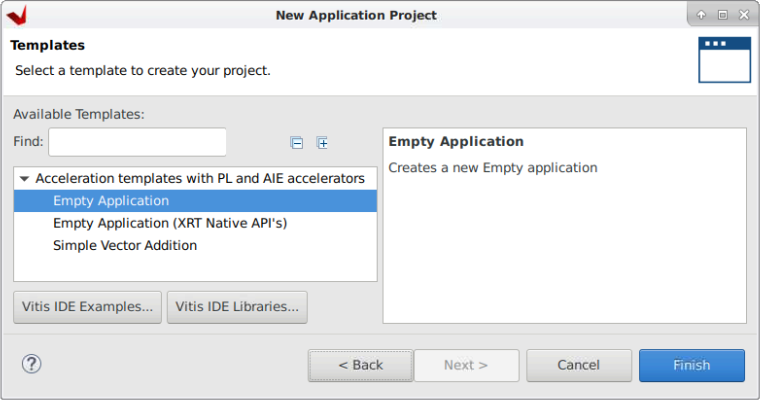
-
In the Explore pane, right-click on
host_x86, then select Import Sources…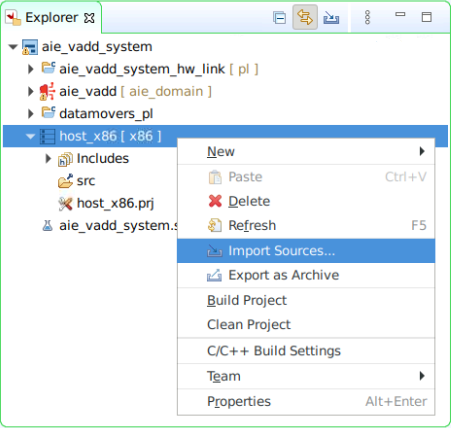
-
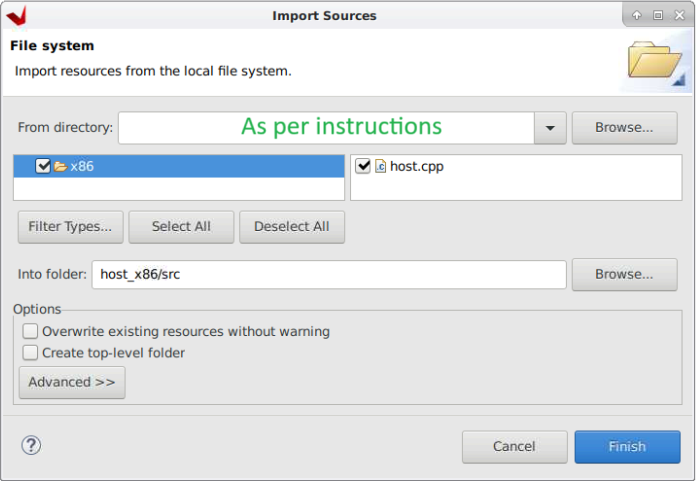
In the Import Source window, click Browse…, then navigate to
$HOME/xup_aie_training/sources/vadd_lab/hostand click Open. -
Tick the host box, then click Finish
Configure x86 compilation
-
In the Explore pane, right-click on
host_x86 [x86], then select C/C++ Build Settings…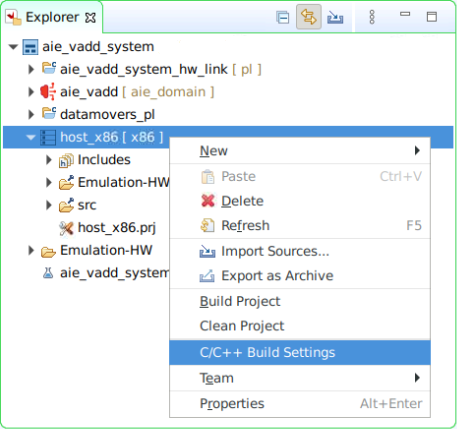
-
Select All configurations and add dialect flag,
-std=c++17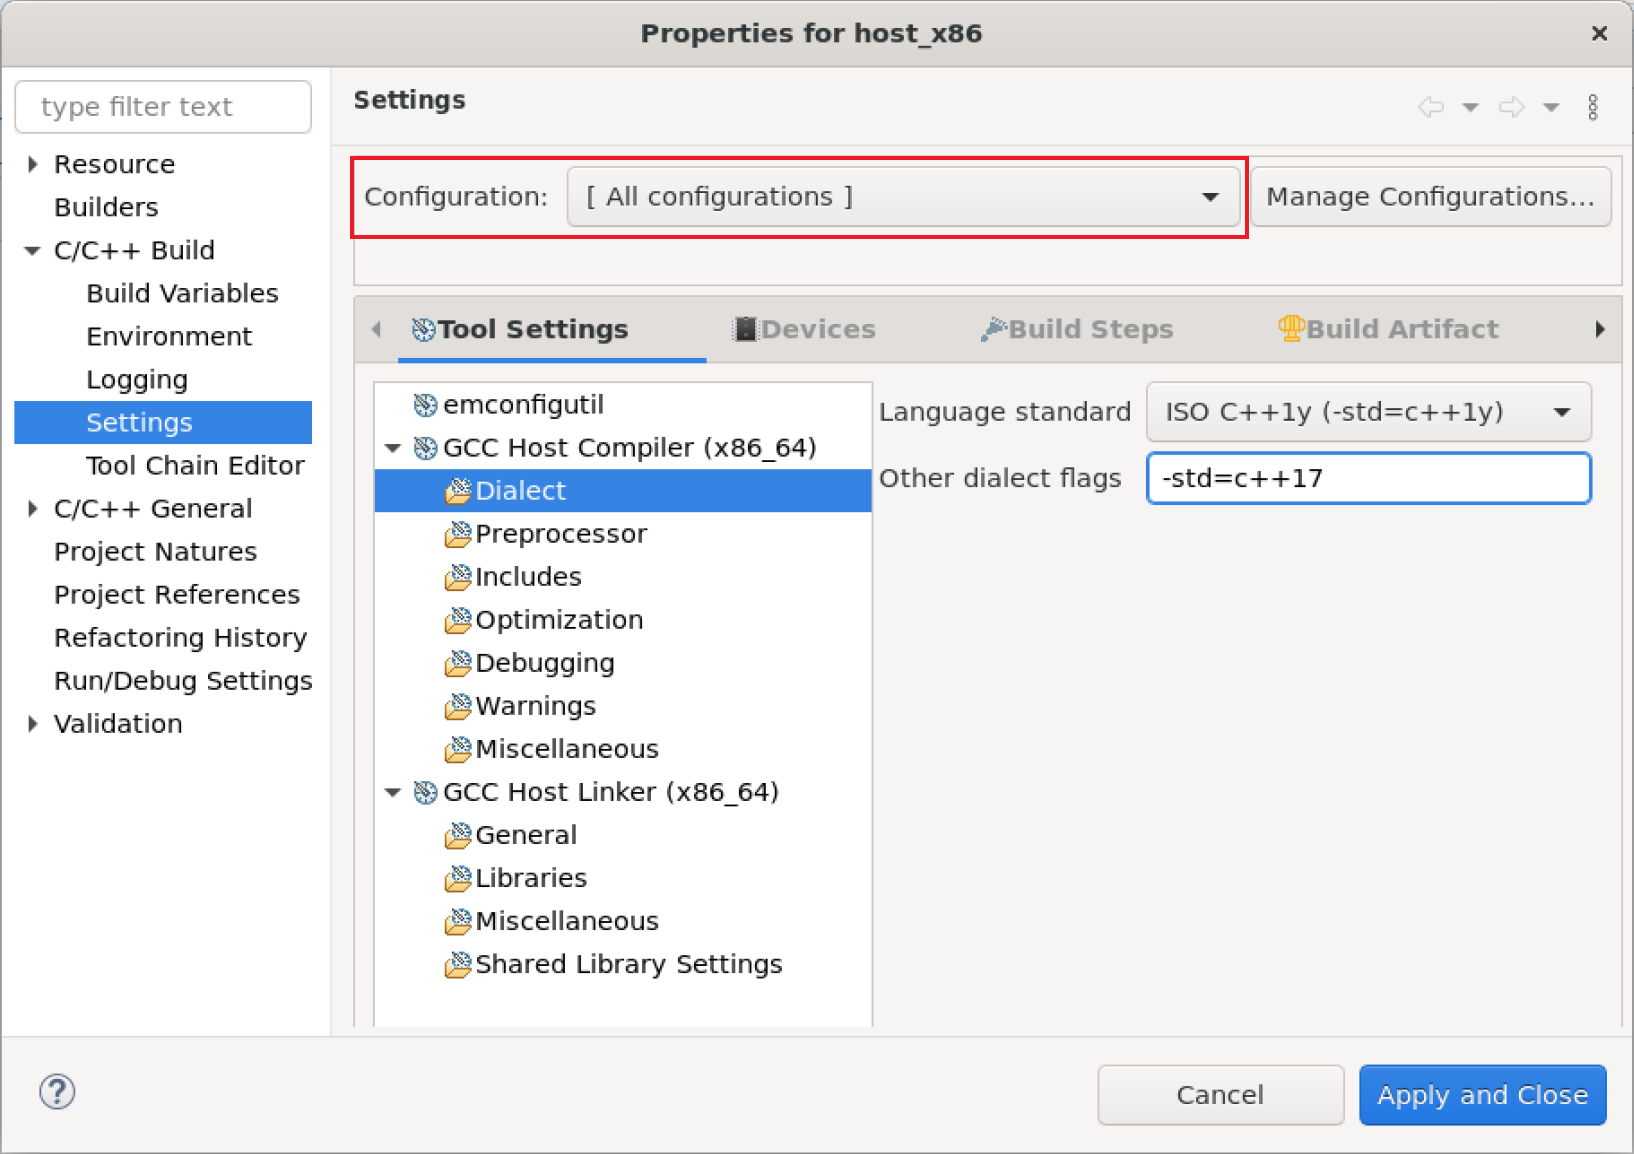
-
Select
GCC Host Linker (x_86_64) > LibrariesAdd the following libraries, under Libraries (-l)
xrt_coreutil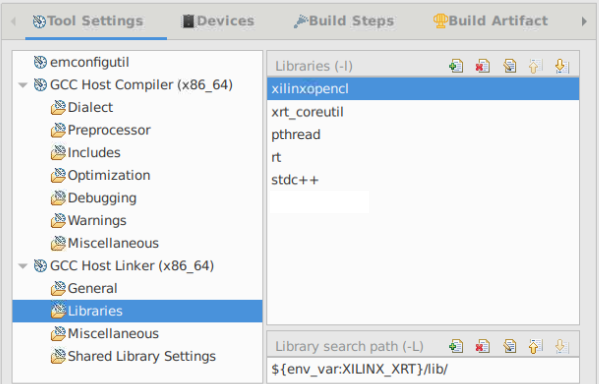
-
Finally, click Apply and Close
Implement for actual hardware
In this section, we are going to run the vector add in actual hardware
-
In the Explore pane, double-click on
aie_vadd_system.sprj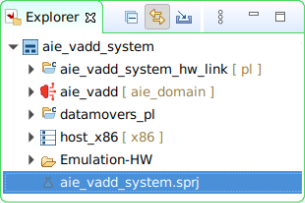
-
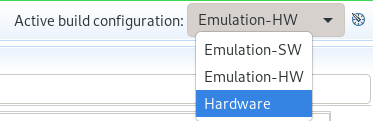
Select Hardware as the active build configuration
-
In the Explore pane, right-click on the
aie_vadd_systemthen select Build Project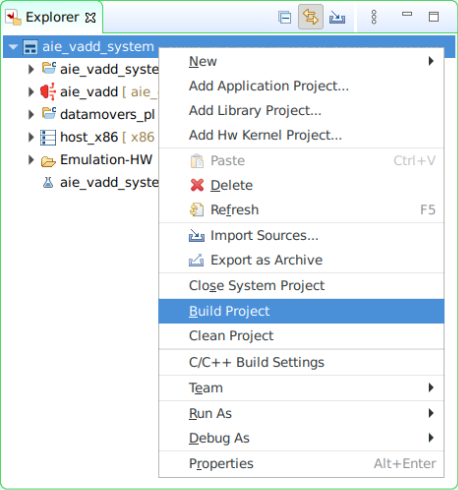
This process takes around 80 minutes.
-
In the Explore pane, right-click on
aie_vadd_systemand then select Run As > Launch Hardware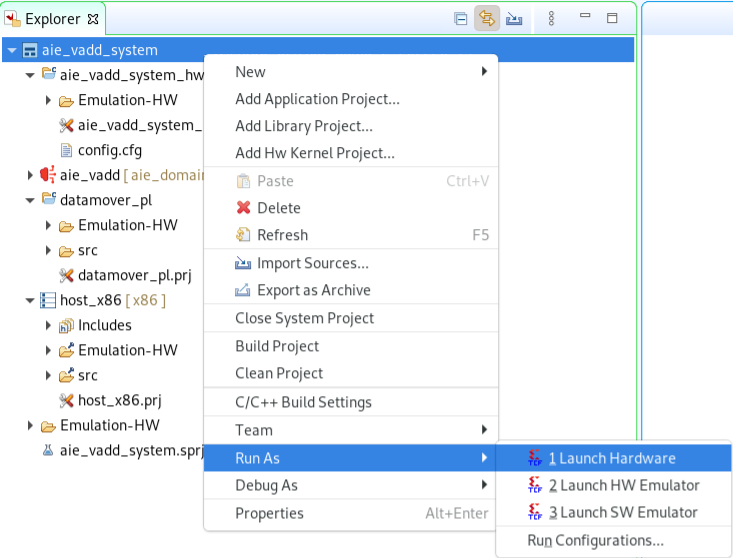
Conclusion
In this lab, you used Vitis IDE to include the PL and x86 domains to get a complete system that can run on the VCK5000.
Copyright© 2023 Advanced Micro Devices