Introduction to Vitis Part 1
Introduction
This lab guides you through the steps involved in creating a Vitis project using Graphical User Interface (GUI). After creating the project, you will run software emulation to verify the functionality of the design.
References
For more details on the Vitis IDE see the Vitis documentation for Creating a Vitis IDE Project.
Description of example application
This lab uses an example application available in Vitis. It consists of a host application and kernel (written in C++/OpenCL). The kernel is a simple vector addition. The elements of 2 vectors (A & B) are added together, and the result returned in a third array (C). The host application initializes the two input arrays, send data to the kernel, and reads back the result.
You will compile and test a software only version of the application. The vector add kernel will then be implemented as a hardware kernel. You will first build and run a Software Emulation version of the design, followed by a Hardware Emulation version which will run a simulation of the hardware model of the kernel along with the host application. You will then test the design with the hardware kernel running in the FPGA in the next part of the lab.
Objectives
After completing this lab (part 1 and part 2), you will learn how to:
- Create a project using the Vitis GUI
- Run Software Emulation to verify the functionality of a design
- Run Hardware Emulation to verify the functionality of the generated hardware design
- Build the system and test it in hardware
- Perform profile and application timeline analysis in hardware emulation
Steps
Create a Vitis Project
-
If you have not run lab setup, run it now
-
In a terminal, start the Vitis GUI by running
vitis -
Set the Vitis workspace to a new empty folder, such as
/home/<user>/workspaceand click Launch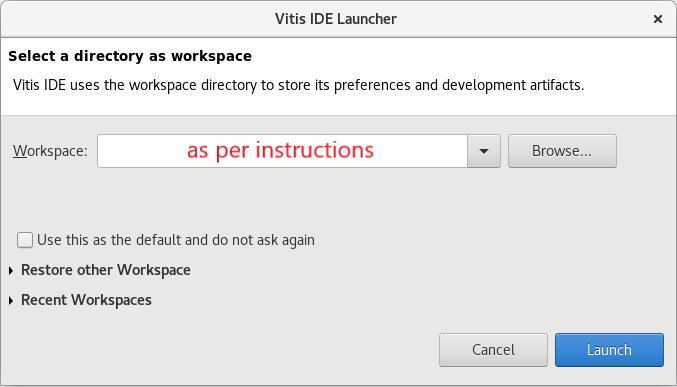
-
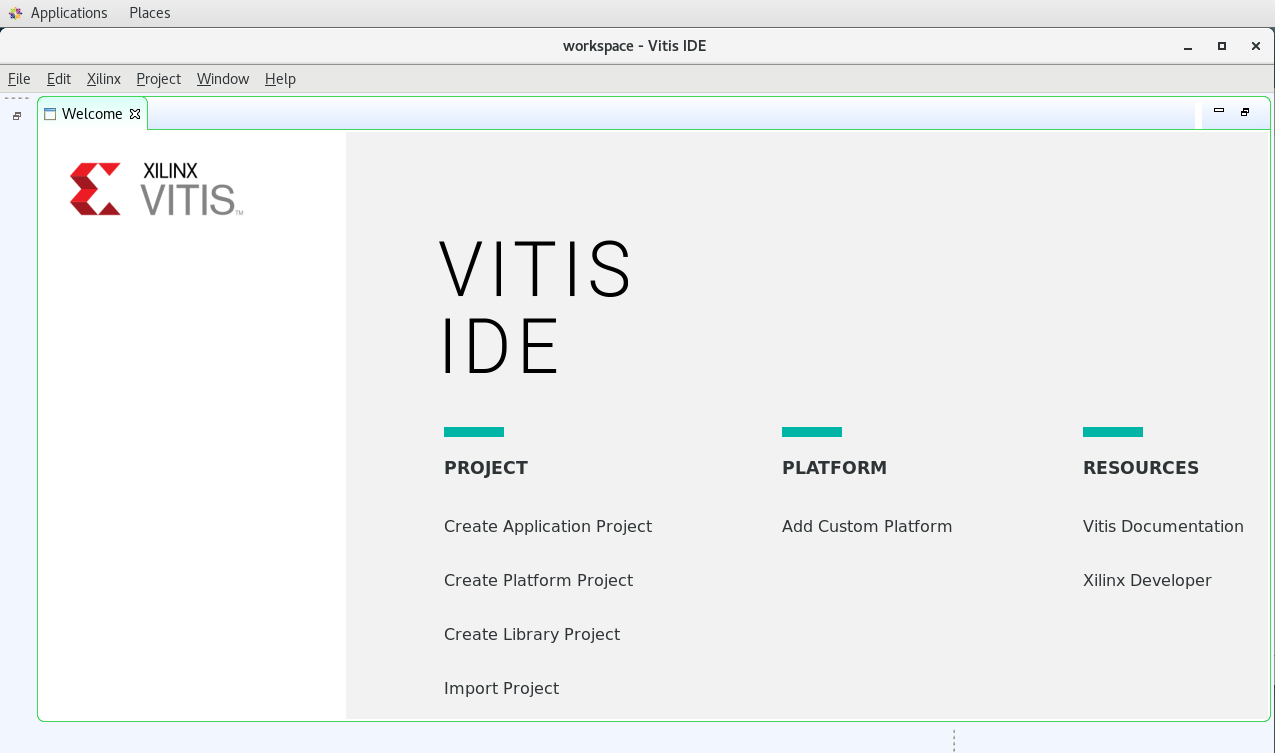
The Vitis IDE Welcome page will be displayed
-
Create a new application project
Click Create Application Project from Welcome page, or File > New > Application Project to create a new application

-
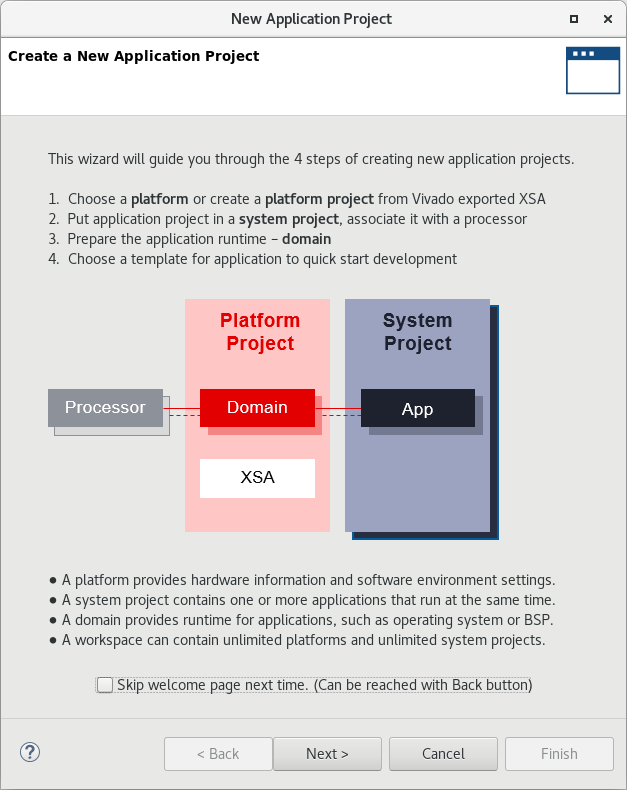
Click Next > in the first window
-
Select
xilinx_aws-vu9p-f1_shell-v04261818_201920_2platform and click Next >If you do not see this platform, check you followed the lab set up instructions to set the
PLATFORM_REPO_PATHSvariable. You can select the platform by clicking the+button and browsing to~/aws-fpga/Vitis/aws_platform/and selectingxilinx_aws-vu9p-f1_shell-v04261818_201920_2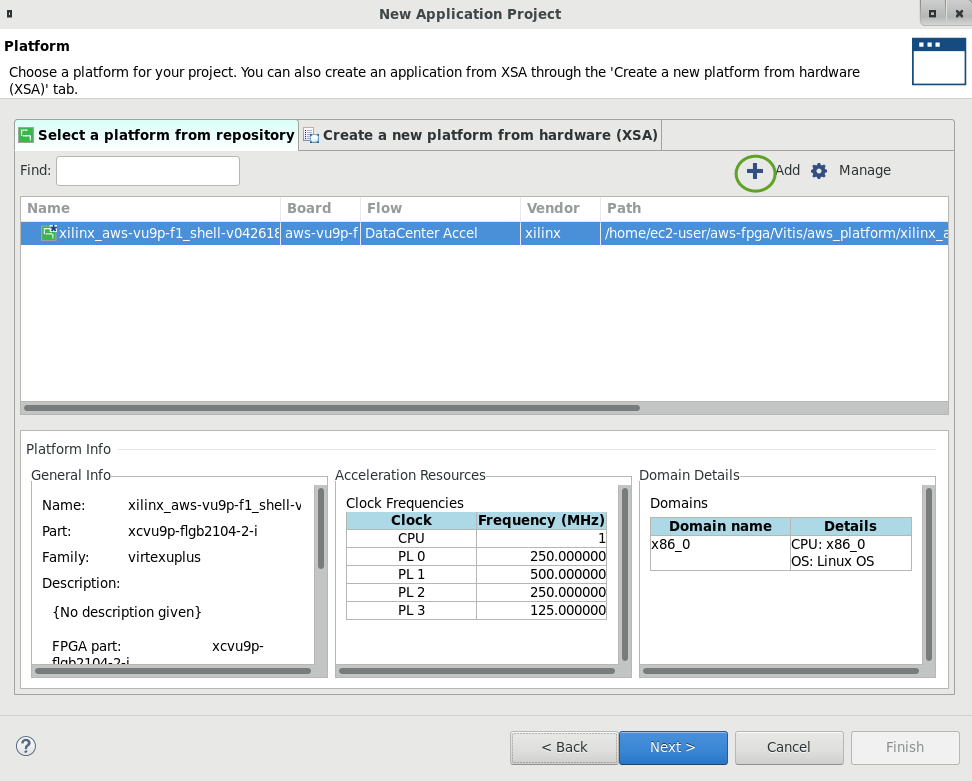
-
Name the project
vaddand click Next >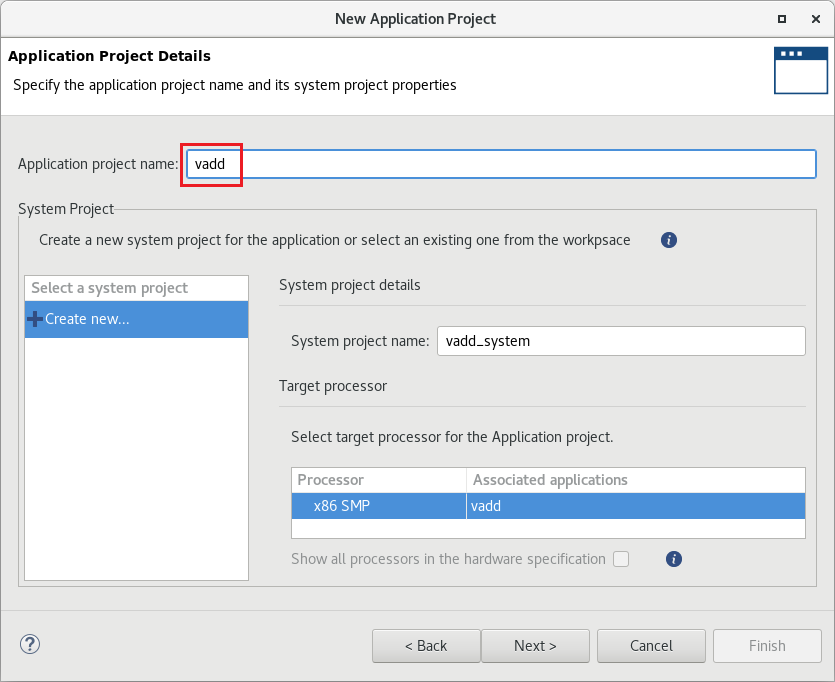
-
Select
Empty Applicationin the Templates window and click Finish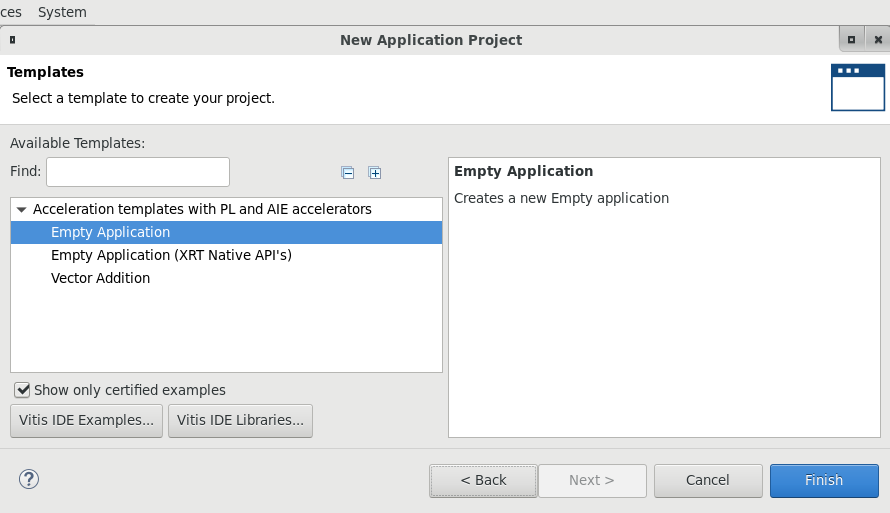
The project is generated. Observe the top-level folder is called vadd_system, under which three sub-folders (vadd_kernels, vadd_system_hw_link, vadd) are generated. The vadd_kernels folder will hold all the kernel related files, the vadd_system_hw_link will hold all linked kernel related files, and the vadd folder will hold all the host application related files.
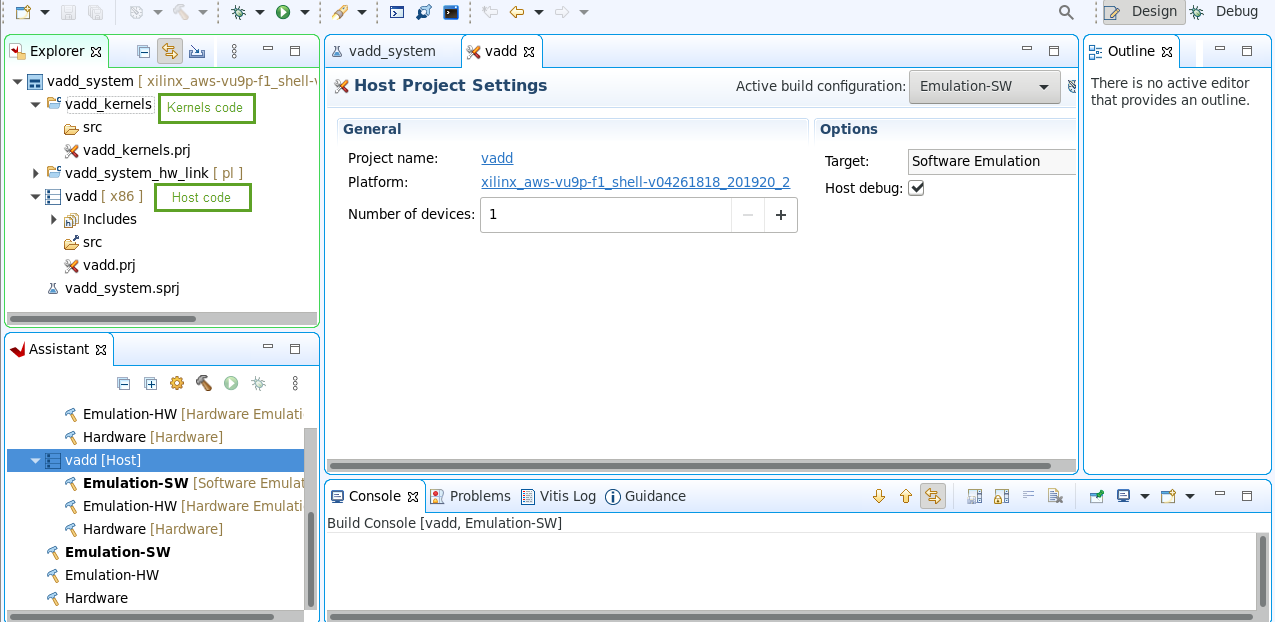
Since the Empty project template was selected, the vadd and vadd_kernels will have empty src folders
-
In the
Explorerview, expand and right-click on vadd_system > vadd > src and select Import Sources…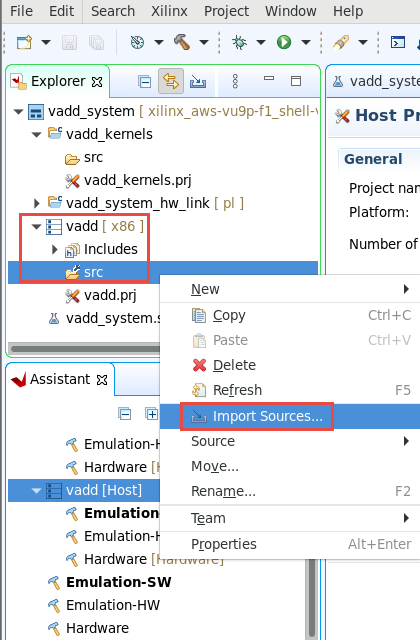
-
In the Import Sources window, click Browse and navigate to
~/xup_compute_acceleration/sources/vadd_lab/and click Open -
Select the vadd.cpp, xcl2.cpp, and xcl2.hpp files as they are part of the host code and click Finish
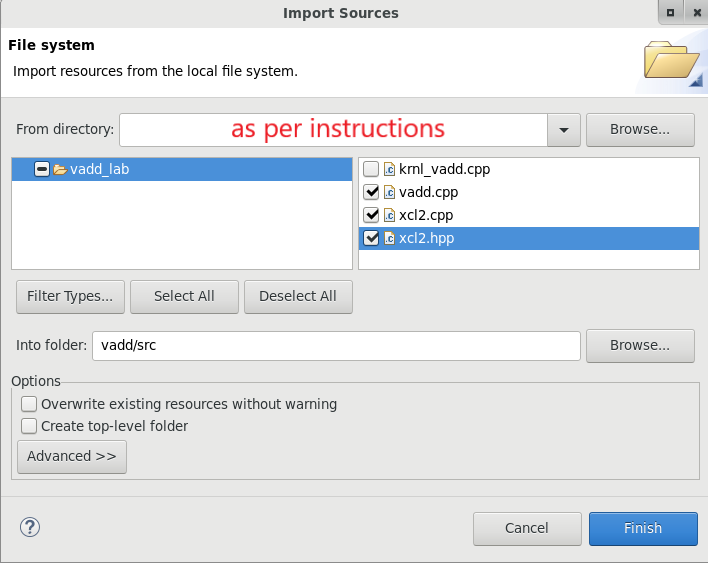
Expand the
srcfolder in theExplorerview to verify that the three files were added. -
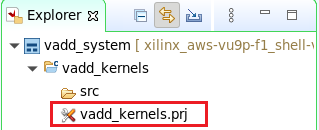
Similarly, import the hardware kernel code (krnl_vadd.cpp) under the vadd_system > vadd_kernels > src folder
-
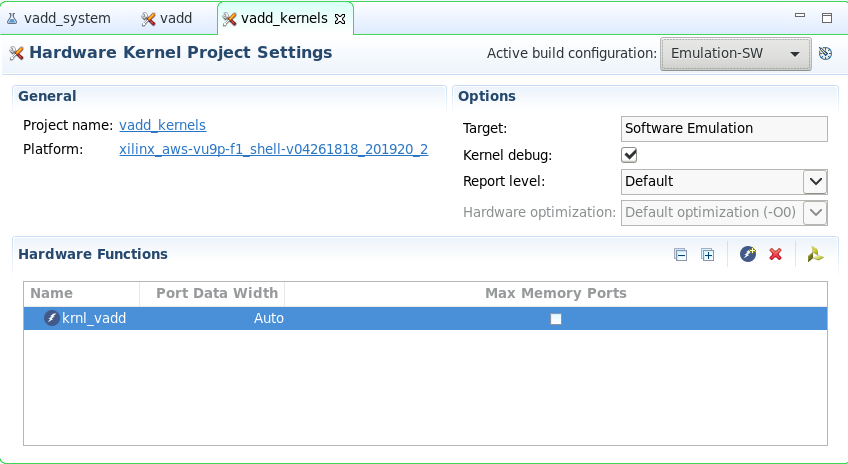
In the Explorer view, double-click on the vadd_kernels.prj under the vadd_system > vadd_kernels folder to open the corresponding Hardware Kernel Project Settings
-
Click the Add Hardware function button (
 ) on the Hardware Functions panel’s ribbon
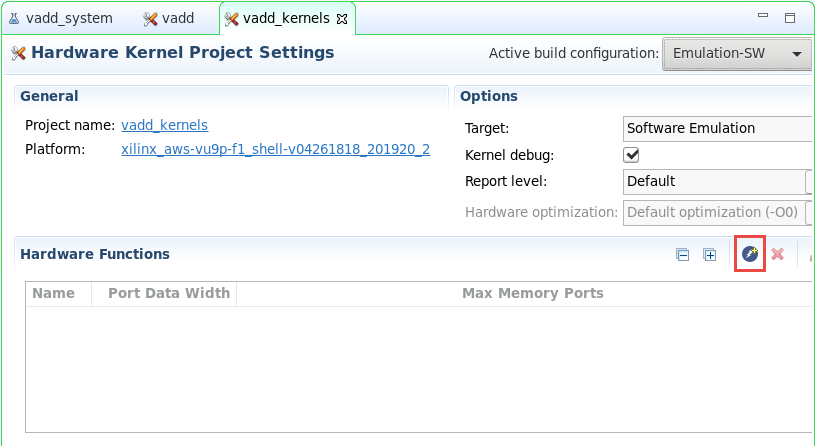
-
Select krnl_vadd(int *, int *, int *, unsigned int) - krnl_vadd.cpp in the Add Hardware Functions window and click OK
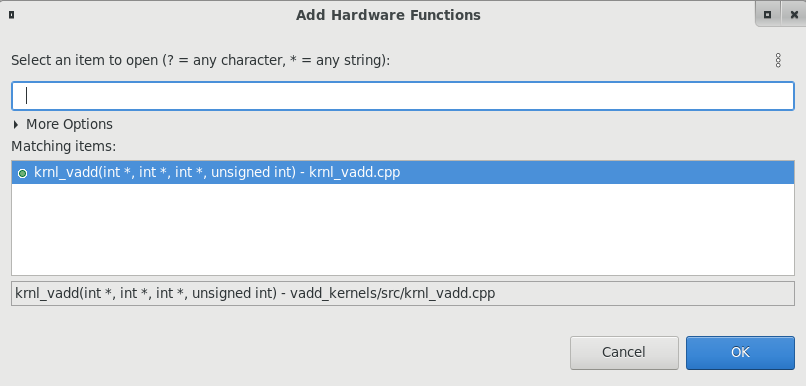
-
Verify that krnl_vadd is added as a Hardware Function
Build and Run Software Emulation
-
Select the vadd_system tab in the project settings view
-
Check the Active build configuration is set to Emulation-SW on the upper right corner of System Project Settings view
-
In the Explore view, select vadd_system and build the design by clicking the hammer button (
 ) on top buttons bar, or right click
 vadd_systemand select Build Project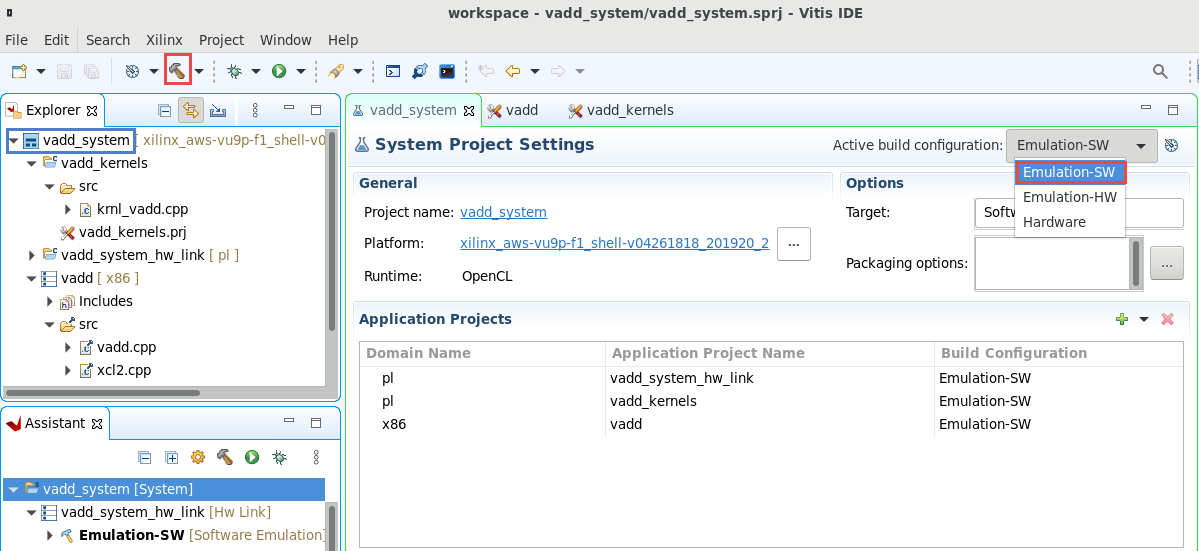
This step compiles each of the kernels, links them, and compiles the host application
-
Run Software Emulation
To launch software emulation, select
vadd_systemeither in the Assistant view or in the Explorer view and then click on the run button
-
Select the Launch SW Emulator option and click OK
Observe the application has run and the output is displayed in the Console view
Found Platform
Platform Name: Xilinx
INFO: Reading /home/centos/workspace/vadd_system/Emulation-SW/binary_container_1.xclbin
Loading: '/home/centos/workspace/vadd_system/Emulation-SW/binary_container_1.xclbin'
Trying to program device[0]: xilinx_aws-vu9p-f1_shell-v04261818_201920_2
Device[0]: program successful!
Running Vector add with 32768 elements
Launching Hardware Kernel...
Getting Hardware Results...
TEST PASSED
You can leave the project open as you will continue from this step in the second part of this lab
Conclusion
In this lab, you used Vitis to create a vector add project using the provided source code. You then ran the design using the software emulation flow.
Copyright© 2021 Xilinx