Kria™ KR260 Robotics Starter Kit
|
Setting up the Board and Application Deployment |
Board Setup and Application Deployment
Introduction
This document shows, how to setup the board and environment to execute Perception stack application.
Pre-requisite
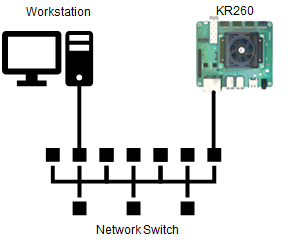
Hardware Requirement
KR260 Robotics Starter Kit
KR260 Power Supply & Adapter (Included with KR260 Robotics Starter Kit)
Cat 5e Ethernet Cable (Included with KR260 Robotics Starter Kit)
USB-A to micro-B Cable (Included with KR260 Robotics Starter Kit)
16GB MicroSD Cards (Included with KR260 Robotics Starter Kit)
Ubuntu 22.04 workstation(x86 Host) with ethernet port for setting up simulation on Gazebo and Visualizing the simulated nodes on RQT
Environment Setup On Host(x86) Machine(Ubuntu 22.04)
Install ROS2 using debian package, see install guide here. Here is the snippet of what is needed for this application:
 sudo curl -sSL https://raw.githubusercontent.com/ros/rosdistro/master/ros.key -o /usr/share/keyrings/ros-archive-keyring.gpg
 echo "deb [arch=$(dpkg --print-architecture) signed-by=/usr/share/keyrings/ros-archive-keyring.gpg] http://packages.ros.org/ros2/ubuntu $(. /etc/os-release && echo $UBUNTU_CODENAME) main" | sudo tee /etc/apt/sources.list.d/ros2.list > /dev/null
 sudo apt update
 sudo apt upgrade
 sudo apt install -y ros-humble-desktop
Install few more dependencies from ros-humble using the below command
sudo apt install ros-humble-gazebo-ros ros-humble-gazebo-plugins ros-humble-gazebo-msgs
Install Gazebo Classic 11.0, see install guide here
Get files to setup and run simulation
git clone https://github.com/Xilinx/kria_ros_perception
cd kria_ros_perception
rm -rf src/image_proc src/tracetools_image_pipeline src/vitis_common src/tracing src/image_pipeline_examples
Install Simulation from the below steps
source /opt/ros/humble/setup.bash  # source ROS2 Humble
colcon build
Run simulation on workstation
source install/setup.bash  # source the workspace as an overlay
ros2 launch perception_2nodes simulation.launch.py
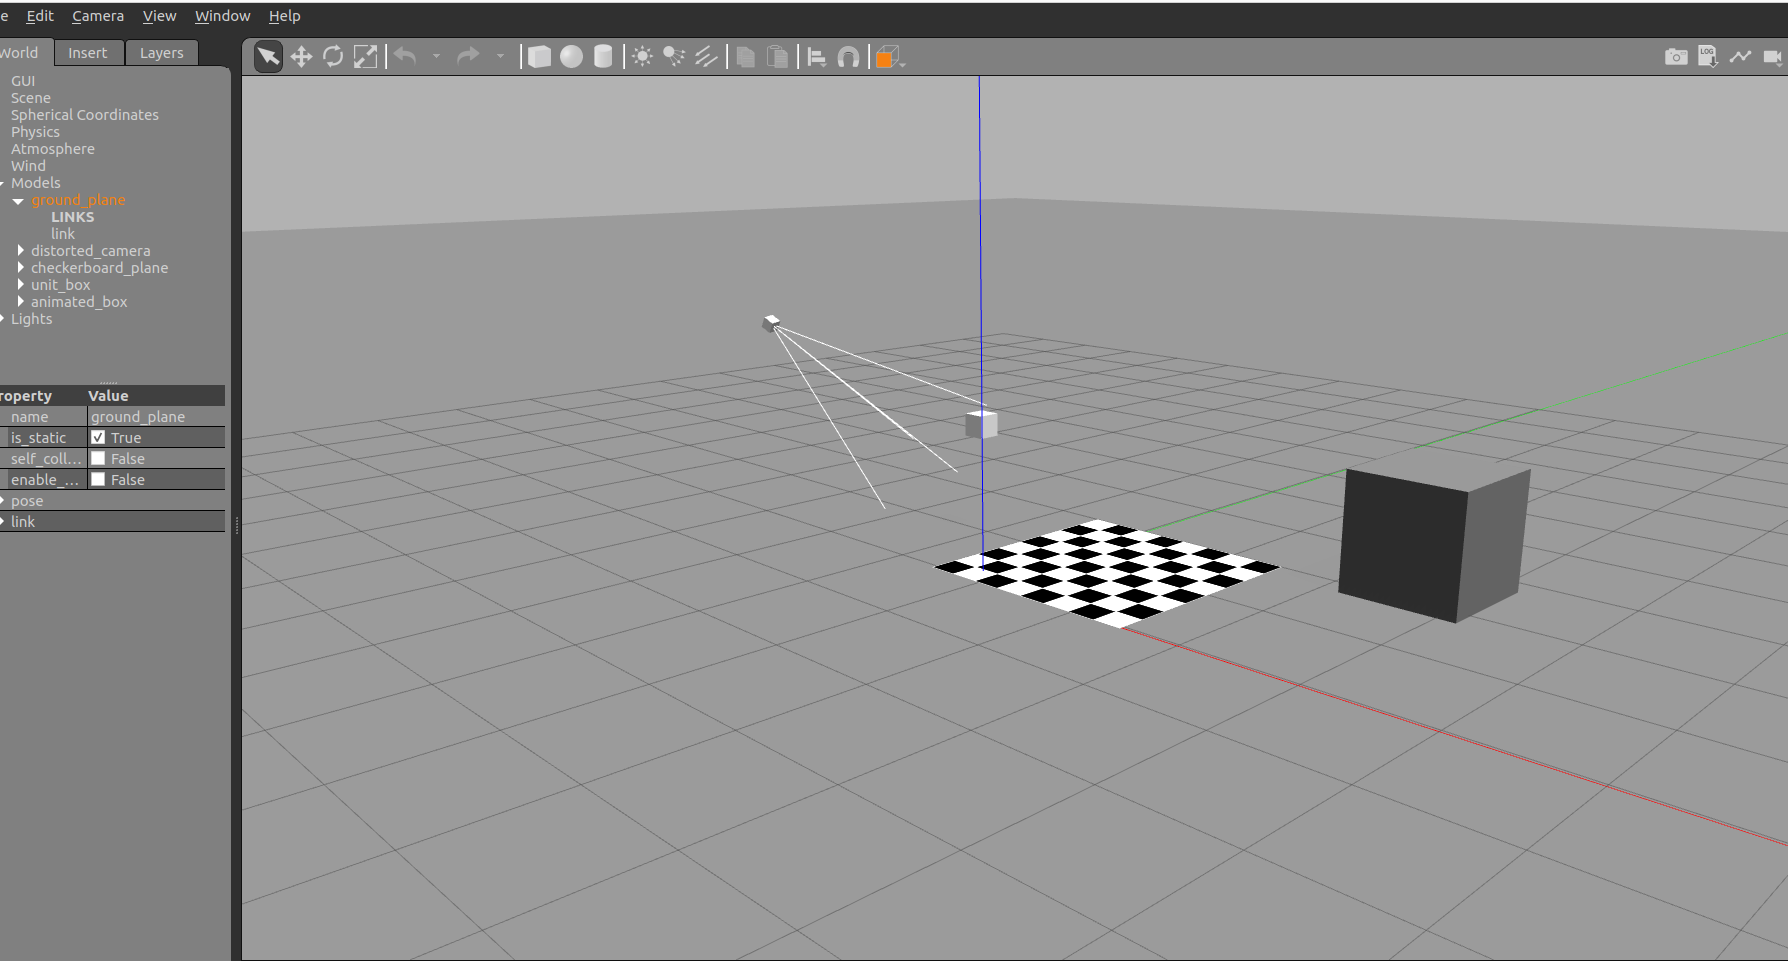
It opens gazebo window showing the simulation world of a pinhole camera capturing a black stationary cube and a small grey cube revolving ontop of a checkered plane as shown below
Setting up RQT on Host(x86) Machine to view the demo
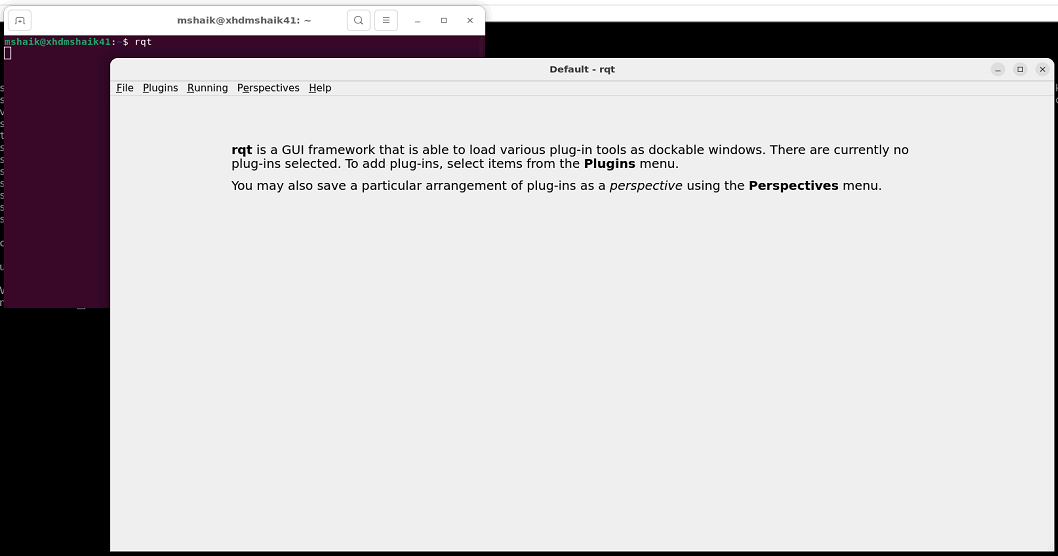
Open new terminal and launch RQT using rqt command as shown below for visualizing the perception graph. It will open a window which appears as shown below
source /opt/ros/humble/setup.bash  # source ROS2 Humble
rqt
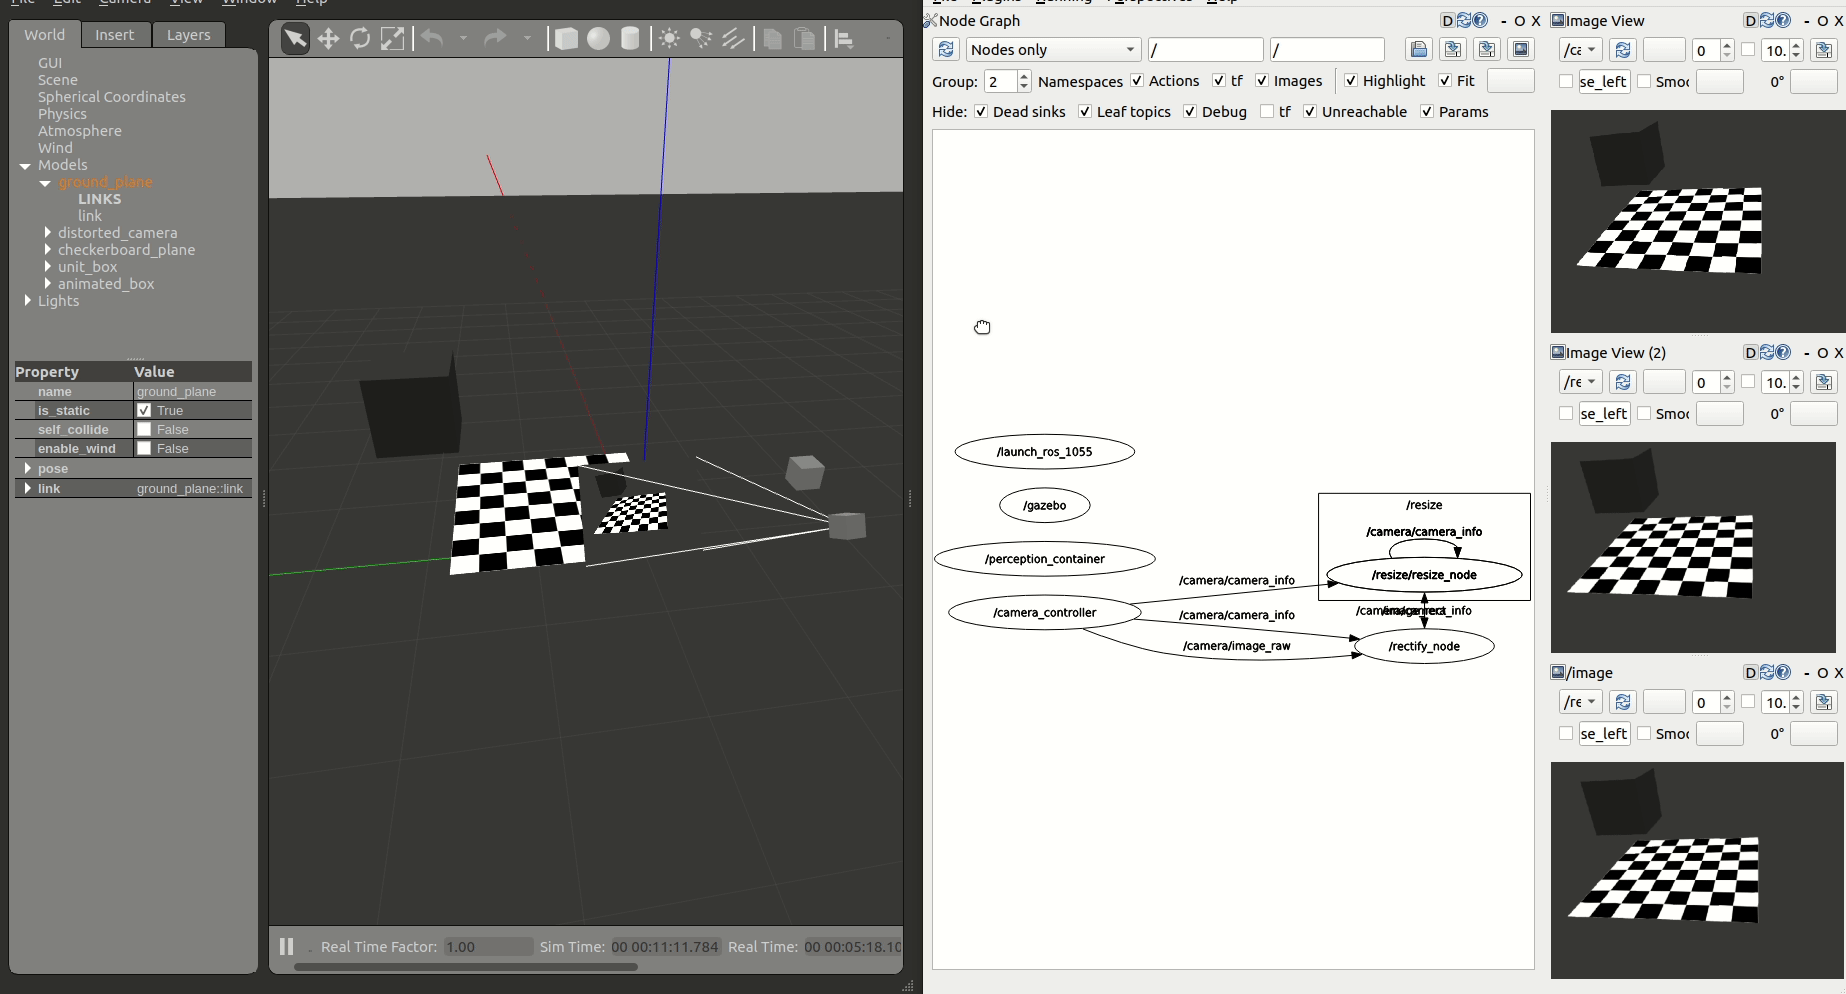
Click on Plugins -> Introspection -> Node Graph and set the configuration as shown below. Refresh the node graph using
 to update to latest graph while running the demo
Similarly enable Visualization plugin from Plugins -> Visualization -> Image View. You can open multiple windows of Image View windows to see multiple images at once. To swich to different image click on the dropdown as shown


NOTE: User is expected to launch as many RQT plugins as required for visualizing the perception show as shown in the below gif animations.
Initial Setup, Setting Up The KR260 Board
Go through Booting Kria Starter Kit Linux to complete minimum setup required to boot Linux before continuing with instructions in this page.
Get the latest ROS perception application & firmware package:
Download the firmware
Search package feed for packages compatible with KR260
ubuntu@kria:~$ sudo apt search xlnx-firmware-kr260
Sorting... Done
Full Text Search... Done
xlnx-firmware-kr260-perception/jammy 0.1-0xlnx1 arm64
FPGA firmware for Xilinx boards - kr260 perception application
Install firmware binaries
sudo apt install xlnx-firmware-kr260-perception
Install ROS 2 humble and LTTng
Refer ROS 2 Documentation for the installation steps. Here is the snippet of what is needed for this application:
sudo curl -sSL https://raw.githubusercontent.com/ros/rosdistro/master/ros.key -o /usr/share/keyrings/ros-archive-keyring.gpg
echo "deb [arch=arm64 signed-by=/usr/share/keyrings/ros-archive-keyring.gpg] http://packages.ros.org/ros2-testing/ubuntu jammy main" | sudo tee /etc/apt/sources.list.d/ros2.list > /dev/null
sudo apt update
sudo apt upgrade
sudo apt install -y ros-humble-desktop
sudo apt install lttng-modules-dkms lttng-tools ros-humble-tracetools-launch
Install ROS 2 application
mkdir -p ~/Downloads
cd ~/Downloads
wget https://github.com/Xilinx/kria_ros_perception/releases/download/xlnx-rel-v2022.1_update4/kria-ros-perception_1.0-1_arm64.deb
sudo apt install ./kria-ros-perception_1.0-1_arm64.deb
Disable Gnome desktop GUI
sudo xmutil desktop_disable
Run The Application on KR260
This application has two flavours, which are developed in way that user can understand how he can tweek the application to achieve a desired performance during development. Below are versions and its details:
CPU Baseline This is a very simplistic version, where nodes are not accelerated and are executed on CPU. This version should allow users get familiar with working environment and understand easiness in working with KRS based applications. Use below steps to execute:
source /opt/xilinx/kria_ros_perception/setup.bash # enable ROS 2 overlays
ros2 launch perception_2nodes trace_rectify_resize.launch.py # launch rectify and resize Nodes on ARM cores
Below is the gif showing the gazebo simulation window(left half) along with RQt window(right half) with node graph and /camera/image_raw, /image_rect and /resize/resize image views. You may need to reload the plugin windows to update the node graph and image views.
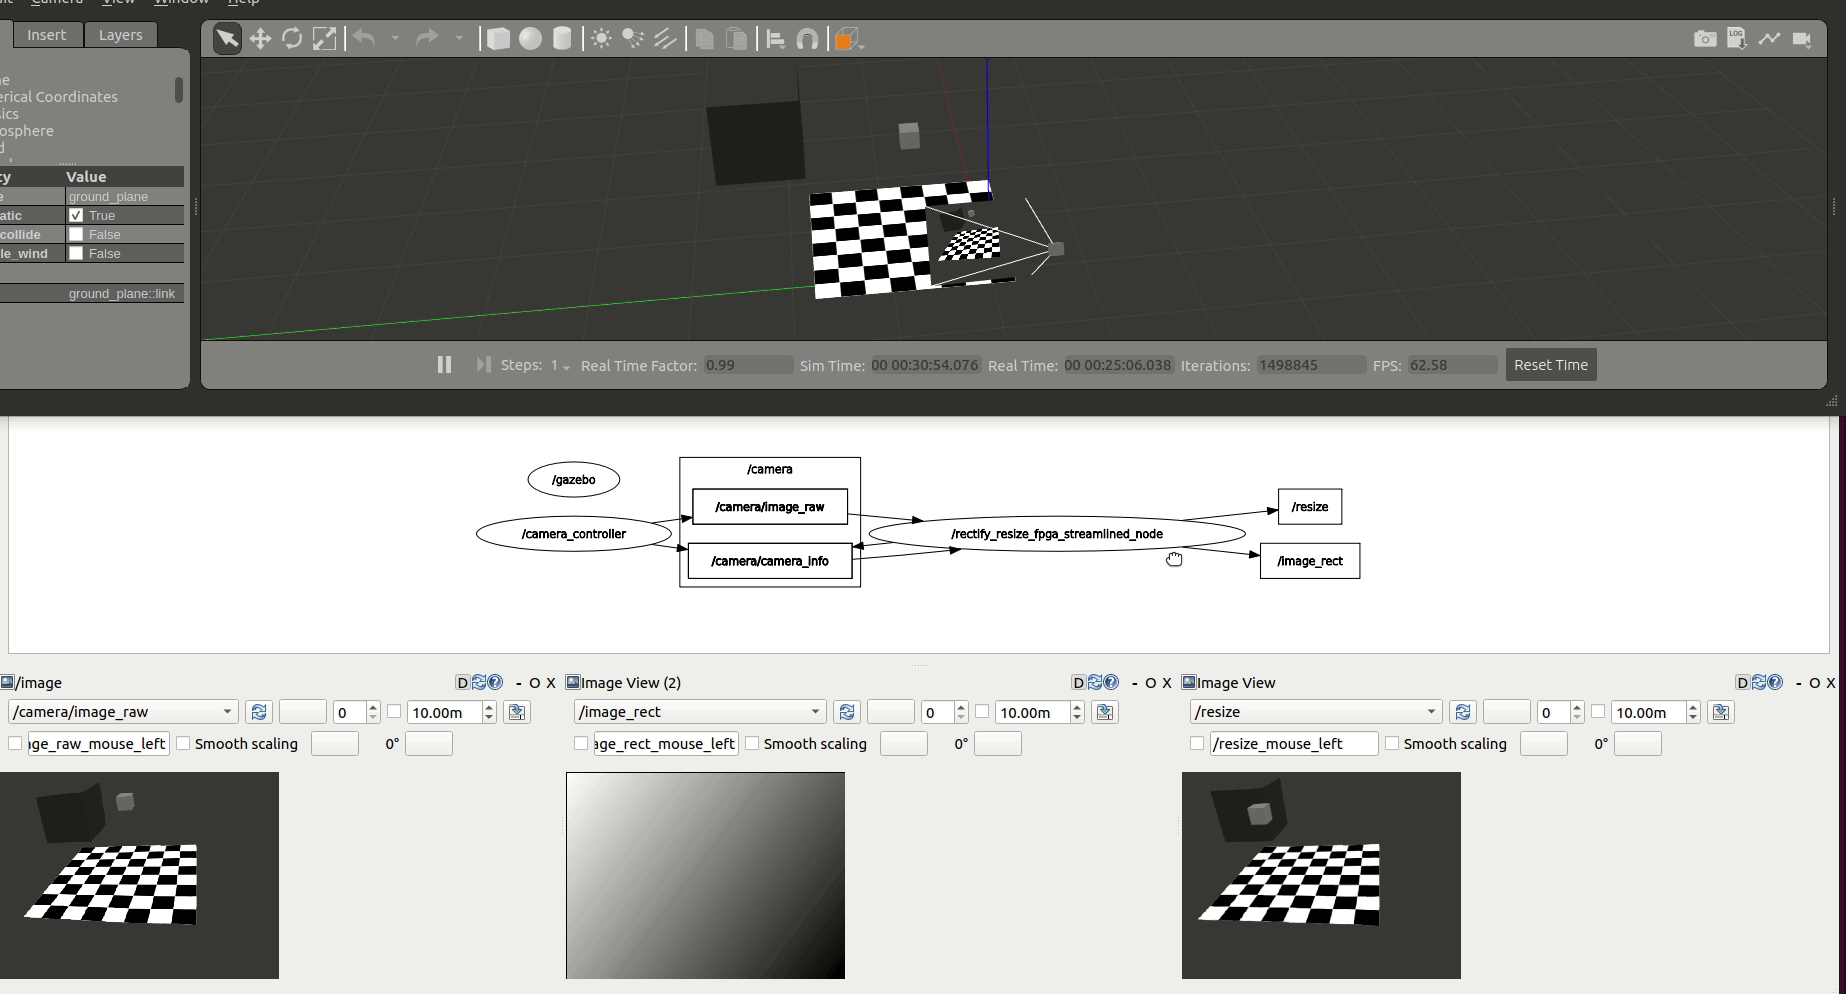
FPGA streamline accelerated: In this application ROS Components
RectifyNodeFPGAStreamlinedandResizeNodeFPGAStreamlinedare redesigned to leverage hardware acceleration, however, besides offloading perception tasks to the FPGA, each leverages an AXI4-Stream interface to create an intra-FPGA ROS 2 communication queue which is then used to pass data across nodes through the FPGA. This allows to avoid completely the ROS 2 message-passing system and optimizes dataflow achieving a 24.42% total speedup. Steps to launch streamlined accelerated version are:# streamlined sudo xmutil unloadapp sudo xmutil loadapp kr260-perception # load the accelerator source /opt/xilinx/kria_ros_perception/setup.bash # enable ROS 2 overlays ros2 launch perception_2nodes trace_rectify_resize_fpga_streamlined.launch.py # launch rectify and resize FPGA accelerated Nodes
Below is the gif showing the gazebo simulation window(top half) along with RQt window(bottom half) with node graph and /camera/image_raw, /image_rect and /resize image views. Since the data is transfer via streaming interface from rectify to resize, we don’t see any image in rectify image view. You may need to reload the plugin windows to update the node graph and image views.
NOTE: For benchmark results using Tracetools and other ROS2 acceleration examples please refer to Kria Robotics Stack (KRS)