4. Build the Vivado Design
4.1. Prerequisites
- Vivado Design Suite 2021.2
- Linux host machine (only Linux supported)
- VCK190 or VMK180 Evaluation board
4.2. Build Flow Tutorial for Baseline Versal Restart TRD
4.2.1. Clone Sources Repository
Skip the following steps if the Git repository has already been downloaded and extracted to a working directory.
Clone the Git Repository for the current release tag.
# Create and move to directory where the source repository is to be cloned
mkdir -p </path/to/source/repo>
cd </path/to/source/repo>

# clone and switch to current release tag (xilinx-v2021.2)
git clone https://github.com/Xilinx/versal-restart-trd.git
git checkout -b xilinx-v2021.2 xilinx-v2021.2
For the rest of the documentation, path to the root of this repository will be referred to as $REPO_SRC.
Note
REPO_SRC = </path/to/source/repo>/veral-restart-trd
$REPO_SRC/hw directory provides sources to build the following components:
- Vivado project
- Hardware XSA
- Hardware PDI
The XSA will be used later by the software instructions.
4.2.2. Automated Vivado Build Using Make Option
To build the Vivado project using the provided Makefile, type the following in the $REPO_SRC directory (substitute vmk180 and/or es1 for other build options):
make build_hw BOARD=vck190 SIL=prod
The result of this operation will be an XSA file in output/vck190-prod-base/reference_images/versal_restart_trd_wrapper.xsa which will be used by Petalinux in the software section.
To see more Makefile options:
make help
4.2.3. Using Vivado to Generate Device Image and XSA for Baseline Subsystem Restart TRD
To run the Vivado portion manually, follow the instructions in this section.
Enable Versal device support (ES1 only)
To enable Versal device support, you need to create a Tcl initialization script for Vivado. Add the following line to the Tcl script for VCK190:
enable_beta_device xcvc1902-*
Add the following line to the Tcl script for VMK180:
enable_beta_device xcvm1802-*
The initialization Tcl script for Vivado shall be placed at:
$HOME/.Xilinx/Vivado/Vivado_init.tcl
Copy the hardware sources to a filesystem with > 50GB space, called $VSSR_WS in this document. Create a subdirectory for the hardware under $VSSR_WS, called hw_ws. Copy the sources to this directory (fill in board and silicon type):
cp -r $REPO_SRC/hw/<board>_<sil>_base $VSSR_WS/hw_ws
cp -r $REPO_SRC/hw/ip_repo $VSSR_WS/hw_ws
Open the Vivado GUI
Set up the Vivado environment in a terminal window by sourcing <Vivado_install_path>/settings64.sh, then at the command prompt enter (fill in board and silicon type):
cd $VSSR_WS/hw_ws/<board>_<sil>_base
vivado -source ./scripts/build_proj.tcl
A Vivado cockpit as shown below will open with Restart TRD project populated.
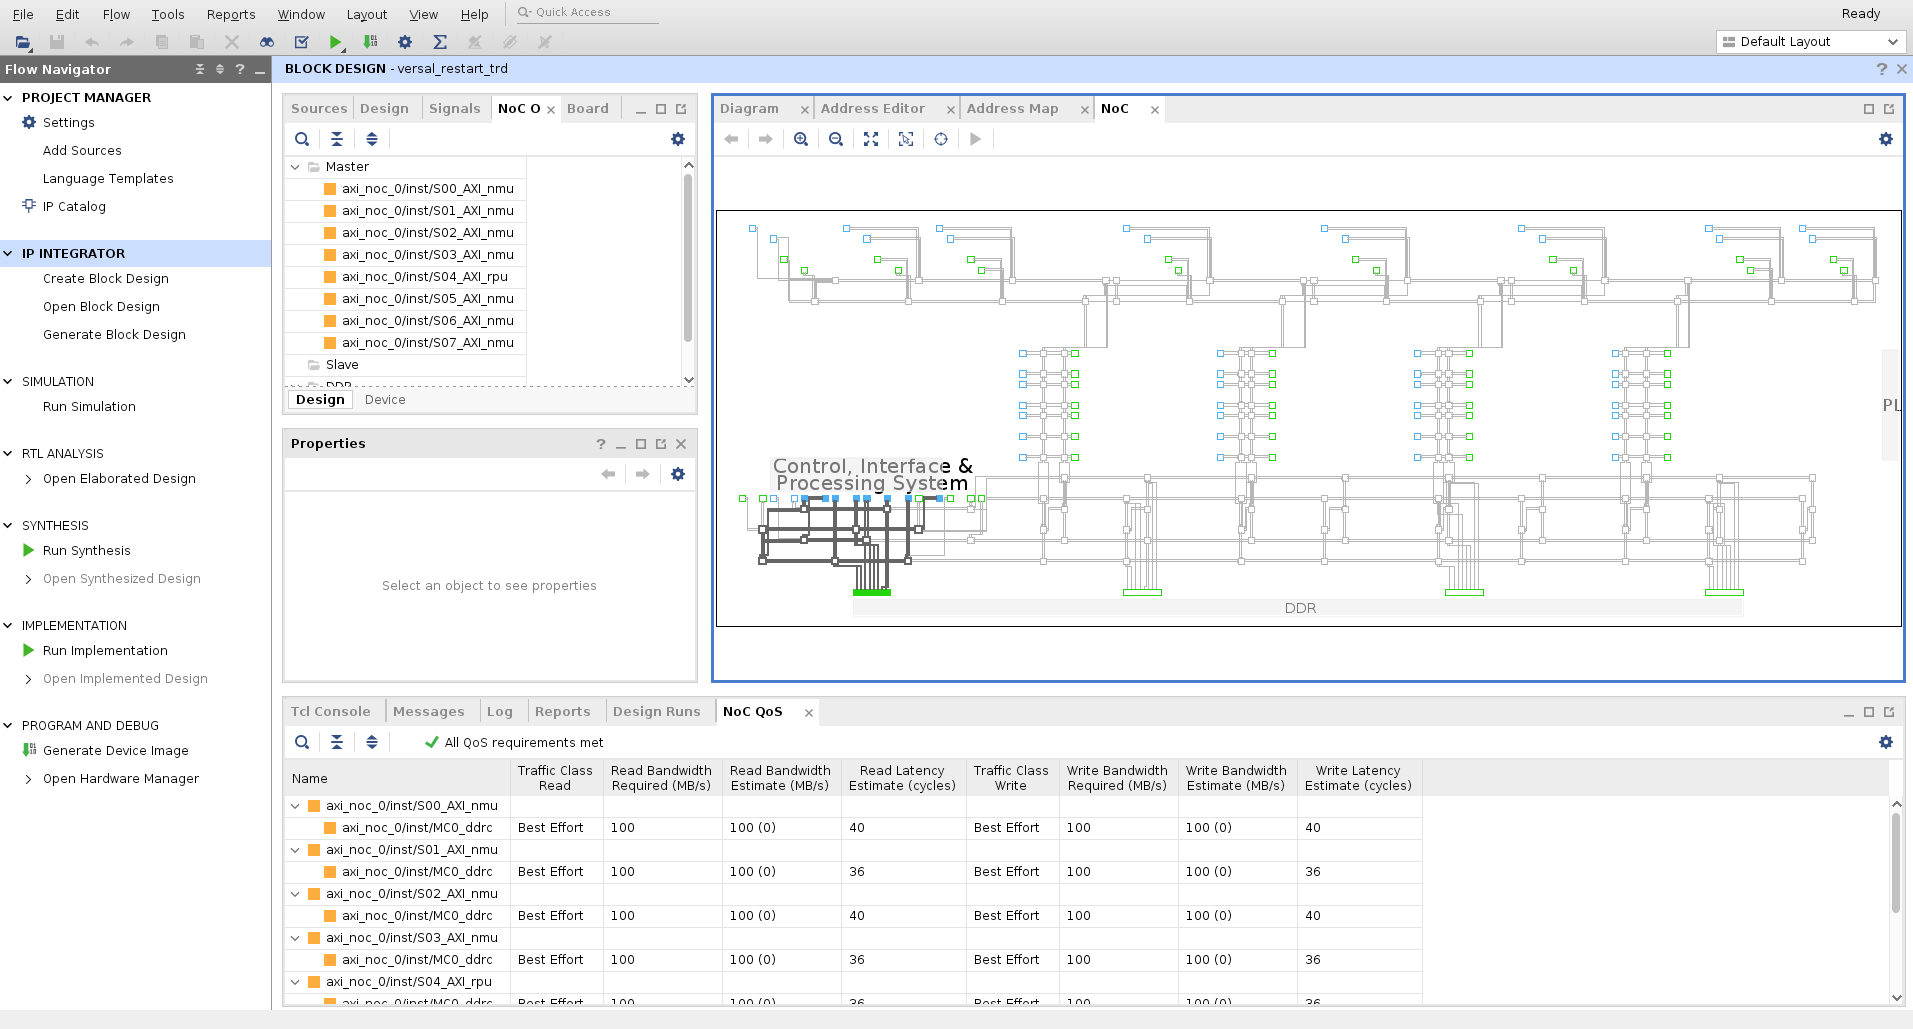
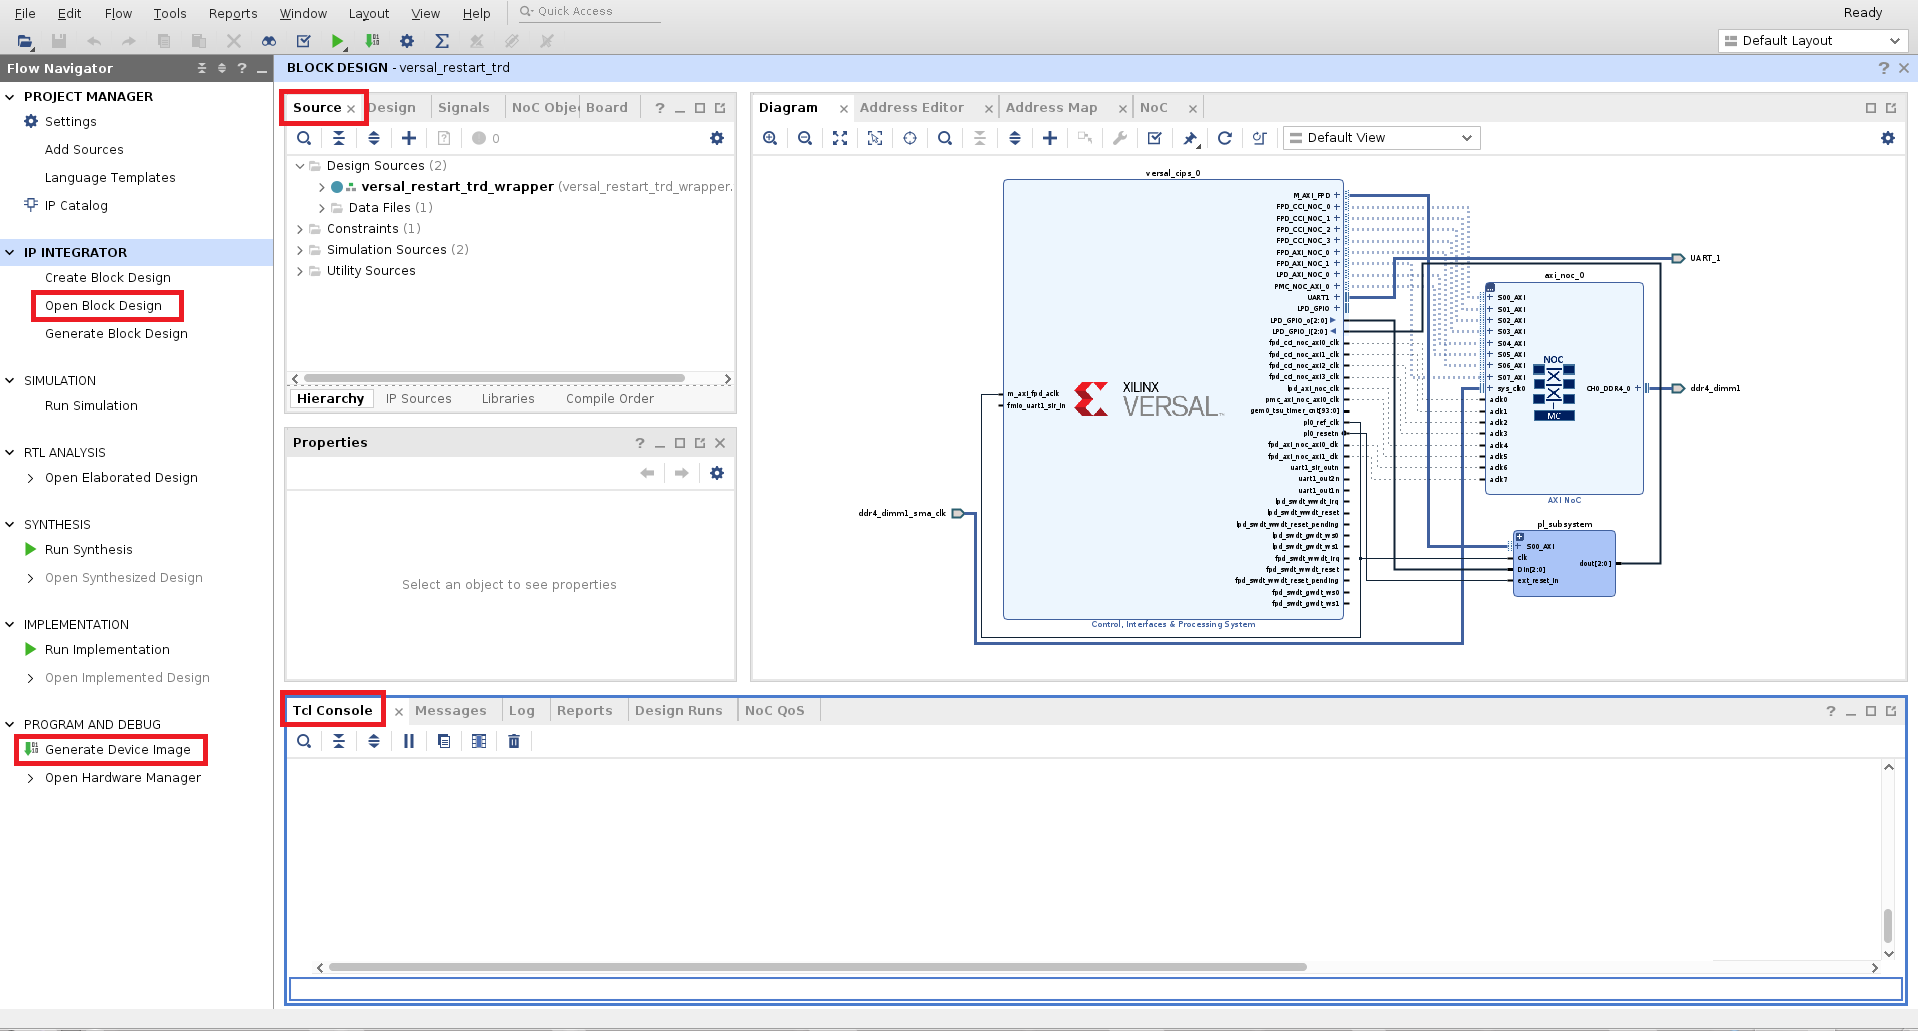
Look at the block design
In the Flow Navigator pane on the left-hand side under IP Integrator, click on Open Block Design. An IP Integrator (IPI) block design (versal_restart_trd.bd) becomes visible that contains the Control, Interface and Processing System (CIPS) IP, NOC IP and simple programmable logic design.
(Recommended) Run the implementation script
To automatically run Vivado all the way through to Write Device Image and generate the XSA, type the following in the Tcl Console window, then skip to the next section:
source ./scripts/run_impl.tcl
When the script finishes, the file versal_restart_trd_wrapper.xsa will be available in $VSSR_WS/hw_ws/vivado/versal_restart_trd.runs/impl_1
(Alternate) To run to run the steps in the
run_impl.tclscript individually, follow the next 4 steps.(Alternate) Implement the design
Click on Generate Device Image in the Flow Navigator pane on the left-hand side under Program and Debug.
When the process finishes, a dialog box will open, offering choices of what to do next. Hit Cancel. The device image (PDI) for the design will be generated and available at $VSSR_WS/hw_ws/vivado/versal_restart_trd.runs/impl_1/versal_restart_trd_wrapper.pdi. However, this PDI does not have the subsystems definitions included yet.
(Alternate) After the device image is generated by Vivado, it will have to be updated with the subsystem.cdo overlay to define the subsystems and recovery options.
In the Tcl Console, change to the implementation directory:
cd vivado/versal_restart_trd.runs/impl_1
Next generate a new PDI with the subsystem overlay included:
exec -ignorestderr bootgen -arch versal -image versal_restart_trd_wrapper.bif -overlay_cdo ../../../overlay/subsystem.cdo -w -o versal_restart_trd_wrapper.pdi
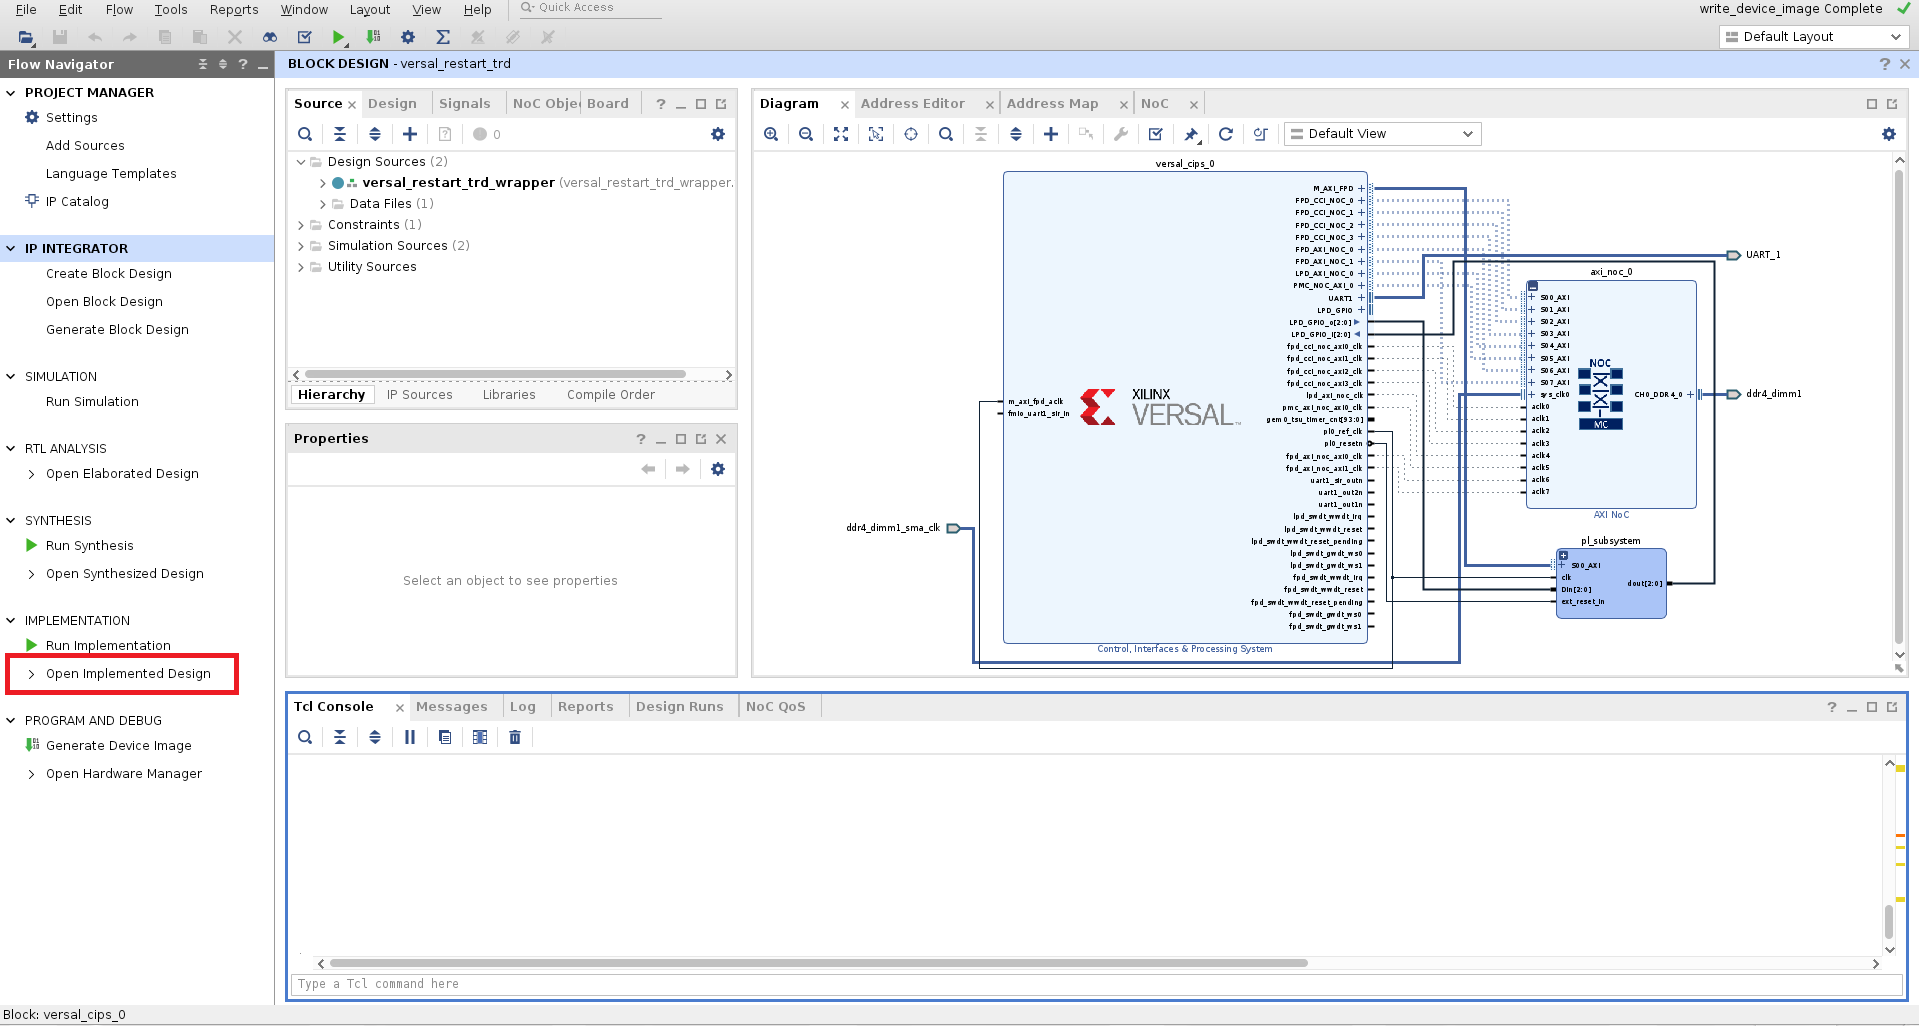
(Alternate) When new PDI is done, click on Open Implemented Design.
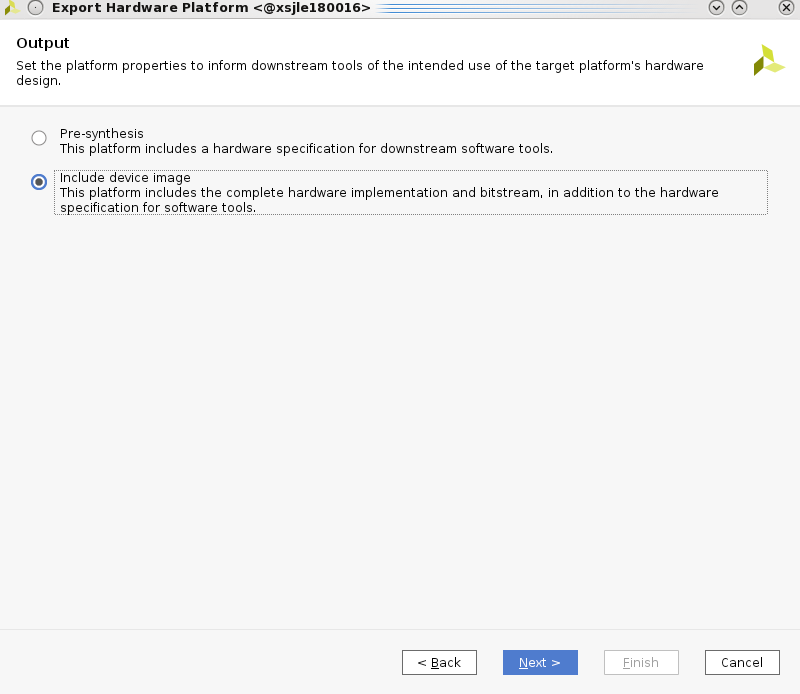
(Alternate) Create the XSA
- To create the XSA, click on File → Export → Export hardware. A window pops up. Click Next.
- Select Include Device Image. Click Next.
- Change Export path to $VSSR_WS/hw_ws/vivado/versal_restart_trd.runs/impl_1. Click Next.
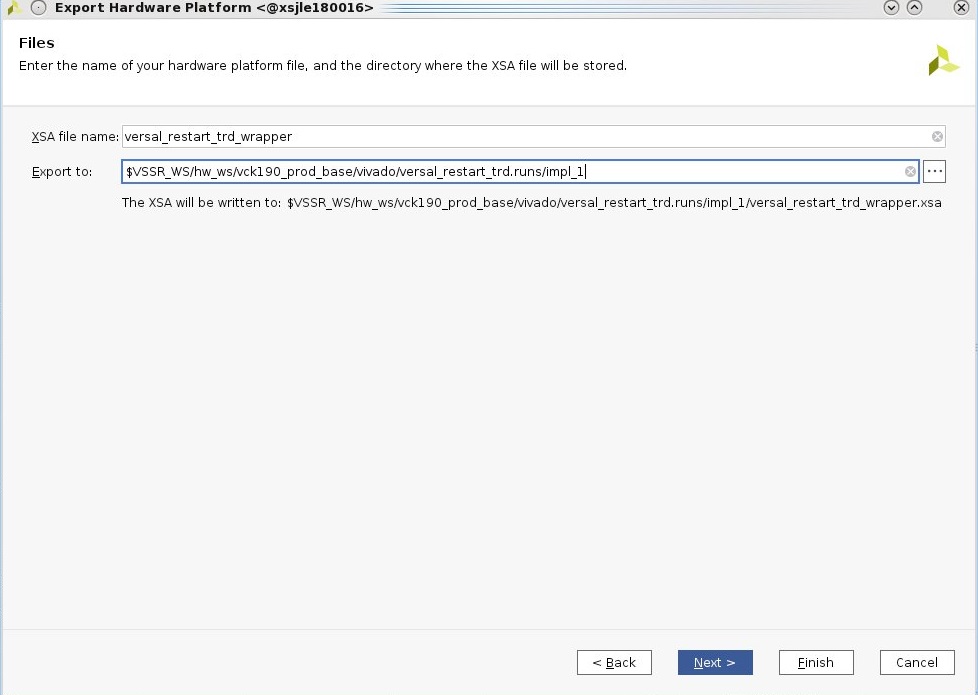
- Click on Finish.
The file versal_restart_trd_wrapper.xsa will be available in $VSSR_WS/hw_ws/vivado/versal_restart_trd.runs/impl_1/