5. Build Software
5.1. Prerequisites
- Vitis Unified Software Platform 2021.2
- PetaLinux Tools 2021.2
- Linux host machine (All instructions are with Linux host machine)
- VCK190 or VMK180 Evaluation Board
Note
Instructions on this page are applicable to both VCK190 and VMK180 developement boards. Use appropriate XSA file for the build.
5.2. Sources
Sources necessary to build hardware and software components of the TRD are available in git repository.
Clone the git repository for the current release tag.
# Create and move to directory where the source repository is to be cloned
mkdir -p </path/to/source/repo>
cd </path/to/source/repo>

# clone and switch to current release tag (xilinx-v2021.2)
git clone https://github.com/Xilinx/versal-restart-trd.git
git checkout -b xilinx-v2021.2 xilinx-v2021.2
For rest of the documentation, path to the root of this repository will be referred as $REPO_SRC.
Note
REPO_SRC = </path/to/source/repo>/versal-restart-trd
$REPO_SRC/sw directory provides sources to build following components:
- RPU application
- Petalinux (Linux Images, rootfs, and BOOT Image artifacts)
- Boot and SD card image (BOOT.BIN and compressed wic image)
5.3. Automated Build with Makefile
The repository provides Makefiles to build and copy hardware and software images to the deploy area.
Running make build_sw builds the software components for the given configuration.
Here is an example build command for vck190 production board.
cd $REPO_SRC
make build_sw BAORD=vck190 SIL=prod DESIGN=base
As the XSA file is not explicitly provided in above command, the build looks for the xsa file at output/vck190-prod-base/reference_images/versal_restart_trd_wrapper.xsa. If the file is not present here, the build triggers the hardware build to generate the xsa file before building the software.
Here is the output for the above build.
output/
└── vck190-prod-base
    ├── petalinux-sdimage.wic.xz  #SD card image
    └── reference_images
        ├── bl31.elf
        ├── boot.bif
        ├── BOOT.BIN
        ├── boot.scr
        ├── Image
        ├── plm.elf
        ├── psmfw.elf
        ├── ramdisk.cpio.gz.u-boot
        ├── rootfs.tar.gz
        ├── rpu_app.elf
        ├── system.dtb
        ├── u-boot.elf
        ├── versal_restart_trd_wrapper.pdi
        └── versal_restart_trd_wrapper.xsa
It is also possible to provide the XSA file explicitly by XSA_FILE option.
make BOARD=vmk180 SIL=es1 XSA_FILE=/scratch/build-area/hw/new.xsa'
This produces
output/
└── vmk180-es1-base
    ├── petalinux-sdimage.wic.xz
    └── reference_images
        ├── bl31.elf
        ├── boot.bif
        ├── BOOT.BIN
        ├── boot.scr
        ├── Image
        ├── plm.elf
        ├── psmfw.elf
        ├── ramdisk.cpio.gz.u-boot
        ├── rootfs.tar.gz
        ├── rpu_app.elf
        ├── system.dtb
        └── u-boot.elf
Run make help in $REPO_SRC directory to see various build options.
For more details on usage of Makefile refer the README.md file in the repository.
5.4. Build without Makefile
This section provides instruction to build individual software components through Vitis and Petalinux flow without automated Makefile.
Following components will be built:
- RPU application
- Petalinux (Linux Images, Rootfs, and BOOT Image artifacts)
- Boot and SD card image (BOOT.BIN and compressed wic image)
Choose a workspace area (with more than 50GB of free space). Lets call that area as $VSSR_WS.
5.4.1. Build RPU Application
On Linux, set up the Vivado environment in a terminal window by sourcing <Vitis_install_path>/settings64.sh
Launch the Vitis Unified Software Platform:
vitis -workspace $VSSR_WS/rpu_ws
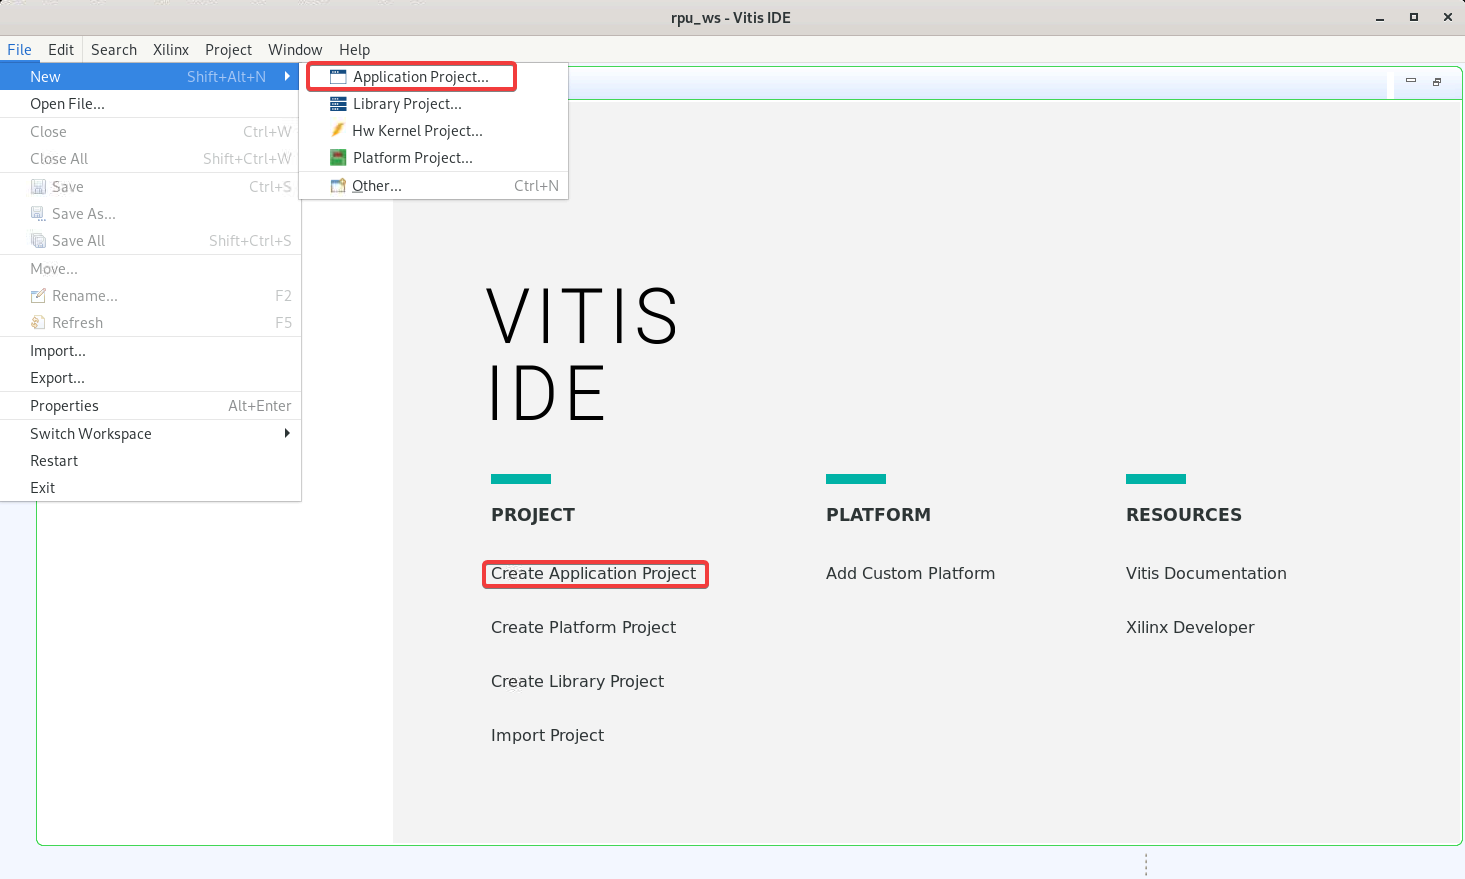
From the Welcome screen or File -> New menu select Create Application Project
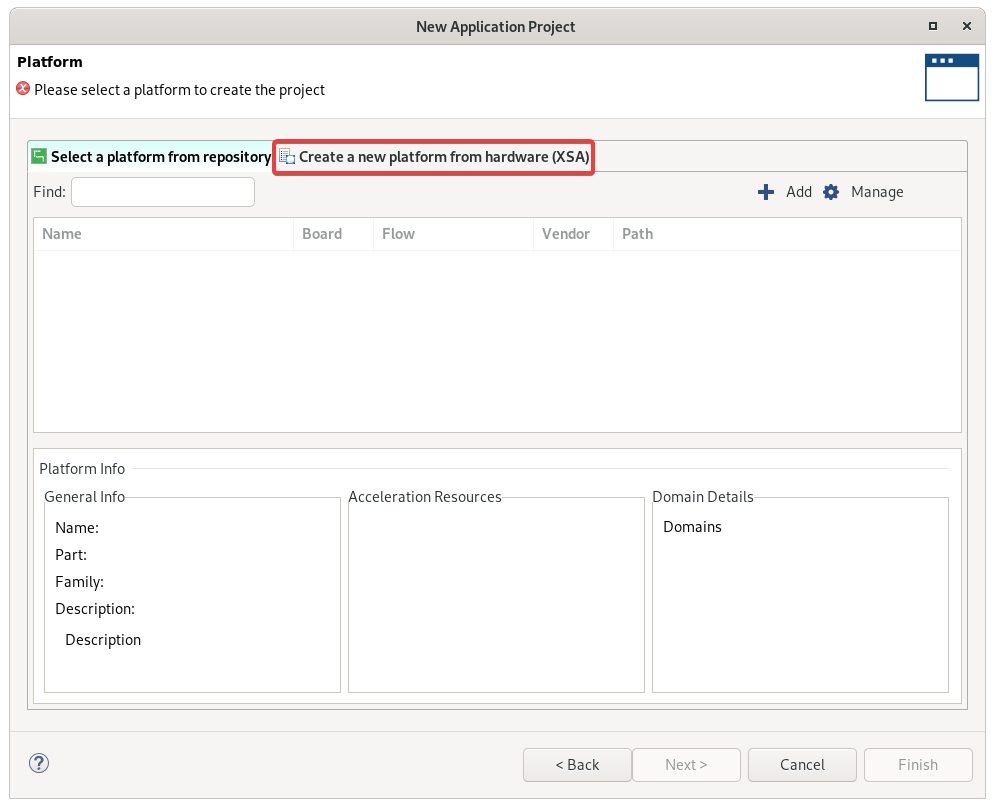
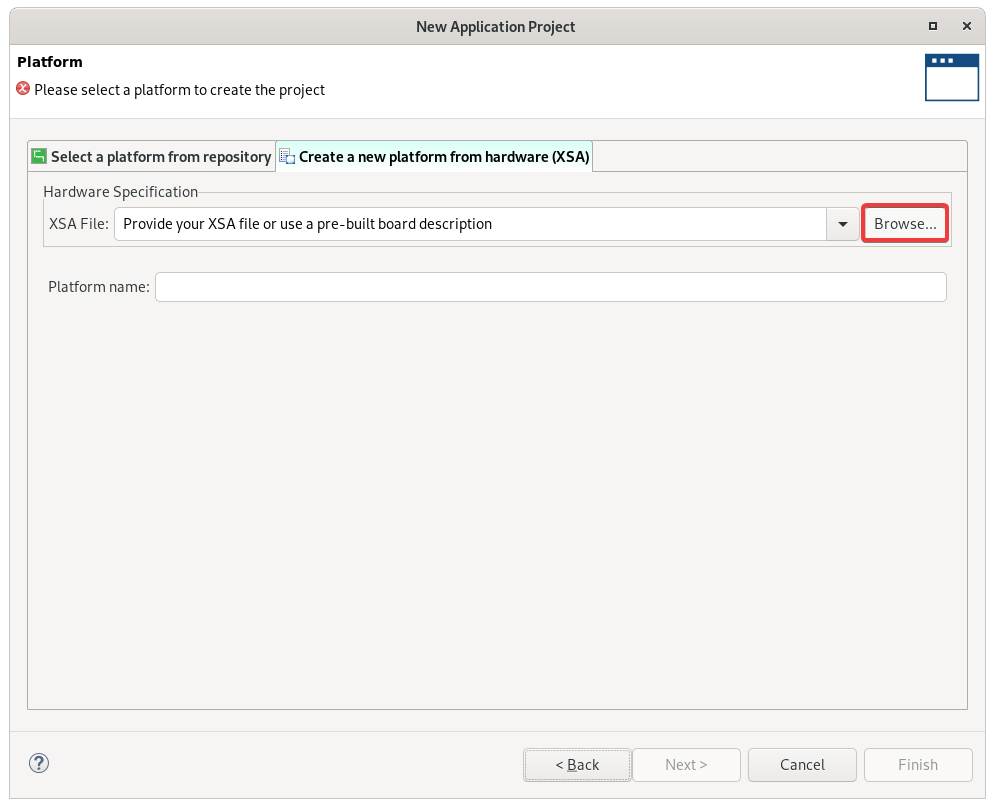
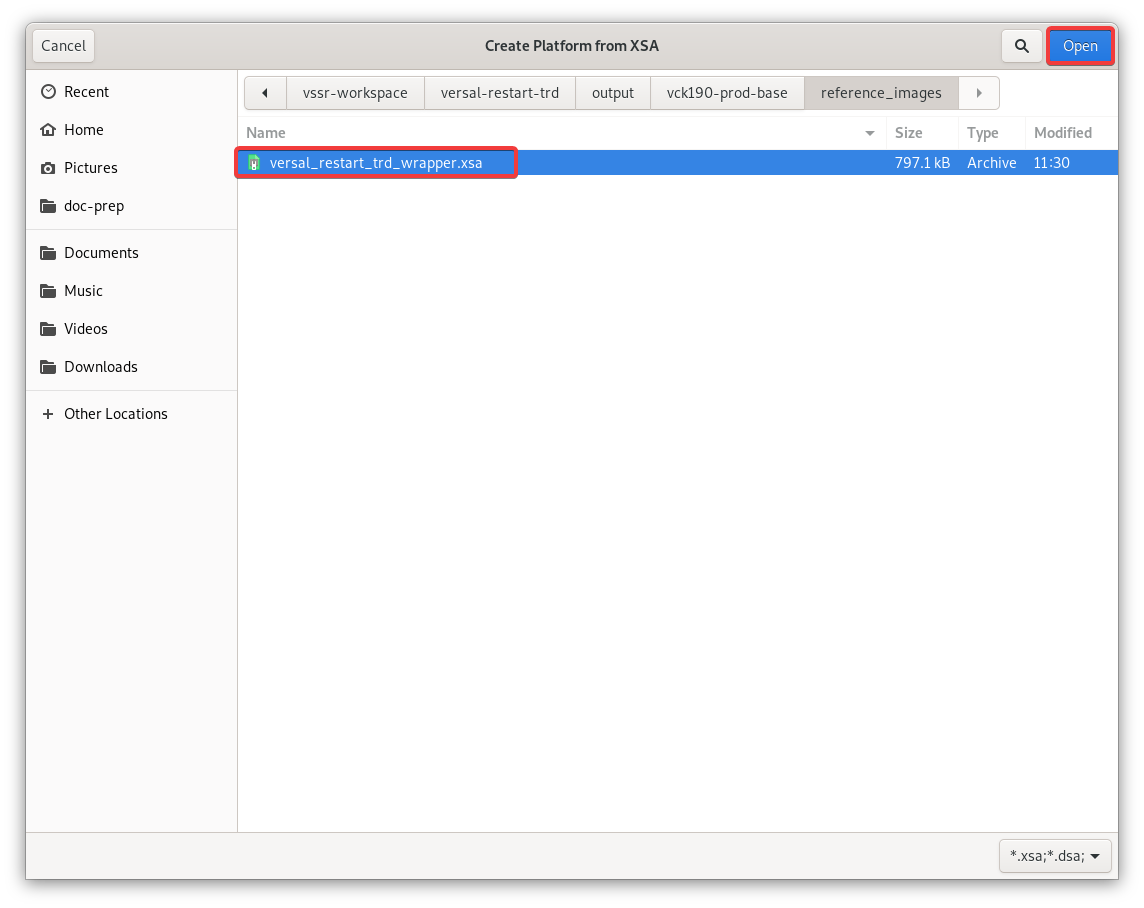
Platform: Select Create a new platform from hardware (XSA), then browse and select the hardware XSA file to be used and press Next.
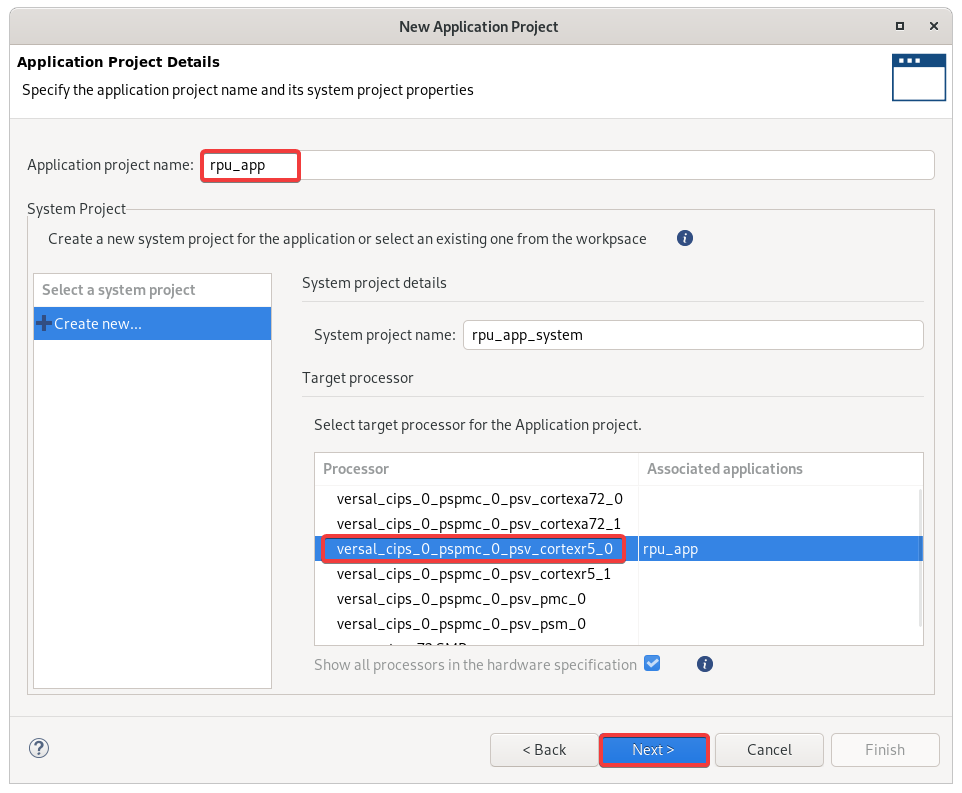
Application Project Details: Add application name and select r5_0 for the target processor.
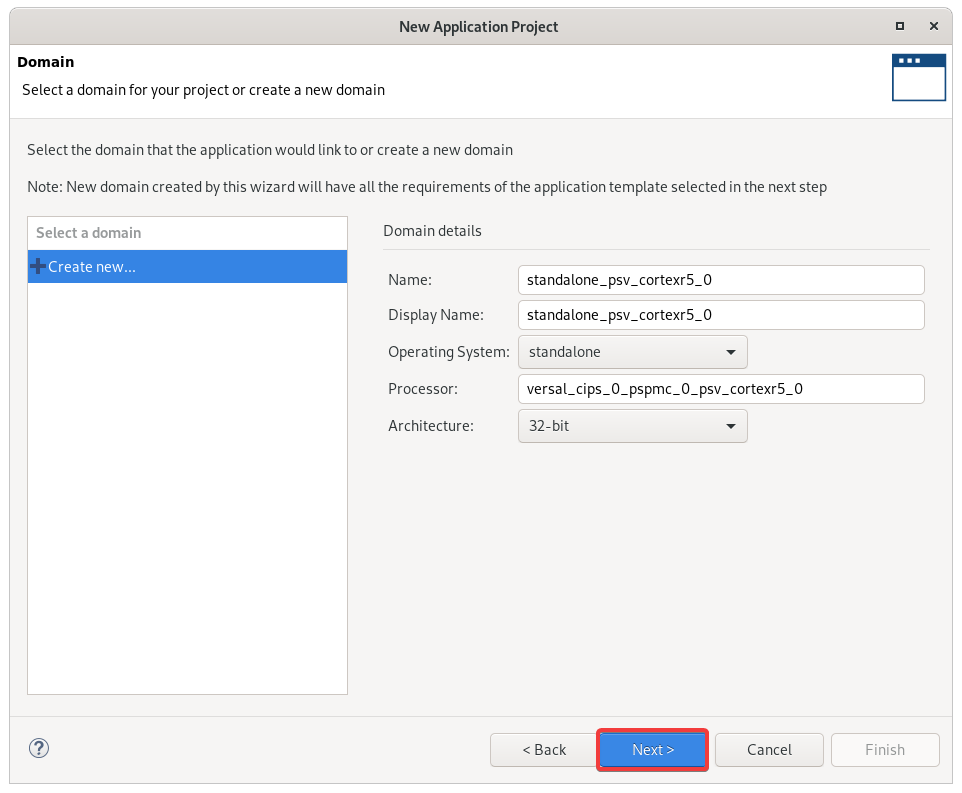
Domain Selection: Create new domain for r5 application to run standalone operating system (default).
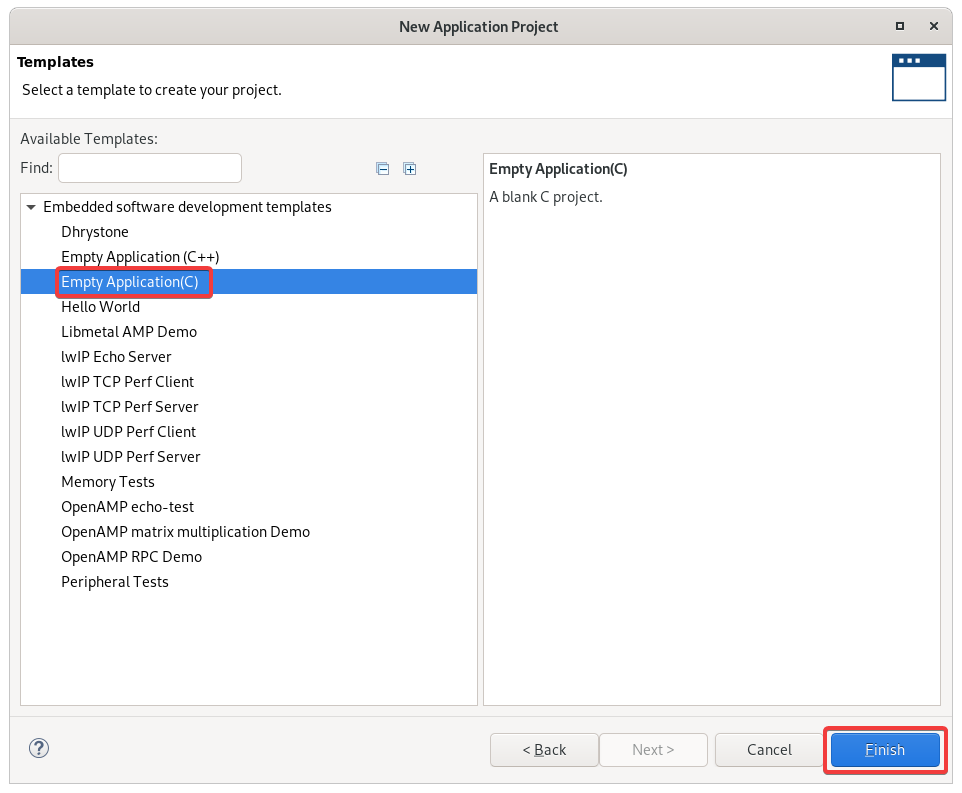
Application Template: Choose Empty Application(C) and click Finish
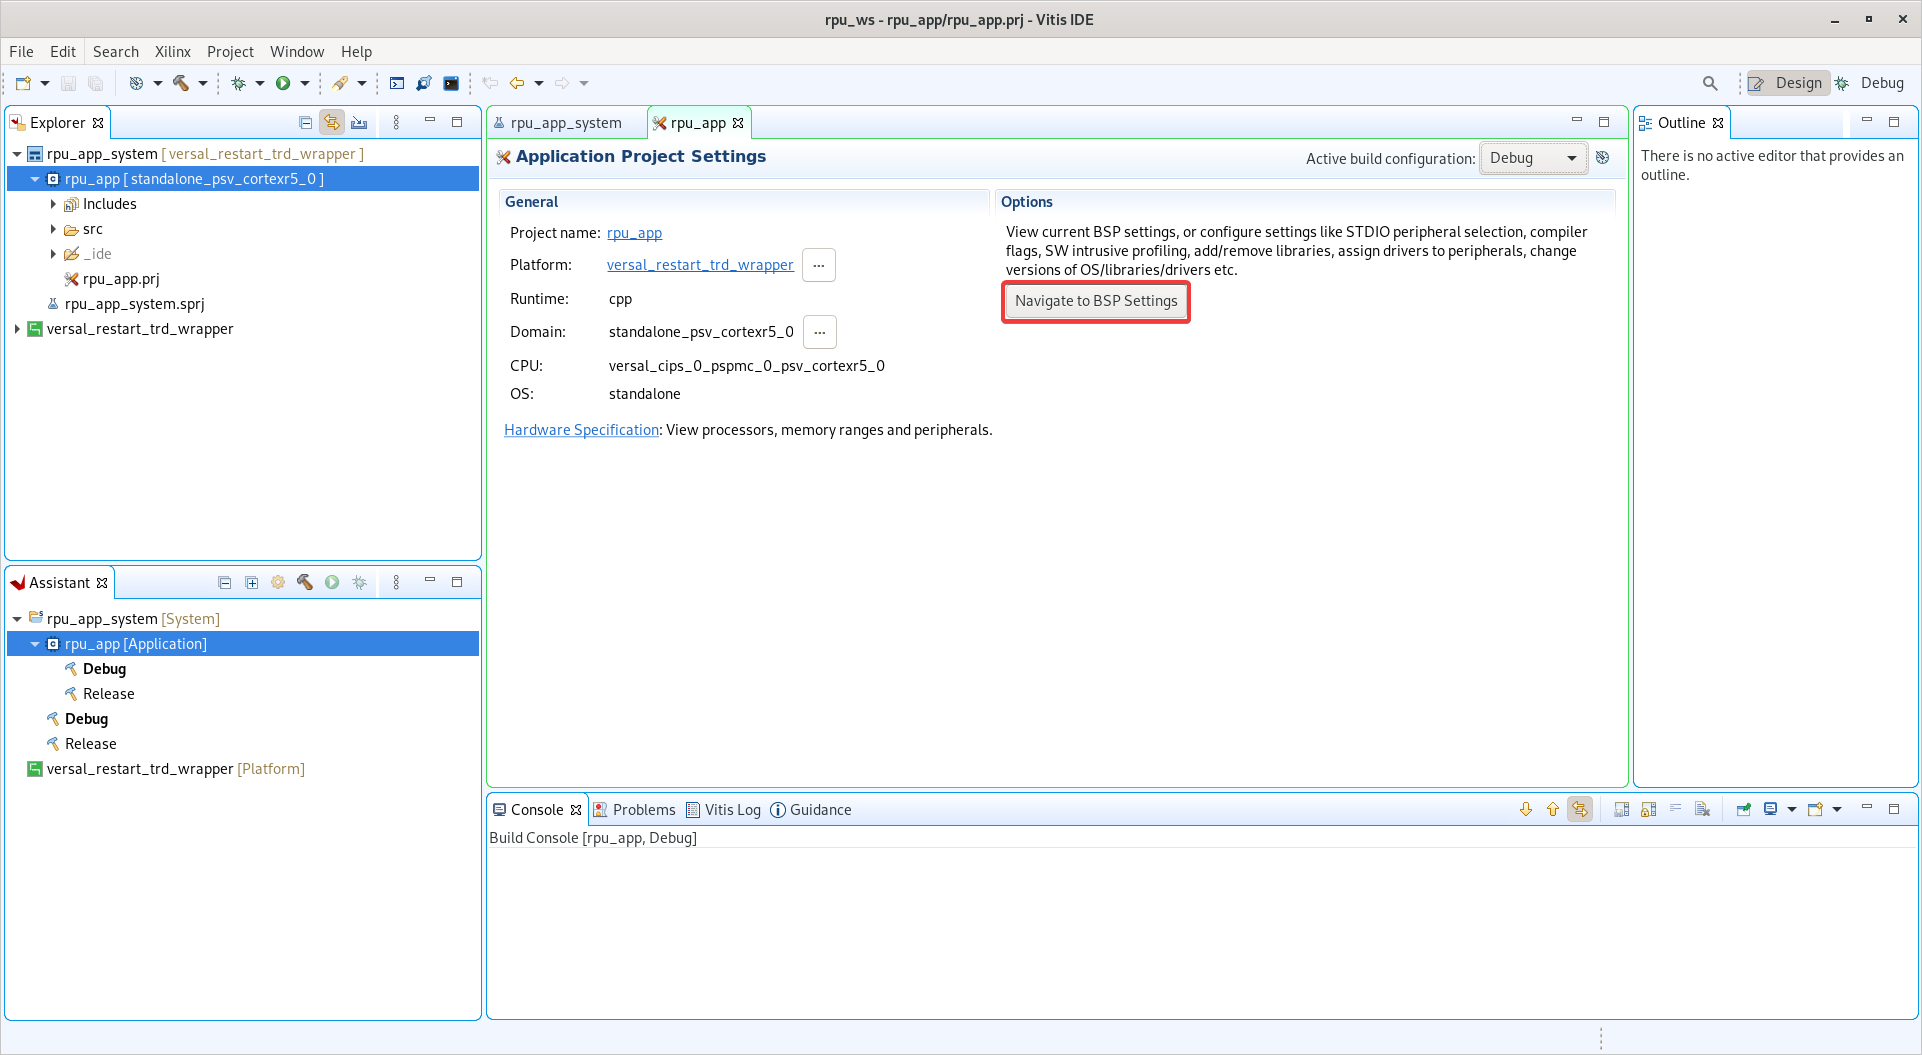
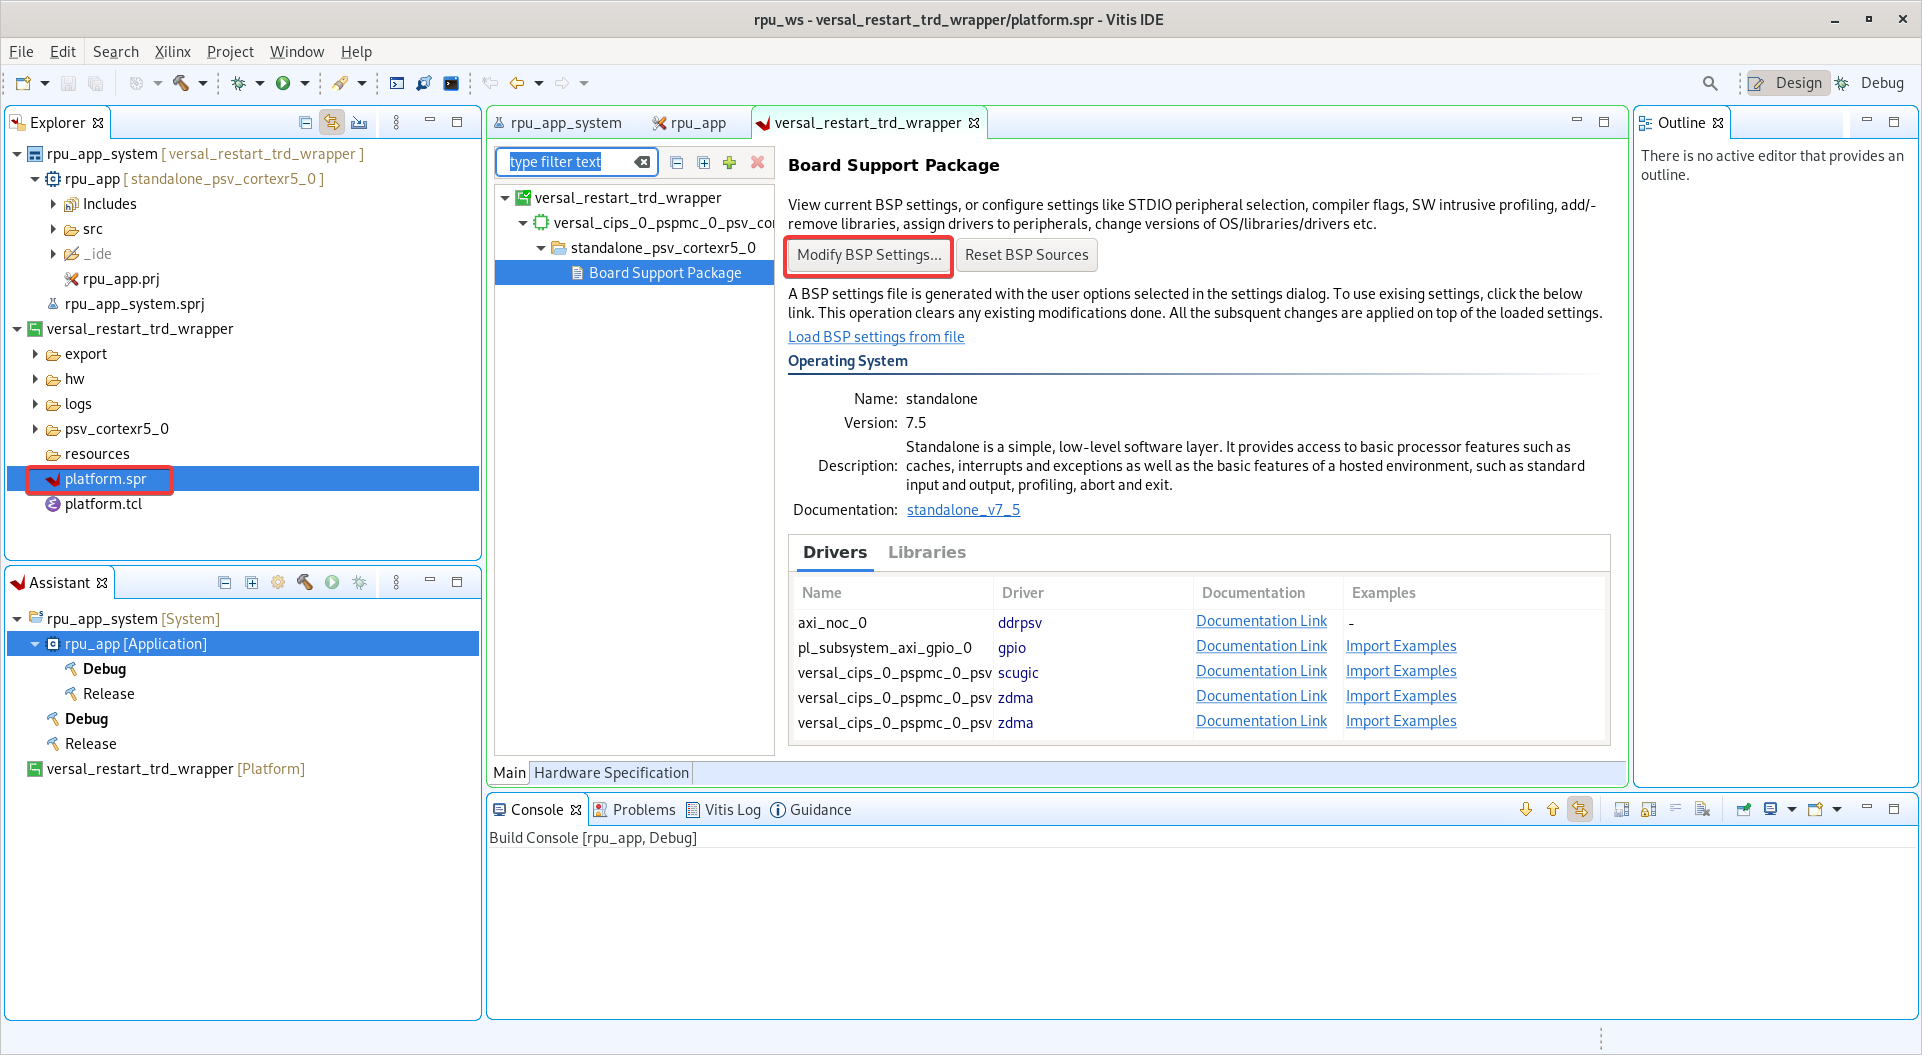
Navigate to BSP Settings and click Modify BSP Settings.
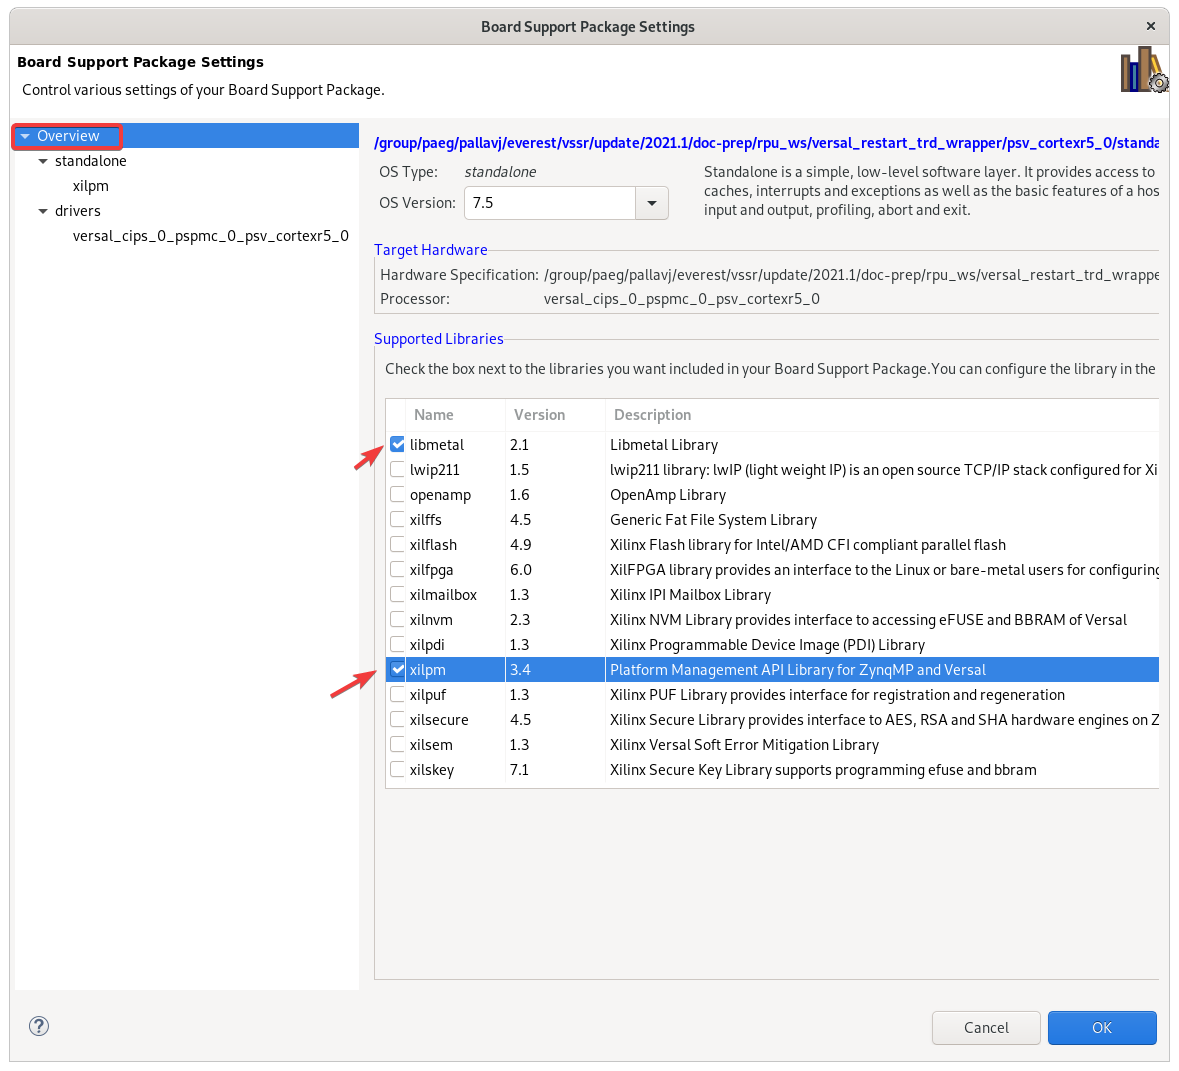
Select libmetal and xilpm libraries from the overview tab.
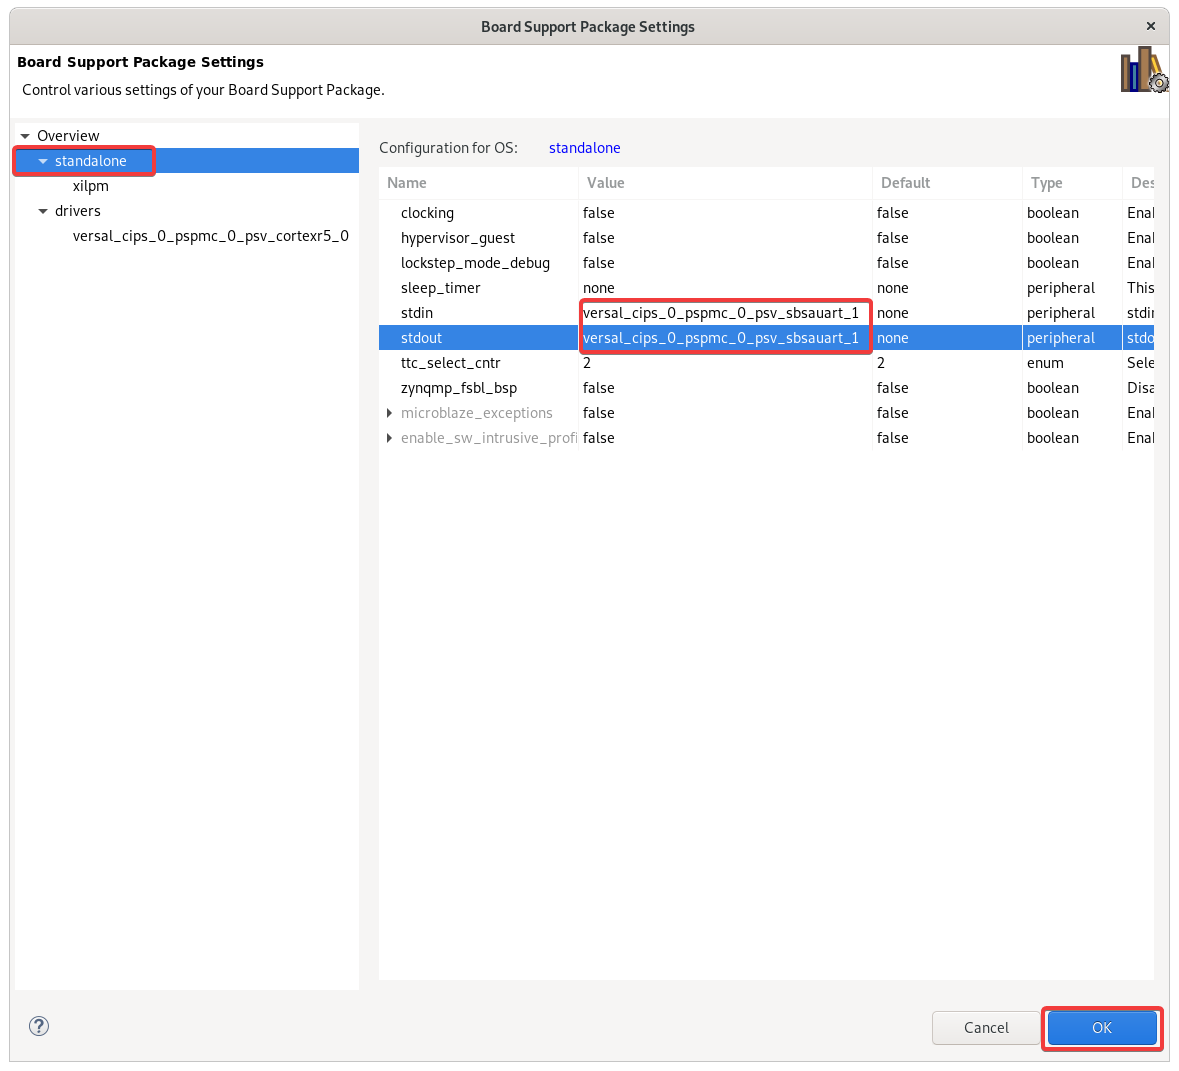
Change stdin and stdout to use UART1 instead of UART0 and press Ok to exit bsp settings.
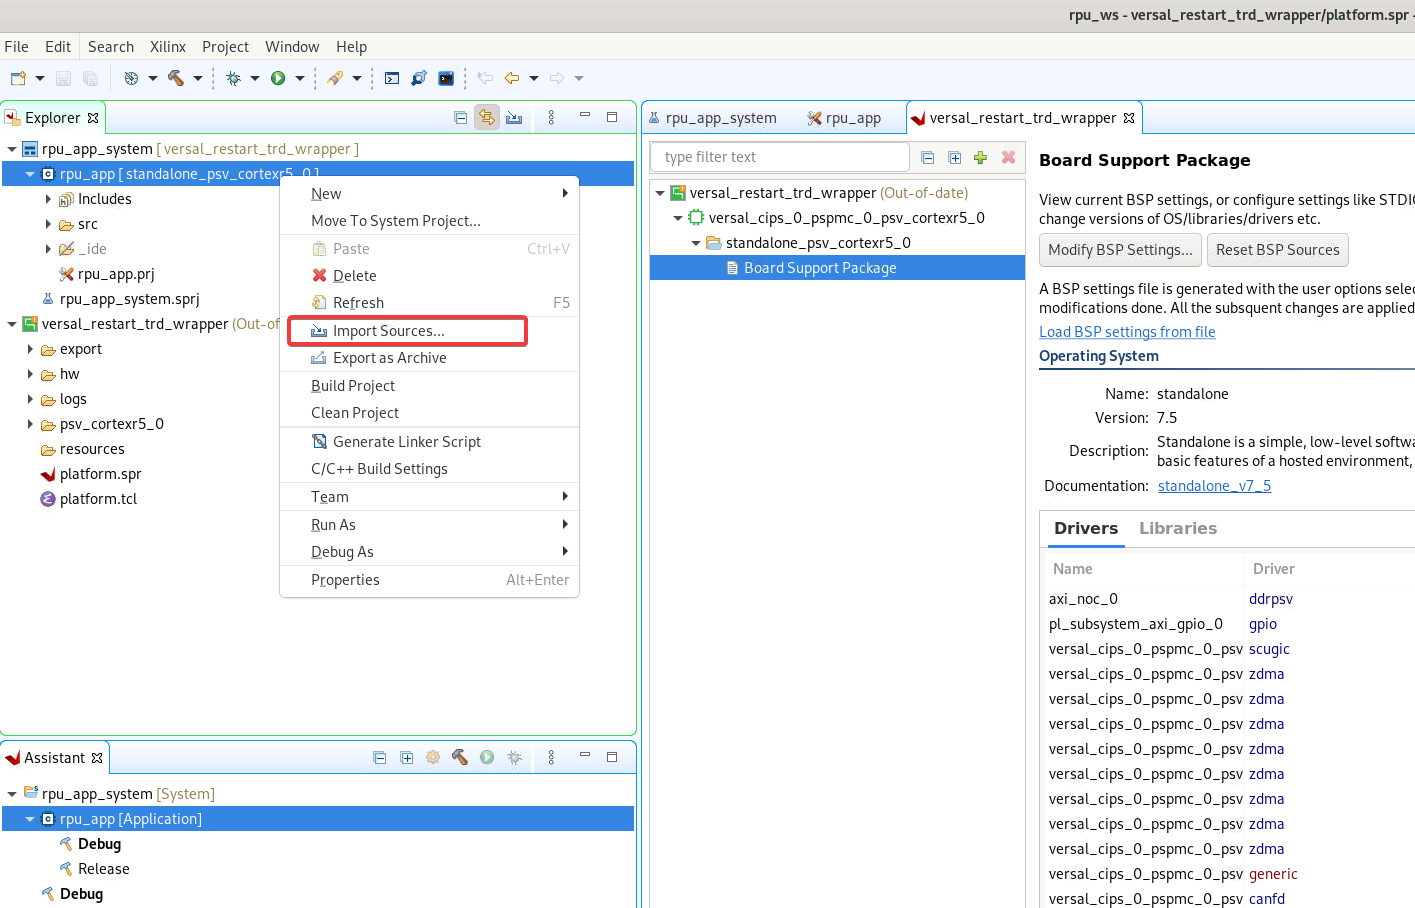
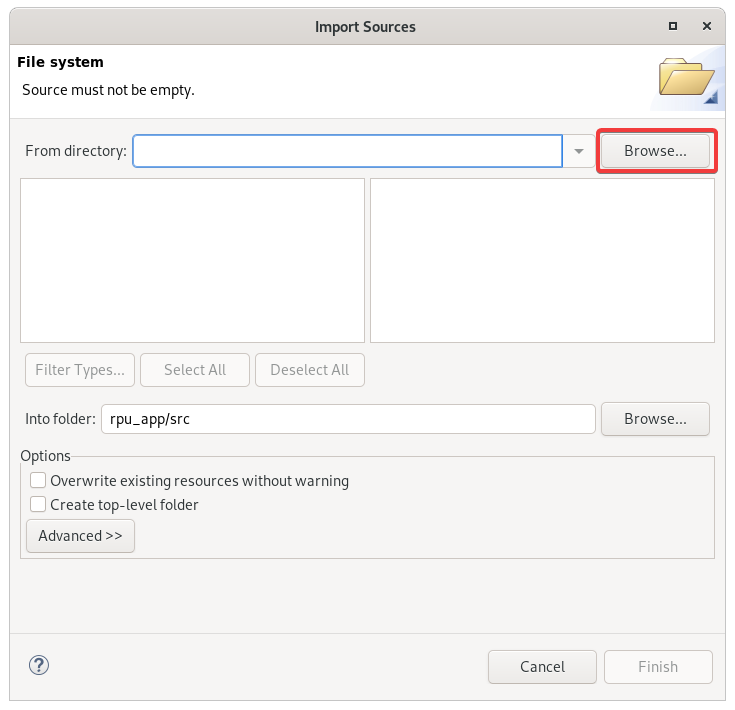
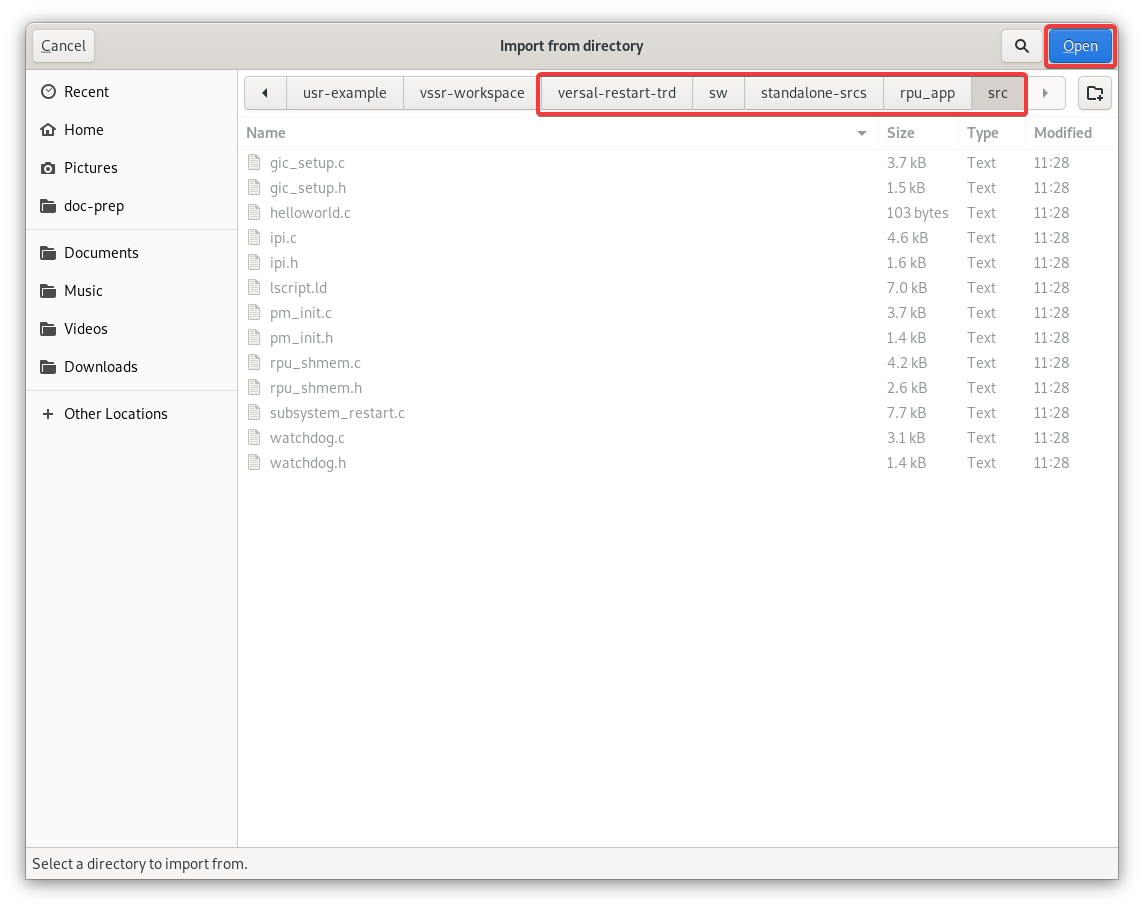
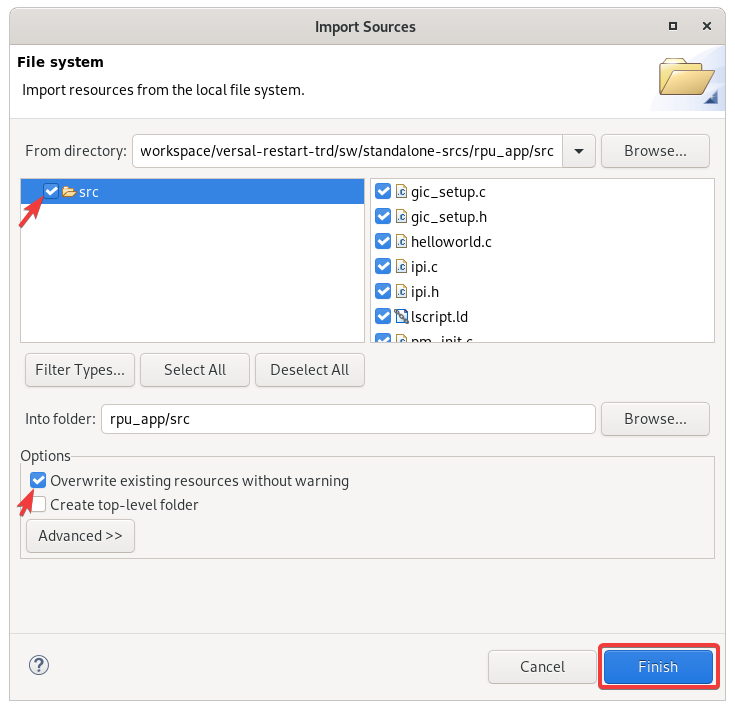
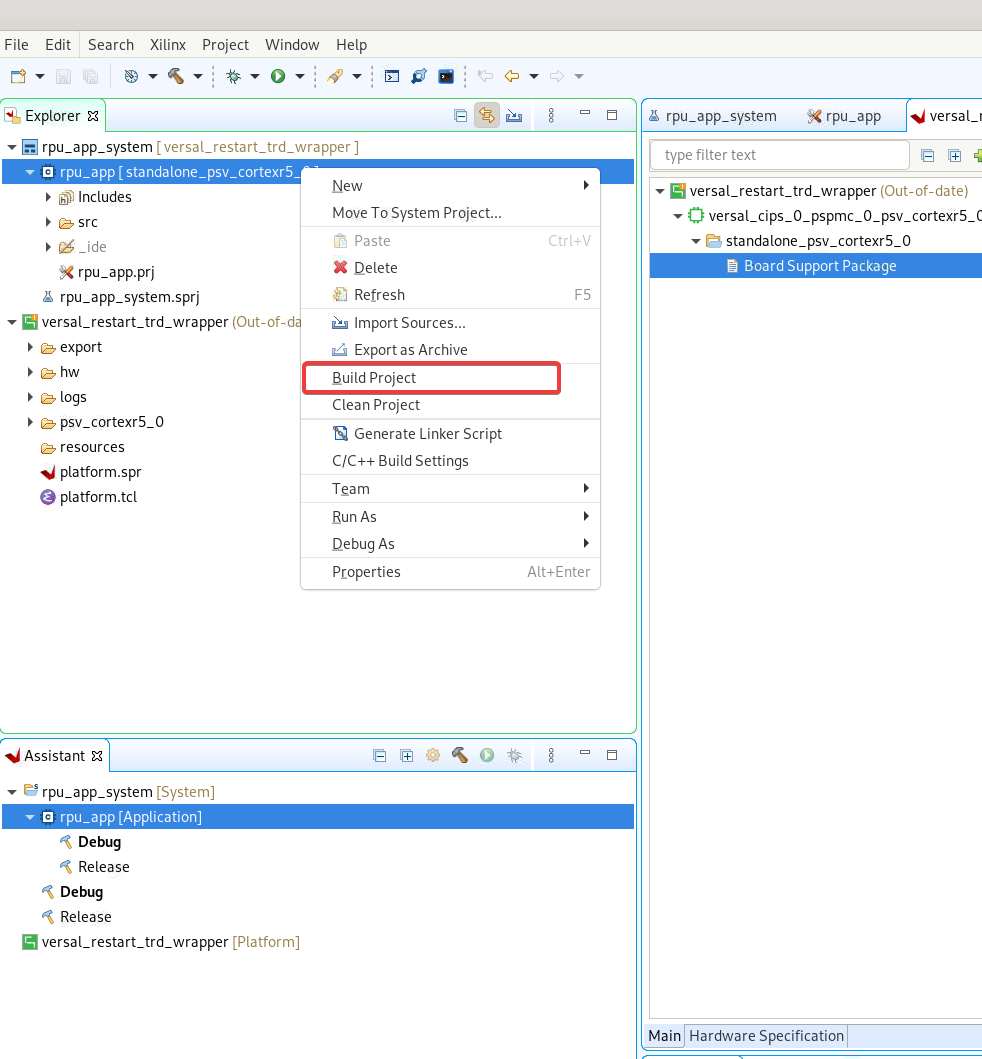
Import Sources: Right click rpu_app and select Import Sources… (or do File -> import ) and import sources from ${REPO_SRC}/sw/standalone-srcs/rpu_app/src/ and click Finish.
Build all the projects (platform bsp and rpu_app) by clicking the build icon or by right clicking rpu_app in explorer pan and selecting Build Project
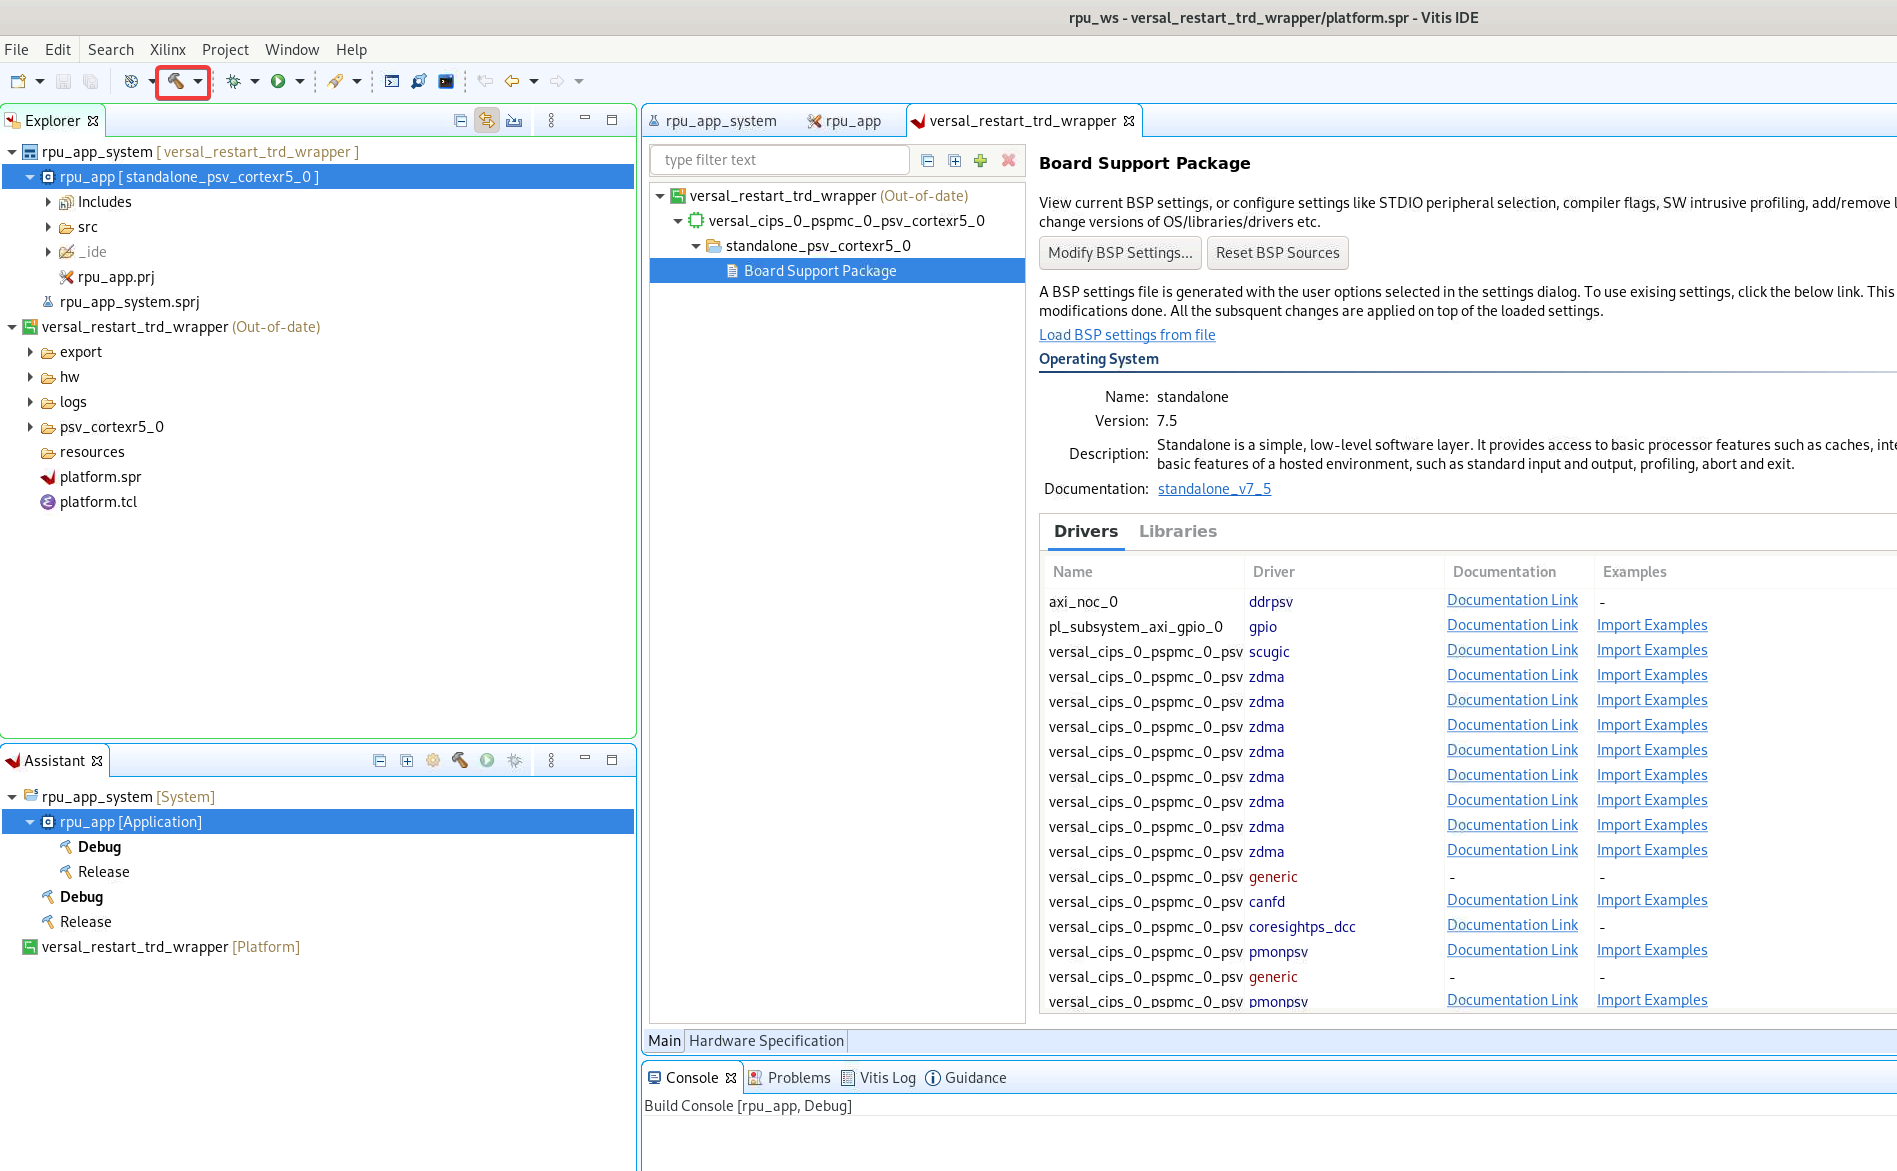
The application will be generated at:
$VSSR_WS/rpu_ws/rpu_app/Debug/rpu_app.elf
For more detailed information on how to use Vitis, please refer to the Vitis Documentation.
5.4.2. Generate Petalinux Image
Create a new Petalinux project with versal template. Name it as plnx-vssr-trd
cd $VSSR_WS
petalinux-create -t project --template versal -n plnx-vssr-trd
cd plnx-vssr-trd
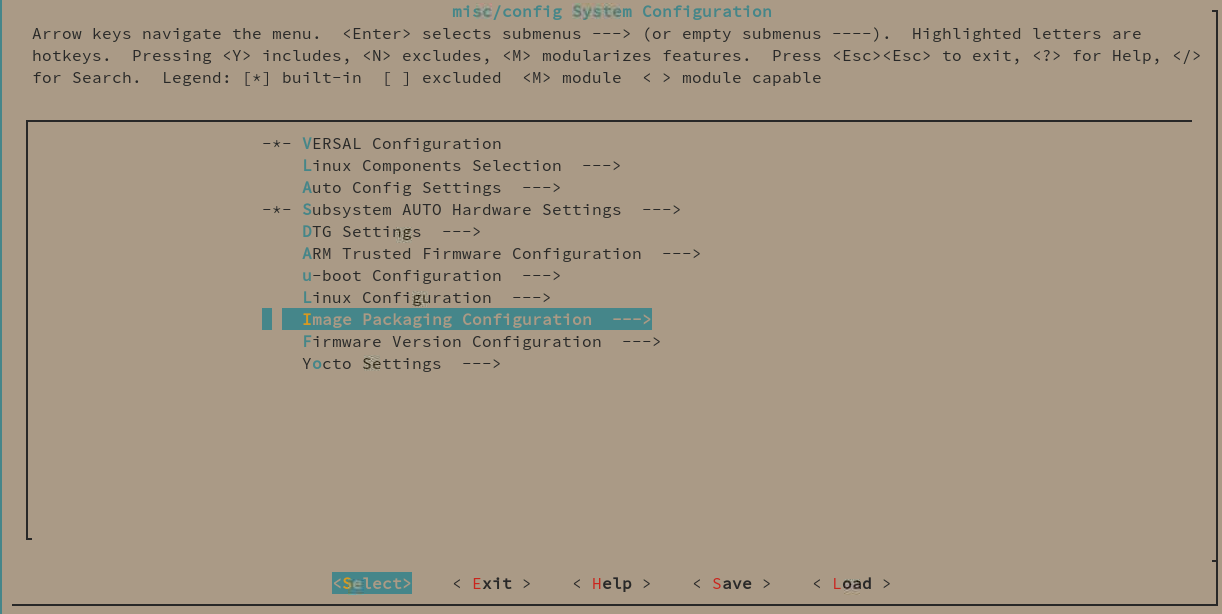
Petalinux Hardware Configuration.
Point to the hardware XSA generated in the Build the Vivado Design section (or provided in the pre-built images). Below command picks the hw XSA from the workspace’s vivado build area:
petalinux-config --get-hw-description=$VSSR_WS/hw_ws/vivado/versal_restart_trd.runs/impl_1/
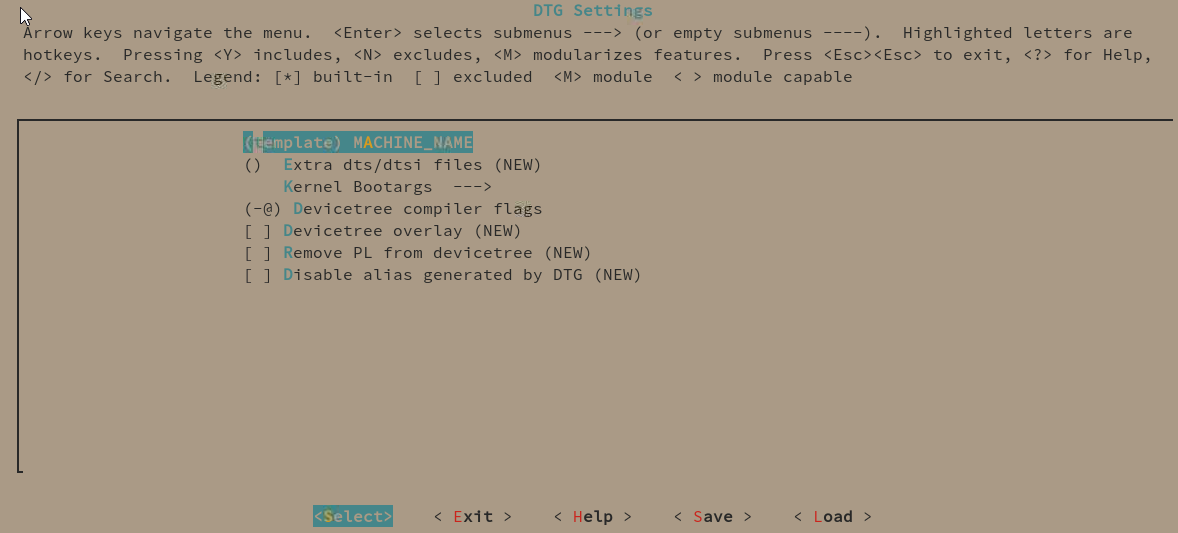
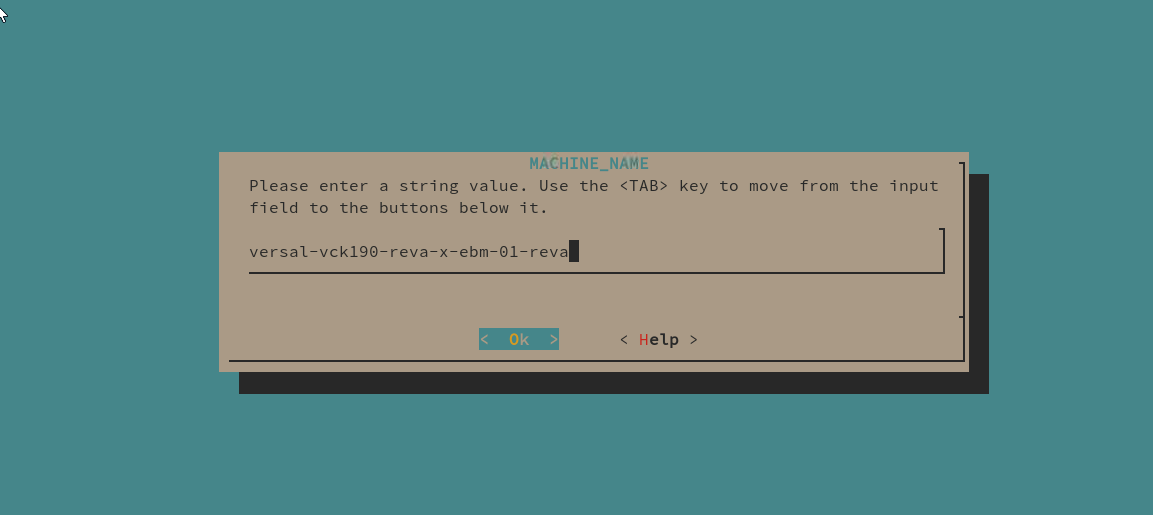
Add The board/machine name in the DTG Settings —> MACHINE_NAME, According to the following table
Board Machine Name VCK190 versal-vck190-reva-x-ebm-01-reva VMK180 versal-vmk180-reva-x-ebm-01-reva 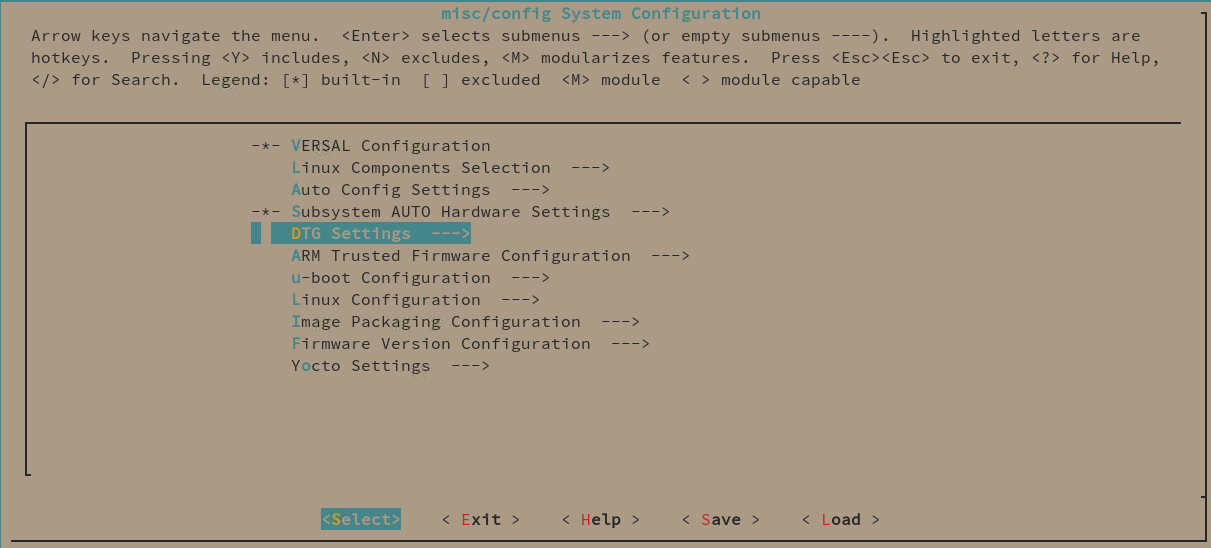
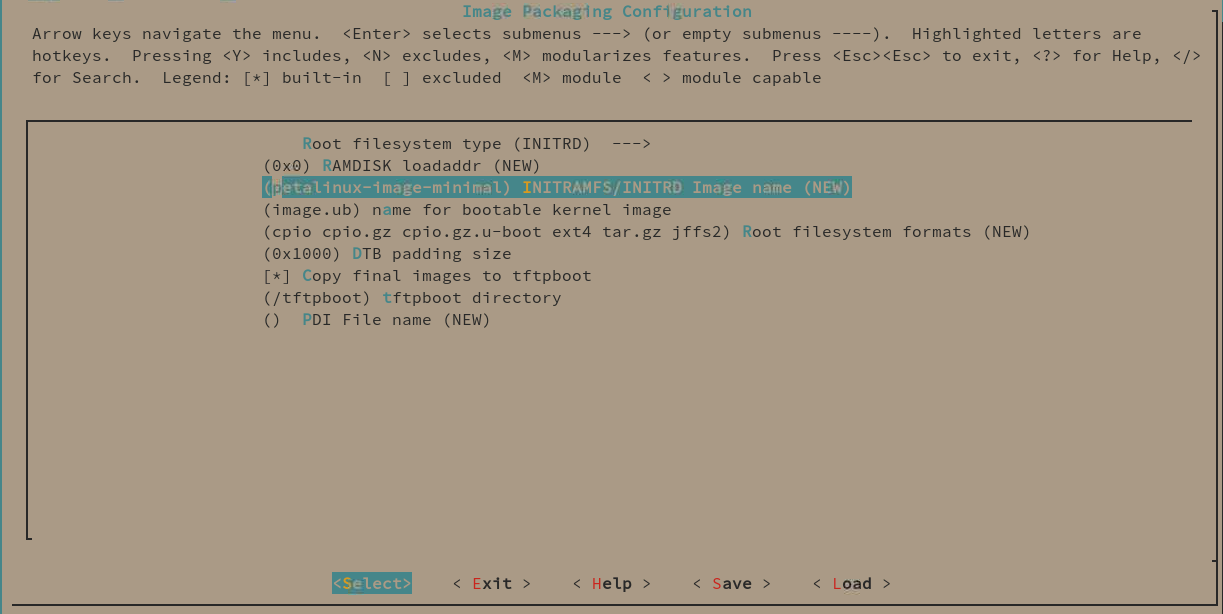
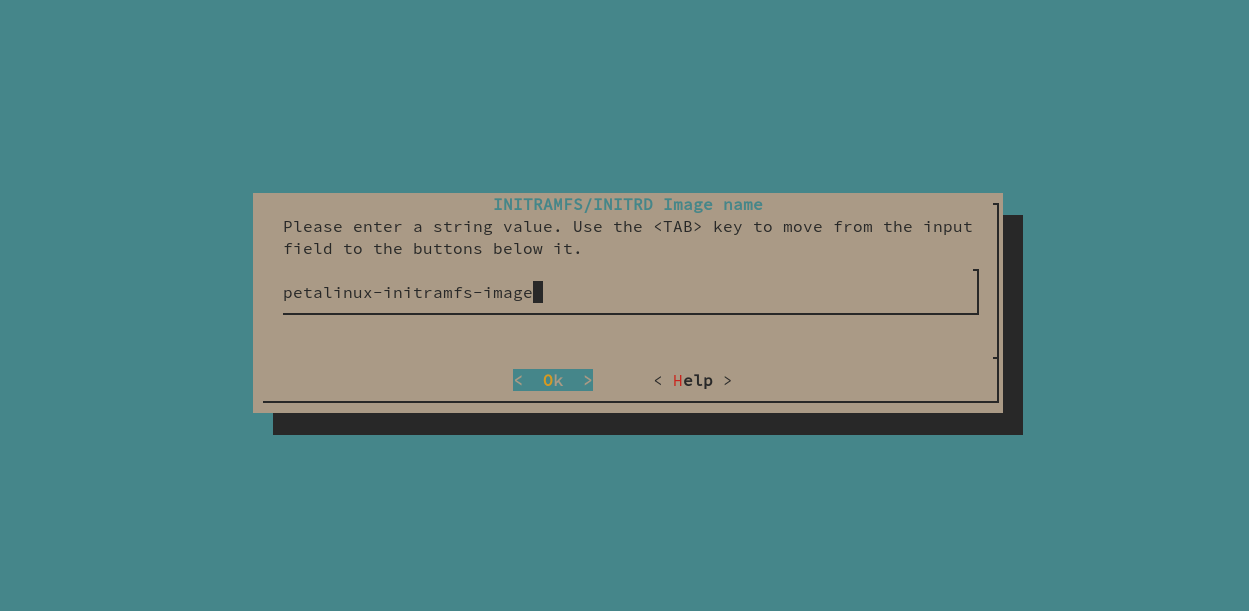
Change INITRAMFS/INITRD Image name to petalinux-initramfs-image. This will ensure to switch to rootfs on the sd card after initial boot from initramfs.
Save and Exit petalinux configuration
Configure Static IP using petalinux config, Petalinux Ethernet IP configuration (Optional. Default=DHCP)
petalinux-config
- Select Subsystem AUTO Hardware Settings —> Ethernet Settings —> Primary Ethernet —> ethernet_0
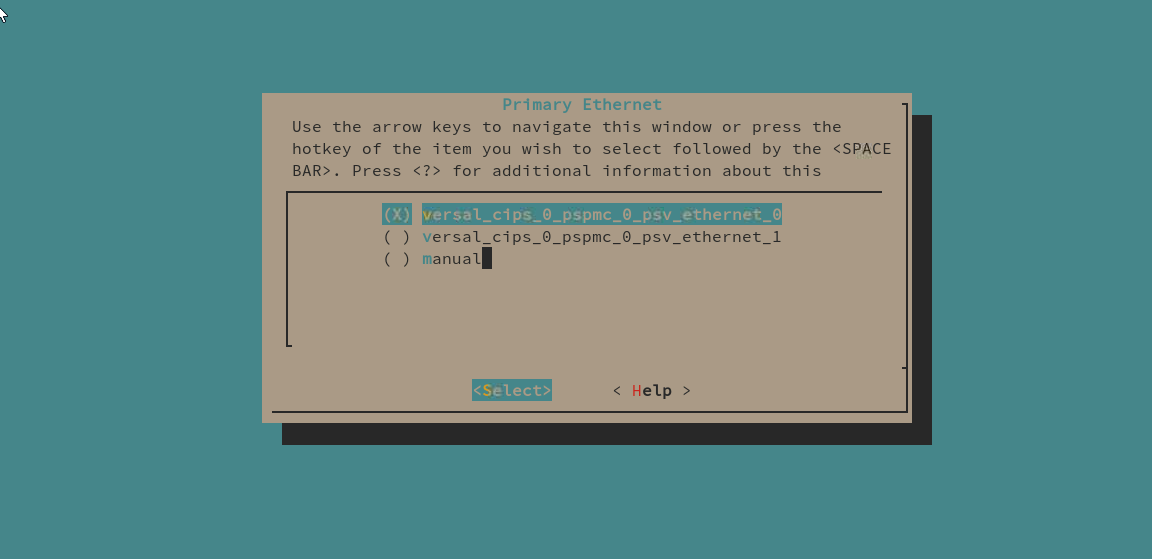
- Unselect Obtain IP address automatically and set the static IP
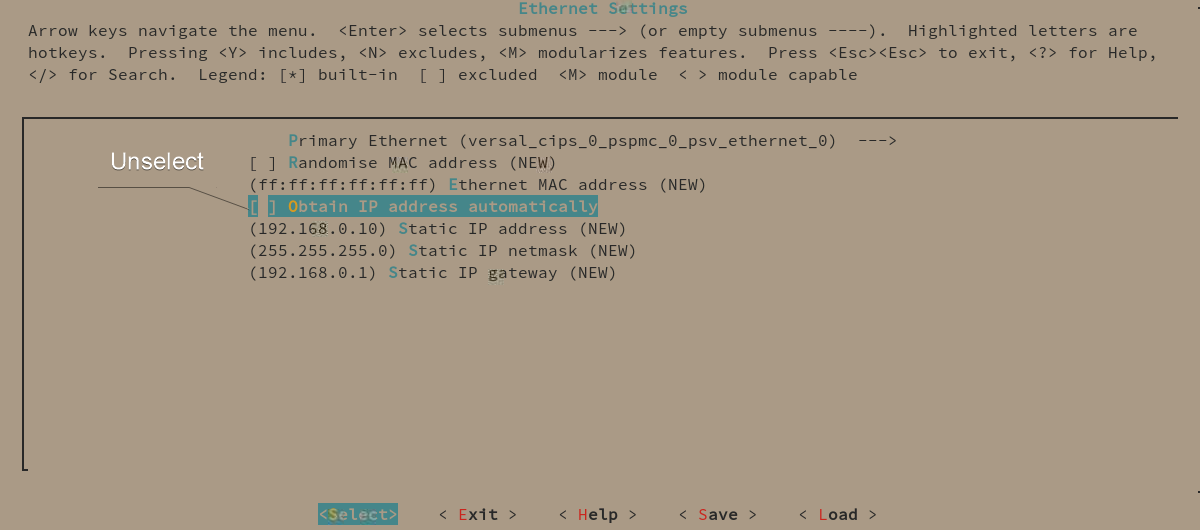
- Save and Exit petalinux configuration
Add vssr-trd yocto layer
# Copy the layer sources
cp -rf $REPO_SRC/sw/yocto-layers/meta-vssr-trd project-spec/
# Add Yocto layer in the petalinux configuration
petalinux-config
Add new user layer and enter the layer path at Yocto Settings —> User Layers —> user layer 0
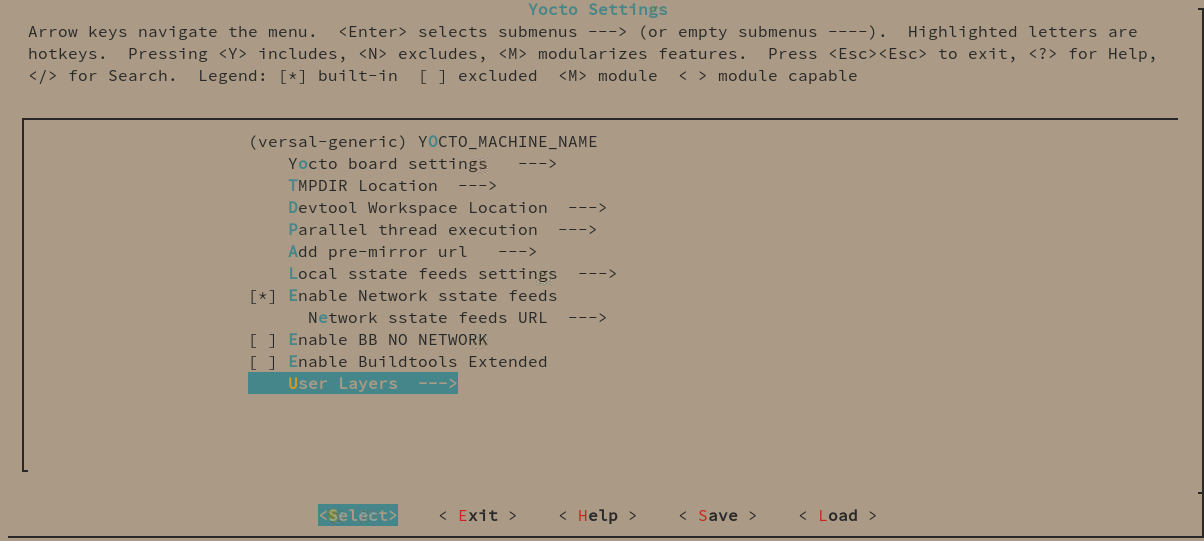
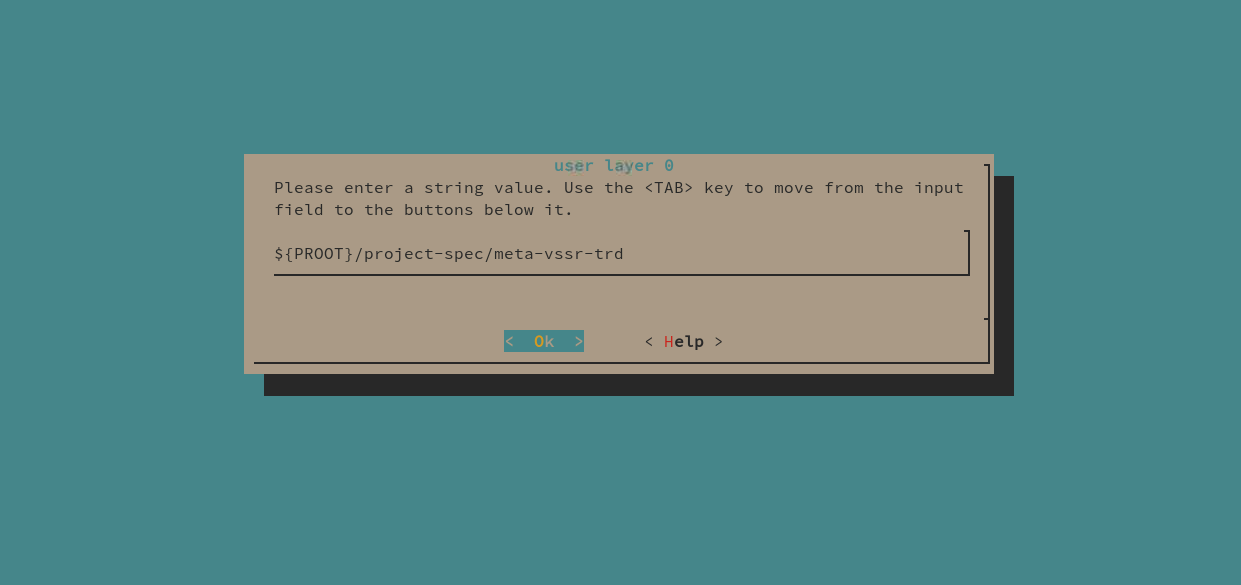
Save and Exit petalinux configuration
Build the Petalinux project:
petalinux-build
Output images are generated in following directory:
${VSSR_WS}/plnx-vssr-trd/images/linux
5.4.3. Create BOOT.BIN
Perform the following steps in a Linux shell with Petalinux environment configured.
Navigate to Petalinux project root:
cd ${VSSR_WS}/plnx-vssr-trd/Copy RPU application elf built in previous section to current directory:
cp $VSSR_WS/rpu_ws/rpu_app/Debug/rpu_app.elf .
Build the BOOT.BIN using the bif available in the meta-vssr-trd:
petalinux-package --boot --bif project-spec/meta-vssr-trd/scripts/bif_files/boot.bif
5.4.4. Create Create SD card wic image
Following step create a SD card wic image which can be flashed on the uSD card for the target board.
Navigate to Petalinux project root:
cd ${VSSR_WS}/plnx-vssr-trd/Create wic image:
petalinux-package --wic --wic-extra-args "-c xz"
This will create the compressed wic image at following location:
${VSSR_WS}/plnx-vssr-trd/images/linux/petalinux-sdimage.wic.xz
The resulting build artifacts will be available in the images/linux/
Refer the “Run Images on Target” section for how to flash the SD Card and boot the TRD images.
For more detailed information on how to use Petalinux, please refer to the Petalinux Tool Reference Guide.