Vivado Accelerator Flow Example
This page walks you through an example adding a simple accelerator (in this case, a simple BRAM) application into the SOM infrastructure in the Vivado Accelerator Flow. Before trying this example, first read Vivado Accelerator Flow.
This example works with 2021.1 and newer tools and BSP. You need Vivado, XSTC, DTG and DTC. For information on how to install DTG and DTC, refer to Generating DTSI and DTBO Overlay Files.
You need to generate three files: .bit.bin (PL bitstream), .dtbo (device tree overlay), and shell.json to load onto the SOM.
Generate .bit.bin
There are two ways to start the Vivado project for Kria SOM Starter Kits. Because the baremetal example has an example for generating PL design in Vivado using board files, this example uses the base Vivado designs. There are two ways to get the base designs, either using board files or example design.
Start Vivado, click Open Project, select xilinx-
- , and the example project opens..xpr 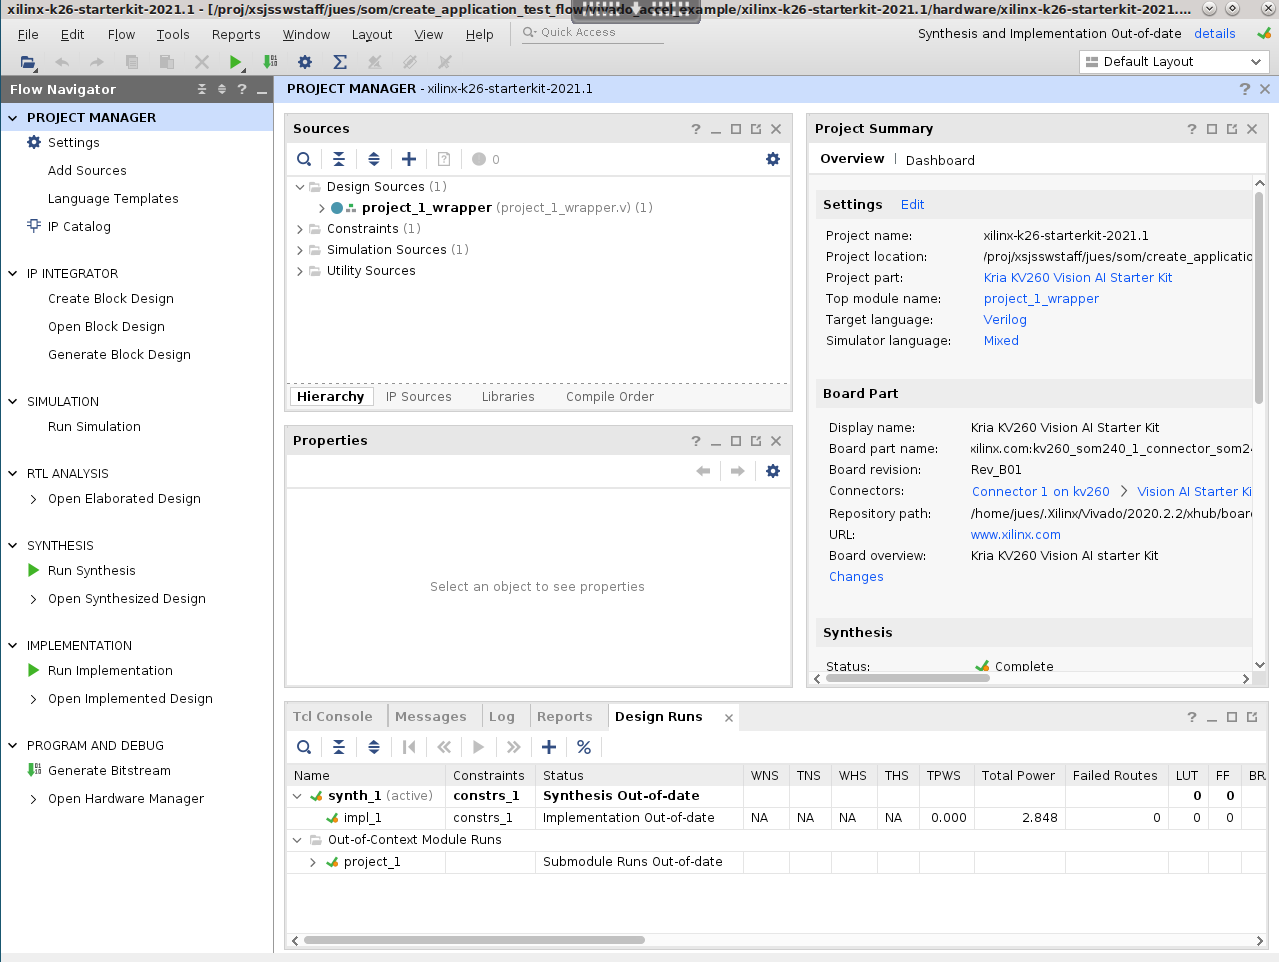
Click Open Block Design. A preconfigured
zynq_ultra_ps_e_0block displays.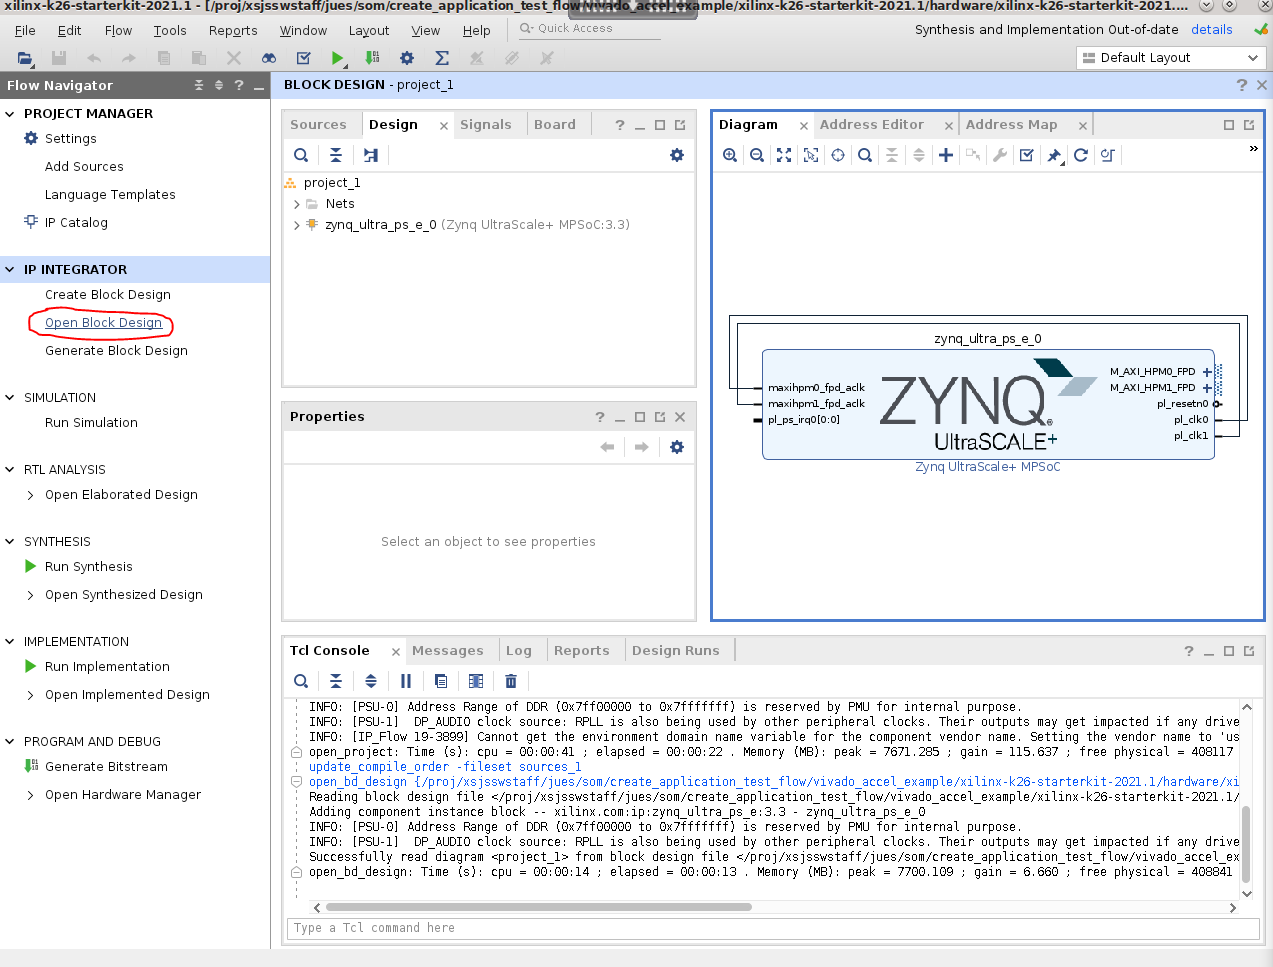
In block design, click on the + sign, and add an
AXI BRAM Controller.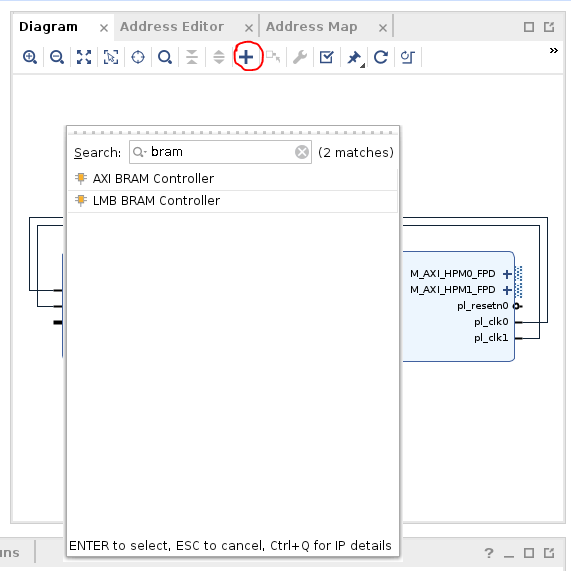
Click Run Connection Automation, and connect
S_AXIofaxi_bram_ctrl_0toM_AXI_HPM0_FPDofzynq_ultra_ps_e_0.
Double click the
axi_bram_ctrl_0 block, and change the Number of BRAM interfaces to 1.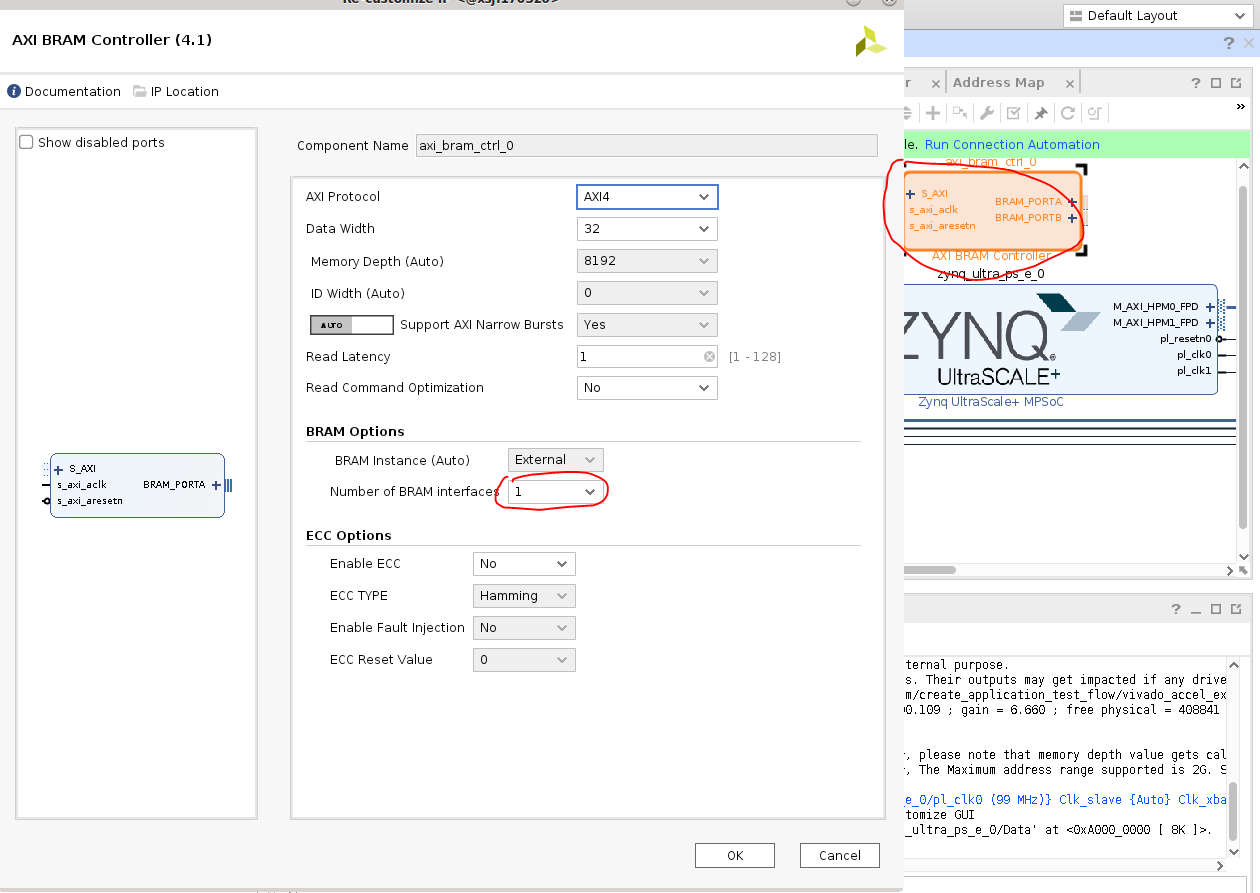
Double click the
zynq_ultra_ps_e_0 block, navigate toPS-PL Configuration, and deselect theAXI HPM1 FPDinterface because it is unused.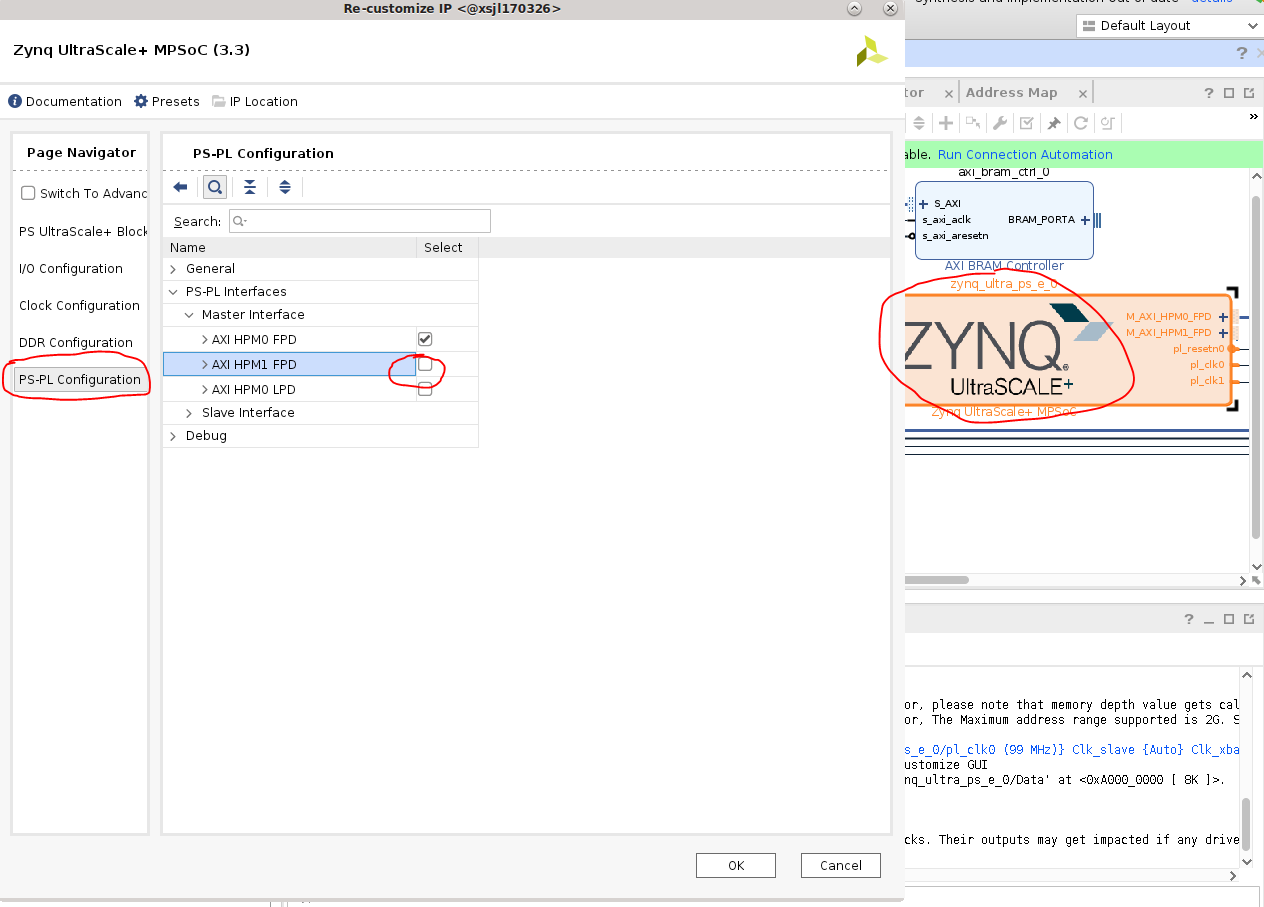
Click Run Connection Automation again, and connect
BRAM_PORTAofaxi_bram_ctrl_0to a new block RAM.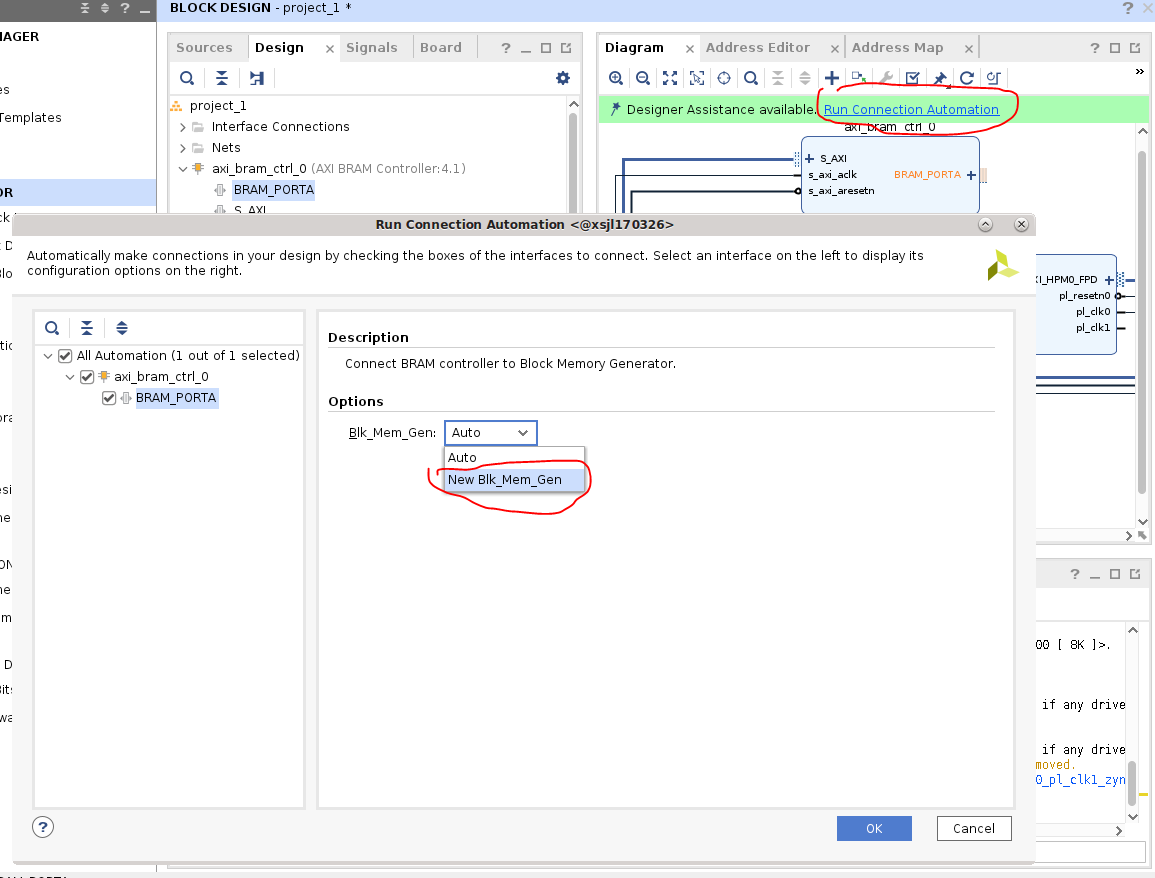
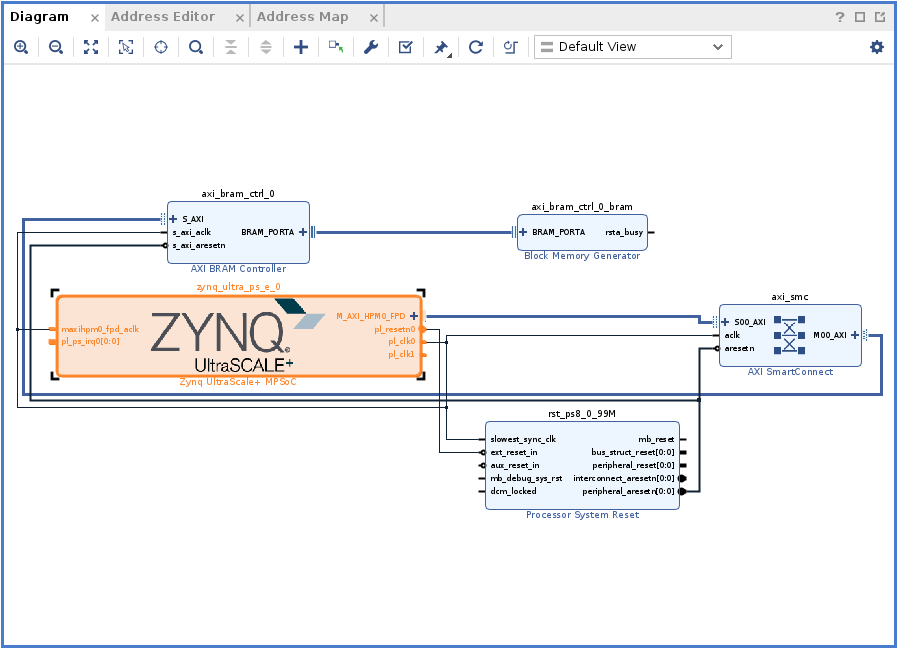
Now your block design should look similar to the following screenshot:
Check the address map to see that bram is mapped to 0xa0000000. Because you chose HPM0, you need this address to test access to bram later:

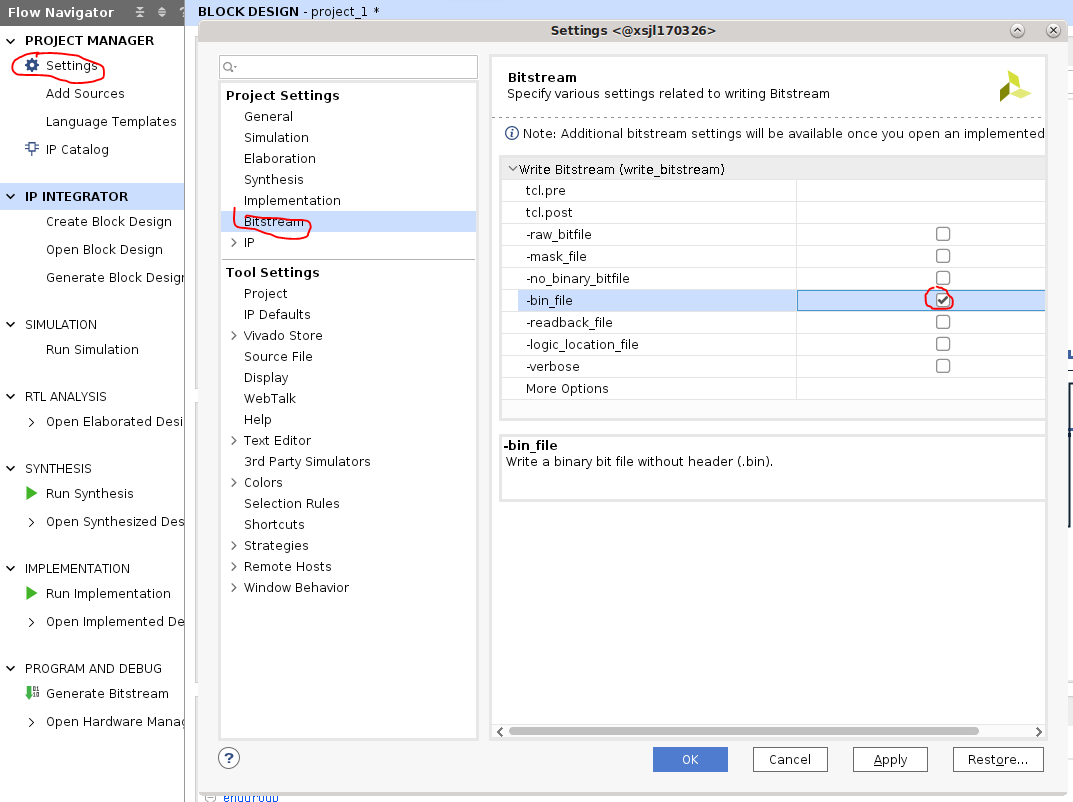
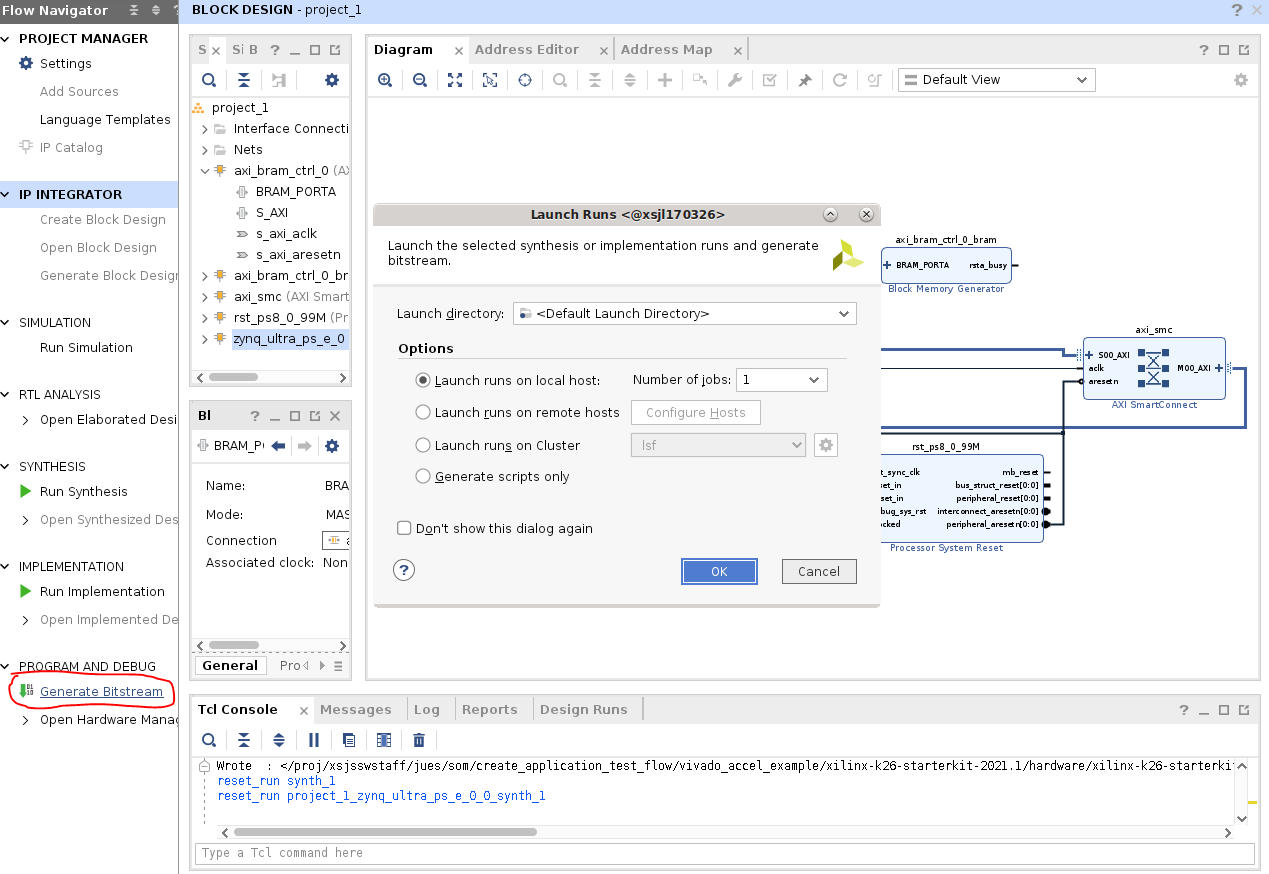
By default Vivado generates a .bit file. Select Settings -> Bitstream -> -bin_file, so a .bin file is also generated.
To generate the .bin file, click Generate Bitstream.
Copy the generated .bin file to top level. Use the name
bramfor this simple application:cp xilinx-<board>-<version>.runs/impl_1/project_1_wrapper.bin bram.bit.bin
Generate .xsa file
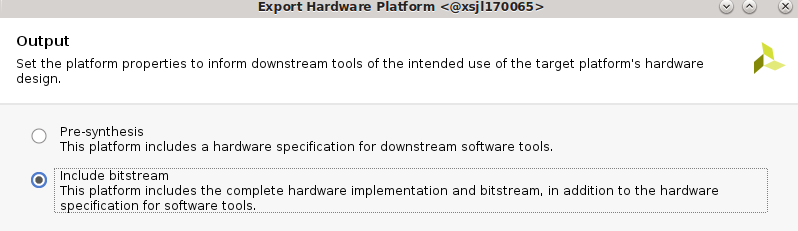
A .xsa file is needed for generation of .dtbo device tree overlay file in the next step. This is also generated in Vivado by by selecting File -> Export -> Export Hardware. Make sure to select include bitstream in the generation.
Generate .dtbo file
In this example, use the first method in Generating DTSI and DTBO Overlay Files to generate the .dtbo file needed.
In XSCT, generate the dts files needed using
project_1_wrapper.xsacreated in the previous step:xsct% hsi open_hw_design project_1_wrapper.xsa xsct% hsi set_repo_path <path to device-tree-xlnx repository> xsct% hsi create_sw_design device-tree -os device_tree -proc psu_cortexa53_0 xsct% hsi set_property CONFIG.dt_overlay true [hsi::get_os] xsct% hsi generate_target -dir bram_dts xsct% hsi close_hw_design project_1_wrapper xsct% exit
Then compile .dtsi to binary .dtbo using DTC:
cd bram_dts/
dtc -@ -O dtb -o pl.dtbo pl.dtsi
cd ../
cp bram_dts/pl.dtbo bram.dtbo
Create the shell.json file
To create a shell.json XRT_FLAT file, refer to On-target Utilities and Firmware.
Test on SOM Target
Now you have bram.bit.bin, bram.dtbo, and shell.json files. You are ready to move them to SOM Starter Kit and test them. It is assumed that you already booted to Linux using the prebuilt .wic images provided here.
Move the files over using your preferred method; this example uses scp to move over the files to target.

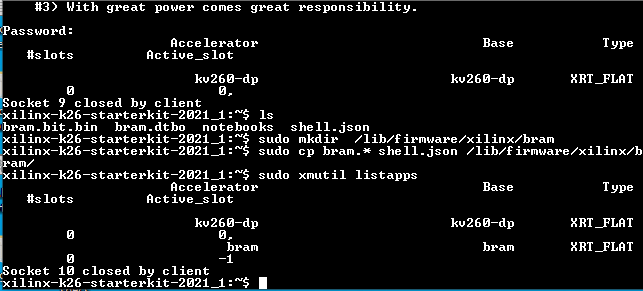
On SOM’s Linux command prompt, create a folder, copy over the files, and check that the new application shows up in listapps:
sudo mkdir /lib/firmware/xilinx/bram
sudo cp bram.* shell.json /lib/firmware/xilinx/bram/
sudo xmutil listapps
Observe that before the BRAM application is loaded, access to 0xa0000000 (the BRAM location that you obtained in Vivado) is not successful, but after loading the BRAM app, you are be able to read and write to 0xa0000000.
sudo xmutil unloadapp
sudo xmutil loadapp bram
sudo devmem 0xa0000000 32
sudo devmem 0xa0000000 32 0xdeadbeef
sudo devmem 0xa0000000 32

Copyright © 2023-2025 Advanced Micro Devices, Inc.