PetaLinux Firmware
In this step, you create the firmware for running the image resizing application. Use the PetaLinux toolchain to build a new PetaLinux .wic image with the hardware and software binaries baked in using recipes.
IMPORTANT: A prerequisite for this step for you to know the PetaLinux flow and be familiar with Yocto recipes.
PetaLinux eSDK Update
You need PetaLinux 2022.1 with eSDK update 1 or later, as the vvas library is released asynchronously and not included in the main 2022.1 PetaLinux tools release. Download the PetaLinux Tools Installer 2022.1.
To install PetaLinux, extract the petalinux installer, accept the license, and source the tool’s settings script.
Set up the PetaLinux environment.
source <petaLinux_tool_install_dir>/settings.sh
The eSDK is used to update the PetaLinux tool for creating new images or SDKs. The eSDK updates are published here. Upgrade the tool with new eSDK for the ‘2022.1 update1’ release and source the tool’s settings script.
petalinux-upgrade -u 'http://petalinux.xilinx.com/sswreleases/rel-v2021/sdkupdate/2022.1_update3/' -p 'aarch64'
The petalinux tool is now updated with ‘2022.1 update1’ Yocto eSDK.
Platform outputs
Before creating the PetaLinux firmware, bring all the platform outputs inside a platform_outputs directory.
//If you are on a differnet level, go the *tutorial* directory

mkdir platform_outputs
cp kria_platform/kria-vitis-platforms/kv260/overlays/examples/smartcam/binary_container_1/link/int/system.bit platform_outputs/
cp kria_platform/kria-vitis-platforms/kv260/overlays/examples/smartcam/binary_container_1/dpu.xclbin platform_outputs/
Create PetaLinux Project
The first step is to download the 20022.1 Starter Kit SOM BSP from the Kria K26 SOM Wiki under the PetaLinux Board Support Package section. Create a PetaLinux project with the Starter Kit SOM BSP using the following commands:
mkdir firmware
cd firmware
// copy the Downloaded BSP into the firmware folder
petalinux-create -t project -s xilinx-kv260-starterkit-v2022.1-05140151.bsp
cd xilinx-kv260-starterkit-2022.1/
petalinux-build
Add recipes for FPGA binaries, MIPI cameras, VVAS custom plug-ins, and package groups in the following steps. These recipes are part of the project-spec/meta-user folder, which is a meta-layer that is already included in the project.
FPGA Firmware
When you launch the xmutil loadapp application, the xmutil invokes the DFX Manager. The dfx-mgr is an AMD library that implements an on-target daemon for managing a data model of on-target applications, active PL configuration, and loading/unloading the corresponding bitstreams. The dfx-mgr requires that the application bitstreams be loaded in /lib/firmware/<company_name>/<app_name>.
The dfx-mgr requires that the files required for an application be loaded in the same <app_name>. The app_name directory must contain the following:
Application bitstream converted to
*.bit.binformatApplication bitstream device tree overlay *.dtbo
If it is a Vitis-based PL design using XRT, a metadata file in .xclbin format
shell.jsonfile with metadata about the PL design
Converting Bittream to bit.bin
The fpgamanager class automatically converts system.bit to system.bit.bin.
Modifying the .dtbo File
Download the SmartCam .dtsi, rename the file as tut_1.dtsi, and copy it to the platform_outputs directory. Modify the following line 15 contents:
firmware-name = "system.bit.bin";
Generating shell.json
The shell.json file is a metadata file for dfx-mgr. The shell.json file only needs the following content. Touch and copy it to the platform_outputs directory.
{
  "shell_type" : "XRT_FLAT",
  "num_slots": "1"
}
fpgamanager Class
The fpgamanager provides an interface to Linux for configuring the programmable logic (PL). It packs the dtbos and bitstreams in the /lib/firmware/xilinx directory in the root file system. Use the following command to generate the firmware recipe. The recipe is generated at project-spec/meta-user/recipes-firmware/tutorial/.
The platform_outputs directory has the following files:
system.bit
shell.json
tut_1.dtsi
dpu.xclbin
Run the following command to create a tutorial.bb file. It is created at this location project-spec/meta-user/recipes-apps/tutorial/tutorial.bb.
petalinux-create -t apps --template fpgamanager -n tutorial --enable --srcuri " ../../platform_outputs/system.bit ../../platform_outputs/shell.json ../../platform_outputs/tut_1.dtsi ../../platform_outputs/dpu.xclbin" --force
Navigate to the file, and add the following content:
vi project-spec/meta-user/recipes-apps/tutorial/tutorial.bb
Open the file, and add the following content to the end of the tutorial.bb file:
PACKAGE_ARCH = "${MACHINE_ARCH}"

COMPATIBLE_MACHINE:k26-kv = "${MACHINE}"
Add Recipe for the AP1302 Firmware
SmartCam uses an AR1335 MIPI sensor, which requires AP1302 firmware. AP1302 is released on GitHub. First, create a folder called ap1302-firmware to keep the AP1302 recipes, ap1302-firmware.inc and ap1302-ar1335-single-firmware.bb.
mkdir -p project-spec/meta-user/recipes-firmware/ap1302-firmware/
Create a new file, ap1302-ar1335-single-firmware.bb, and add the following content for project-spec/meta-user/recipes-firmware/ap1302-firmware/ap1302-ar1335-single-firmware.bb:
SUMMARY = "ap1302 ar1335-single firmware binary"

include ap1302-firmware.inc

FW_NAME = "ap1302_ar1335_single_fw.bin"
Create a new file, ap1302-firmware.inc, and add the following content for project-spec/meta-user/recipes-firmware/ap1302-firmware/ap1302-firmware.inc.
LICENSE = "Proprietary"
LIC_FILES_CHKSUM = "file://LICENSE.txt;md5=9c13aad1aab42f76326f1beceafc40c4"

BRANCH ?= "xlnx_rel_v2022.1"
SRC_URI = "git://github.com/Xilinx/ap1302-firmware.git;protocol=https;branch=${BRANCH}"
SRCREV ?= "63e20752dc8b1e91fc6d6d518ebeb76f65e9f738"

S = "${WORKDIR}/git"

FW_NAME ?= ""

do_configure[noexec] = "1"
do_compile[noexec] = "1"

do_install() {
    install -d ${D}/lib/firmware  # create /lib/firmware
    install -m 0644 ${FW_NAME} ${D}/lib/firmware/${FW_NAME} # copy firmware binary to /lib/firmware
}

FILES:${PN} = "/lib/firmware/${FW_NAME}"
Add Recipe for the Image Resizing Software
Next, add the recipe for the SmartCam software, released on GitHub for 2022.1. First create a folder for the application recipe:
mkdir -p project-spec/meta-user/recipes-apps/resize/
Create a new file, resize.bb, and add the following content to the project-spec/meta-user/recipes-apps/resize/resize.bb file.
SUMMARY = "Example Smartcam application"

LICENSE = "Apache-2.0"
LIC_FILES_CHKSUM = "file://LICENSE;md5=a9c5ded2ac97b4ce01aa0ace8f3a1755"

BRANCH = "xlnx_rel_v2022.1"
SRC_URI = "git://github.com/Xilinx/smartcam.git;protocol=https;branch=${BRANCH}"
SRCREV = "ad9523ee5f002141334698eb6ddc9a14679ac8d2"

inherit cmake

DEPENDS = "vvas-accel-libs glog gstreamer1.0-rtsp-server opencv"
RDEPENDS:${PN} = " \
    gst-perf \
    gstreamer1.0-omx \
    gstreamer1.0-plugins-bad-faac \
    gstreamer1.0-plugins-bad-mpegtsmux \
    gstreamer1.0-plugins-good-rtp \
    gstreamer1.0-plugins-bad-kms \
    gstreamer1.0-plugins-bad-mediasrcbin \
    gstreamer1.0-plugins-bad-videoparsersbad \
    gstreamer1.0-plugins-good-multifile \
    gstreamer1.0-plugins-good-rtpmanager \
    gstreamer1.0-plugins-good-udp \
    gstreamer1.0-plugins-good-video4linux2 \
    gstreamer1.0-python \
    gstreamer1.0-rtsp-server \
    vvas-accel-libs \
    libdrm-tests \
    v4l-utils \
    alsa-utils \
    python3-core \
    "

SOMAPP_INSTALL_PATH = "/"
EXTRA_OECMAKE += "-DCMAKE_BUILD_TYPE=Release -DCMAKE_SYSROOT=${STAGING_DIR_HOST} -DCMAKE_INSTALL_PREFIX=${SOMAPP_INSTALL_PATH} "

S = "${WORKDIR}/git"

FILES:${PN} += " \
    /opt/xilinx \
    "
Create the Package Group
Next, you create the package group to include both the firmware and software, as well as the AR1335 driver that is needed for this application. The PetaLinux Tools Documentation: Reference Guide (UG1144) also details this step.
mkdir -p project-spec/meta-user/recipes-core/packagegroups/
Create a new file packagegroup-kv260-example.bb and add the following content to file project-spec/meta-user/recipes-core/packagegroups/packagegroup-kv260-example.bb
DESCRIPTION = "Example Smartcam related Packages"

inherit packagegroup

EXAMPLE_PACKAGES = " \
    ap1302-ar1335-single-firmware \
    tutorial \
    resize \
    "

RDEPENDS:${PN} = "${EXAMPLE_PACKAGES}"

COMPATIBLE_MACHINE = "^$"
COMPATIBLE_MACHINE:k26-kv = "${MACHINE}"
PACKAGE_ARCH = "${MACHINE_ARCH}"
Add the following line to project-spec/meta-user/conf/user-rootfsconfig:
CONFIG_packagegroup-kv260-example
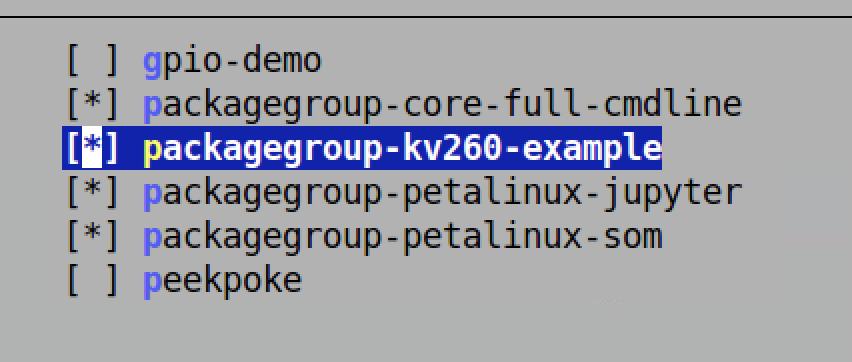
Enable the package group using the following command to get to the configuration GUI:
petalinux-config -c rootfs
Go to the user packages directory, and select packagegroup-kv260-example. Click Yes to save the configurations and exit.
Build the Petalinux .wic Image
Build the image using the following commands.
petalinux-build
petalinux-package --wic --bootfiles "ramdisk.cpio.gz.u-boot boot.scr Image system.dtb"
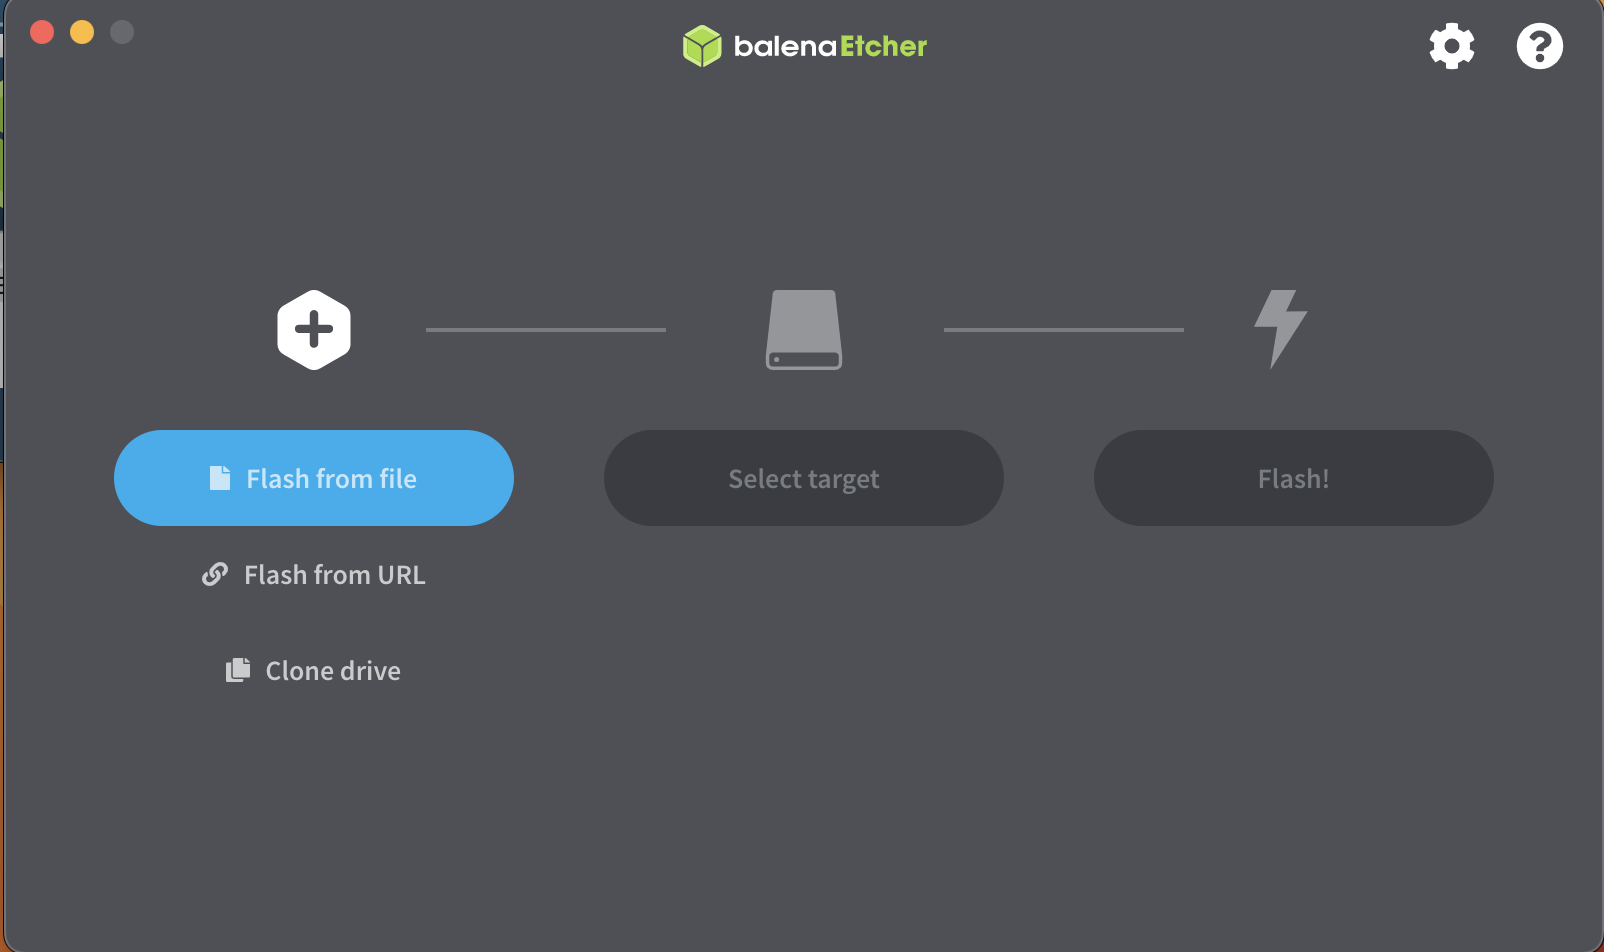
Image SD card
PetaLinux Image is generated in the xilinx-kv260-starterkit-2022.1/images/linux folder. Navigate to the folder. Using a GUI like balenaEtcher, flash a microSD card with the petalinux-sdimage.wic image:
Next Steps
This completes the Petalinux WIC Image generation. The next step is running image application on the board.
Copyright © 2023-2025 Advanced Micro Devices, Inc.